
Create campaign group
A campaign group must be created to deploy any communication; a campaign group is the ‘wrapper’ within which specific campaigns are created. A single campaign group can be created to deploy multiple campaigns. Users with appropriate permissions can create a campaign group.
Follow these steps to create a campaign group:
- From the left menu, navigate to Campaign management > Campaign group. The campaign group list screen appears. It will display all the campaigns created in this tenant.
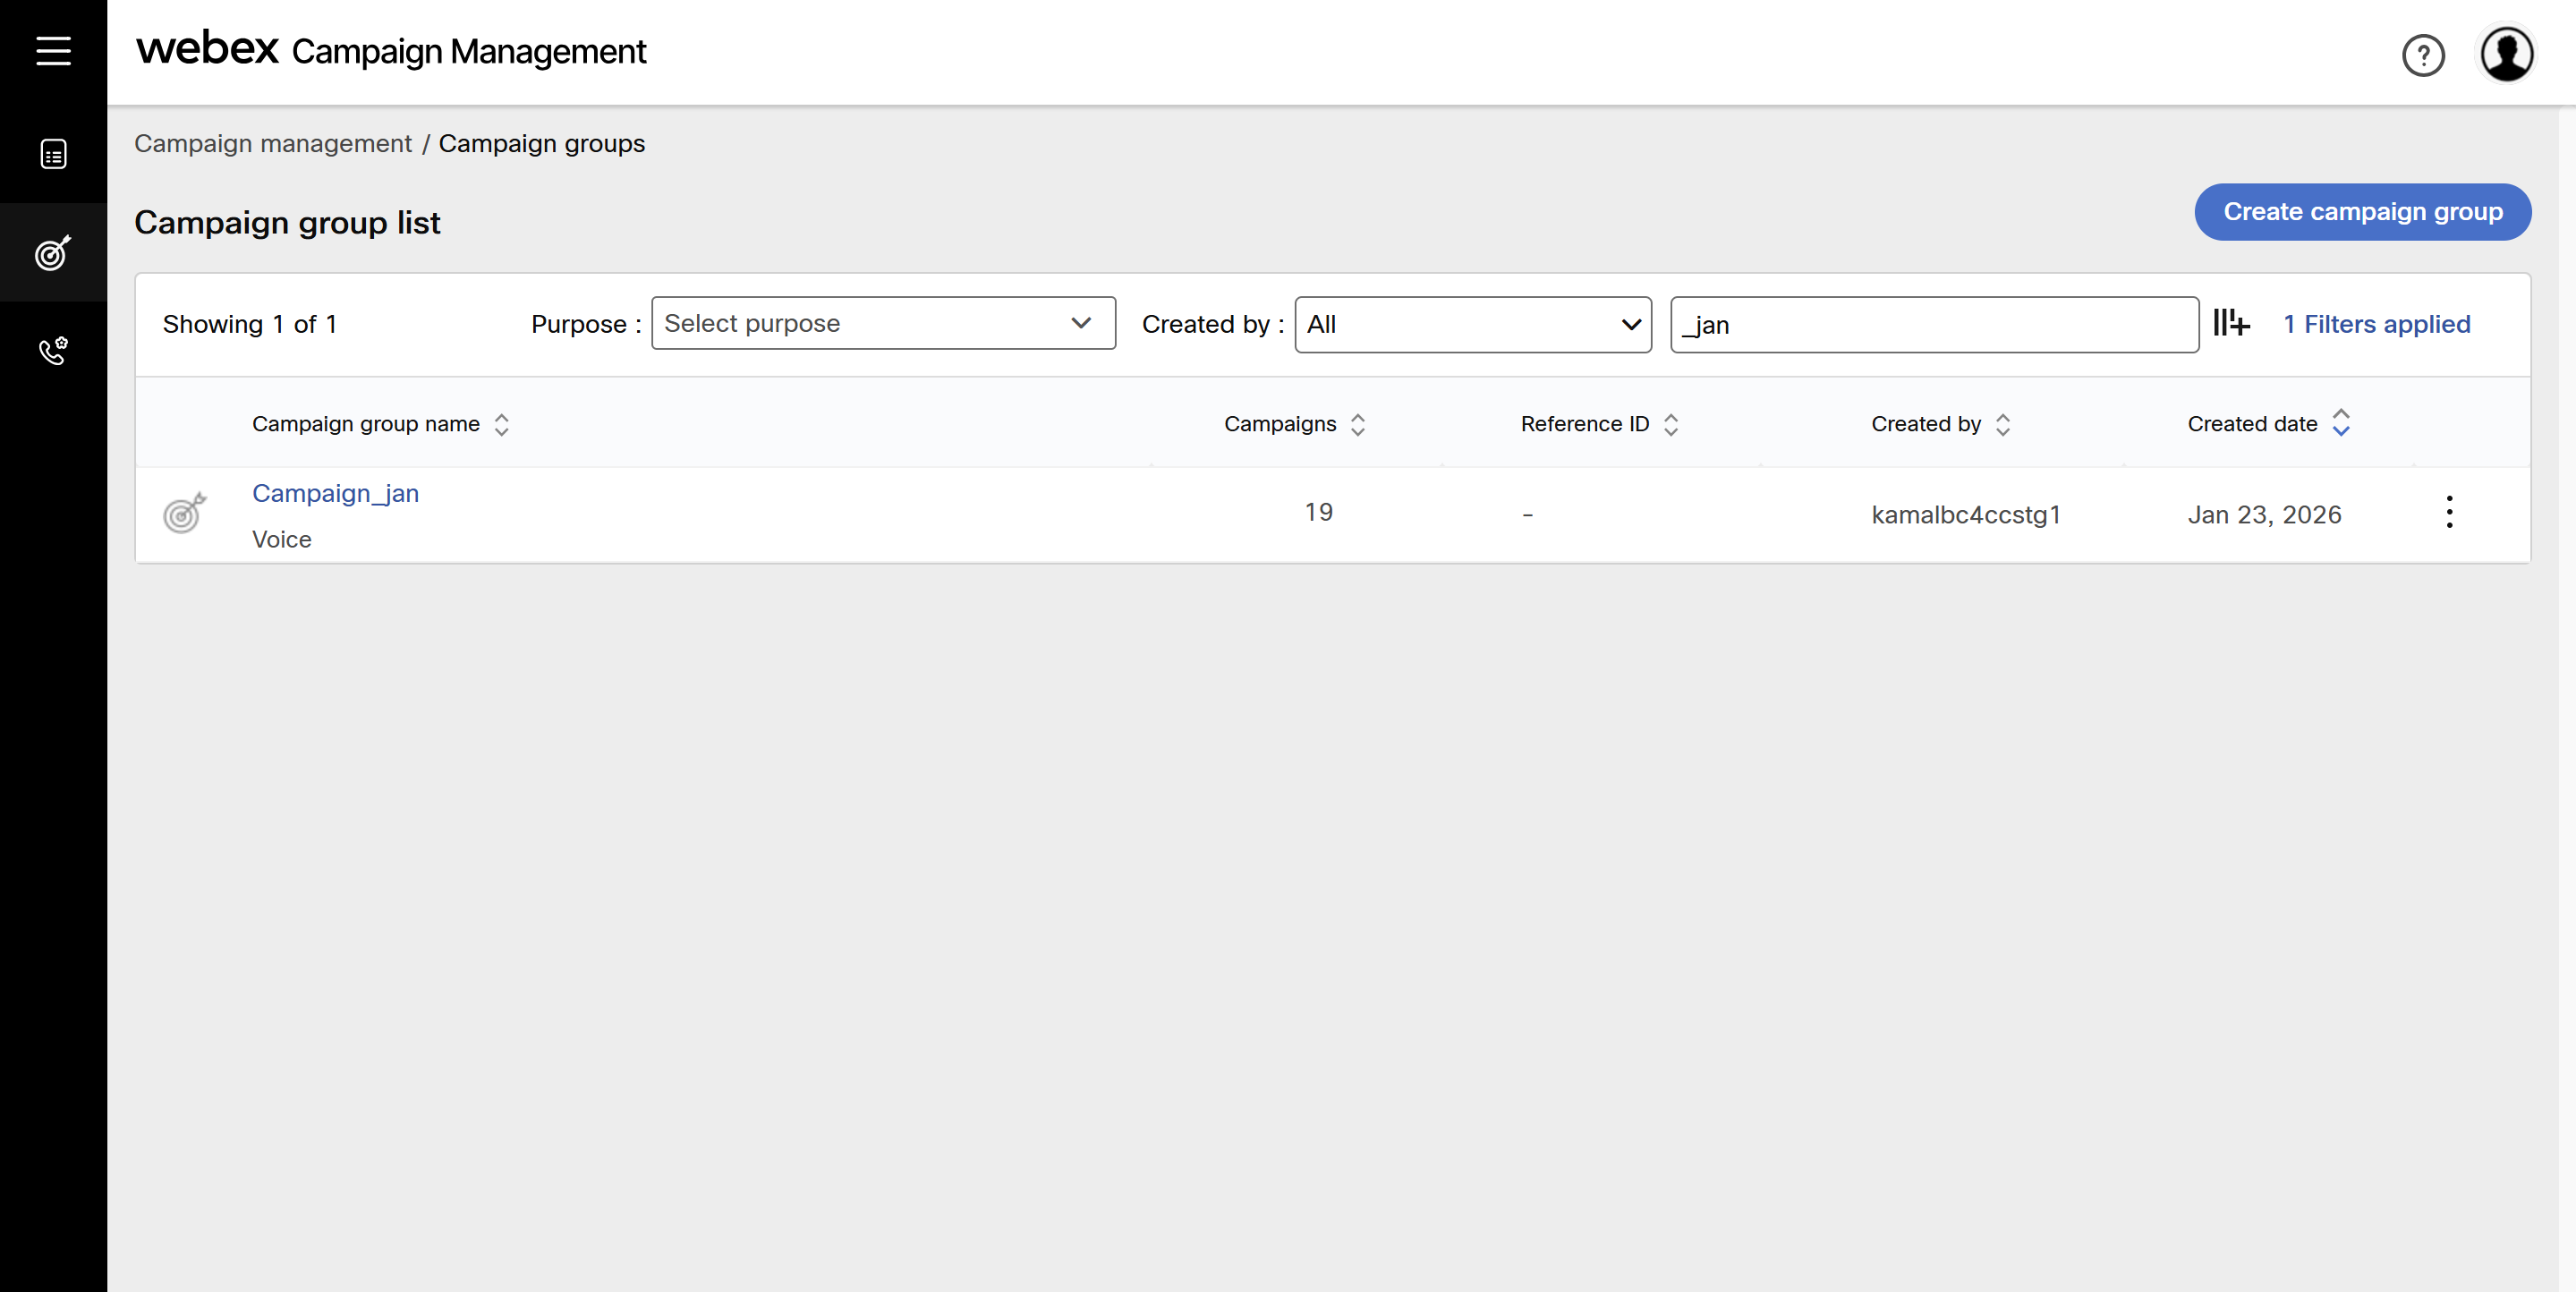
- Click Create campaign group.
- On the Create campaign group screen, enter details for the following fields.
- Campaign group name: Enter a name for the campaign group.
- Business stakeholder: Enter all the stakeholders for the campaign separated by a comma. For example, Sales Team, Marketing Team, Presales, etc.
- Reference ID: Enter a unique ID for the campaign group.
- Campaign image: Add a thumbnail image for the campaign group. The size of the image should not be more than 100 x 100 px. The supported formats are .jpg, .jpeg, .png, .gif, .bmp, and .tif.
- Description: Enter a description for the campaign group.
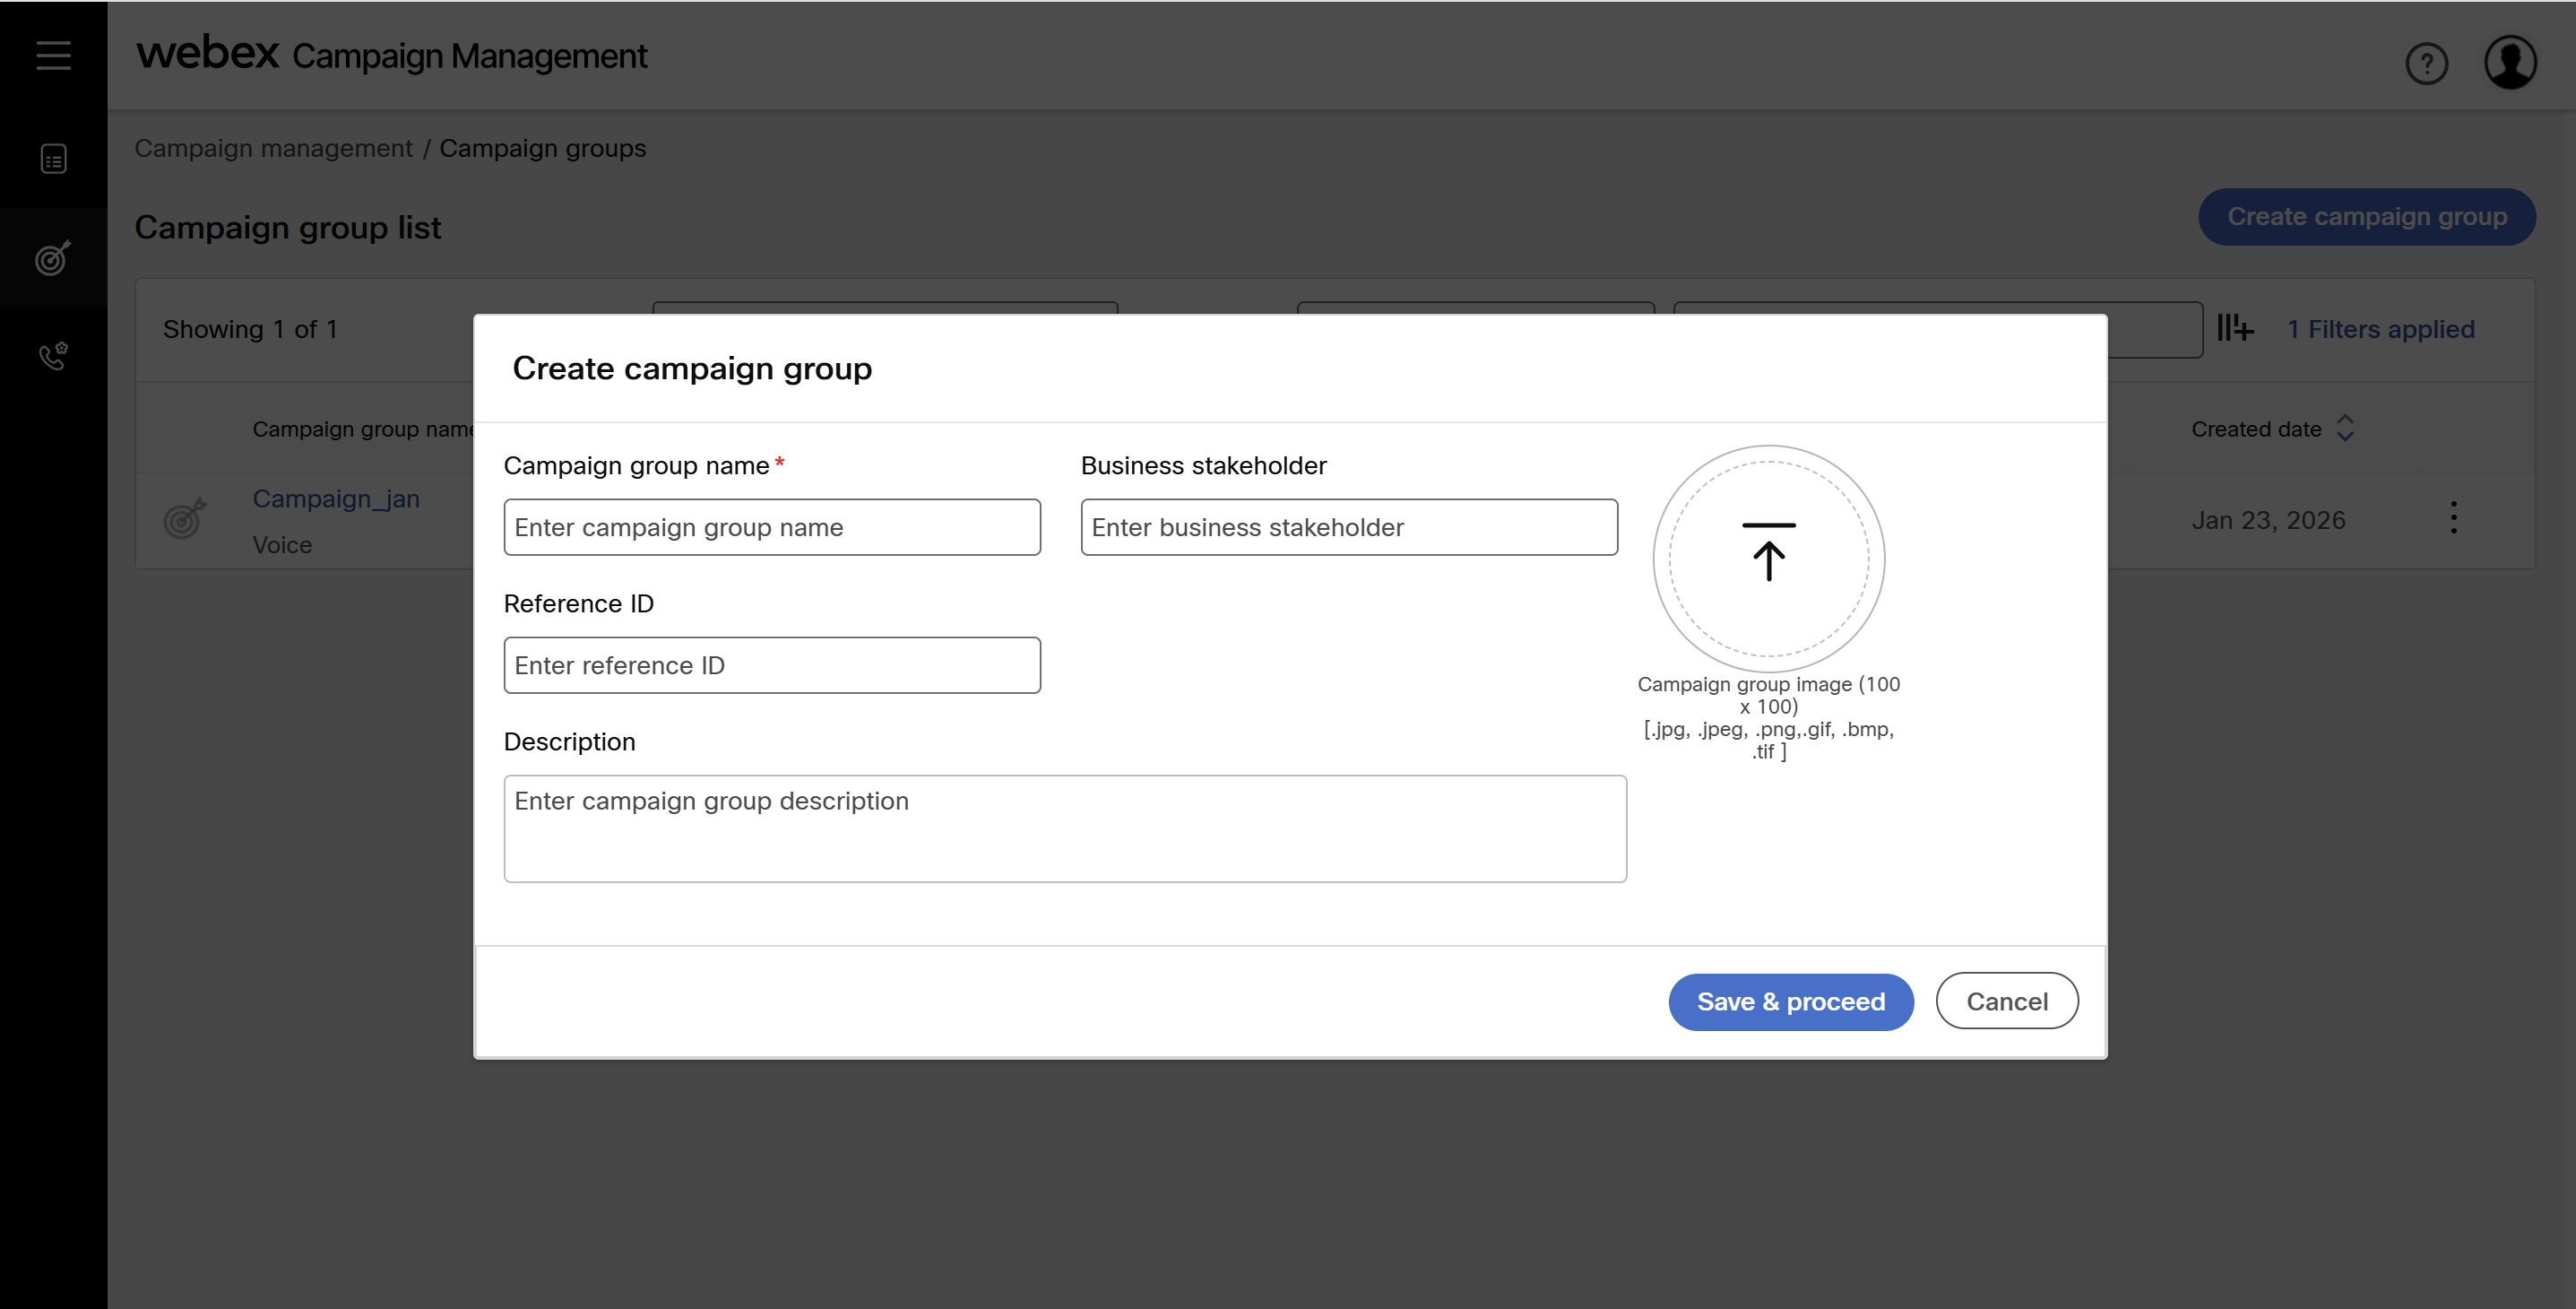
- Click Save and proceed.
Once a campaign group is created, the top portion of the screen will display metrics of the group.
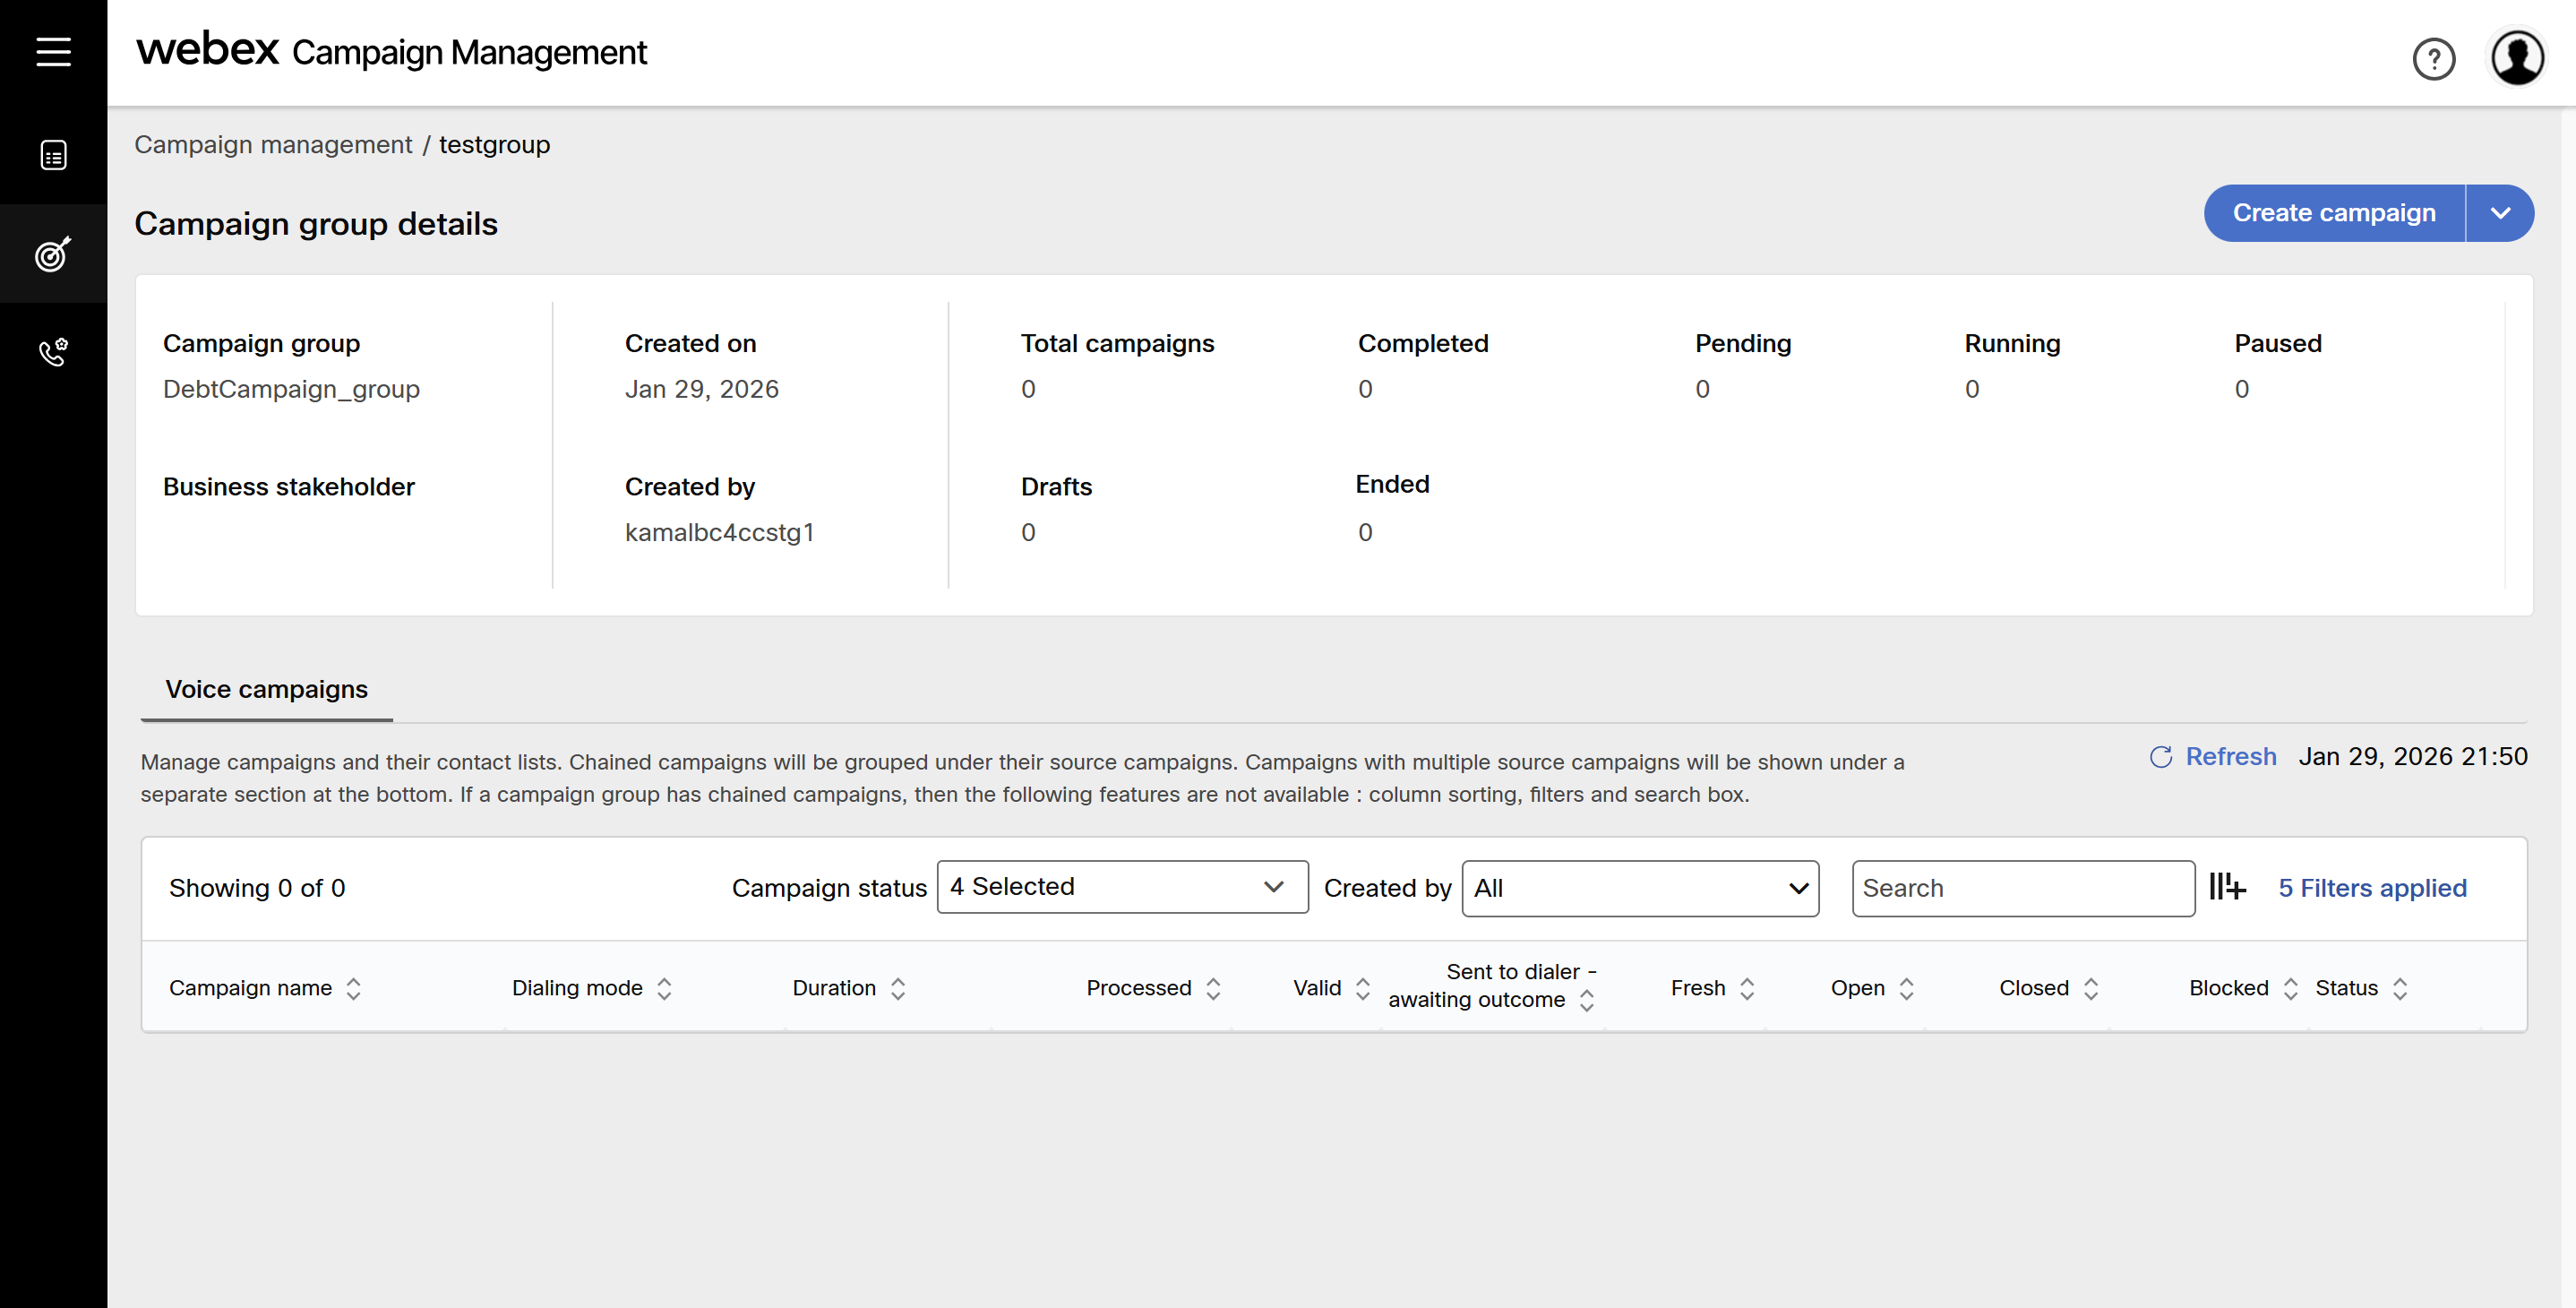
- Campaign group: Displays the name of the campaign group.
- Created On: Display the campaign group created date.
- Total Campaigns: Displays the total number of campaigns created in the group.
- Completed: Displays the number of completed campaigns in the group..
- Pending: Displays the number of pending campaigns in the group.:
- Running: Displays the number of running campaigns in the group.
- Paused: Displays the number of paused campaigns in the group.
- Created by: Displays the user name of the campaign group creator.
- Draft: Displays the number of draft campaigns in the group.
- Ended: Displays the number of campaigns ended in the group.