
Manage contact lists
On the 'Manage contact lists' screen, you can find information about each contact list within a campaign. At the top right corner of the screen, you will see a button to 'Upload file to create contact list'.
The 'Source' column will display one of 3 values: API, Manual File, and SFTP - depending on how each contact list was created.
Other columns will show the counts of contact records as follows:
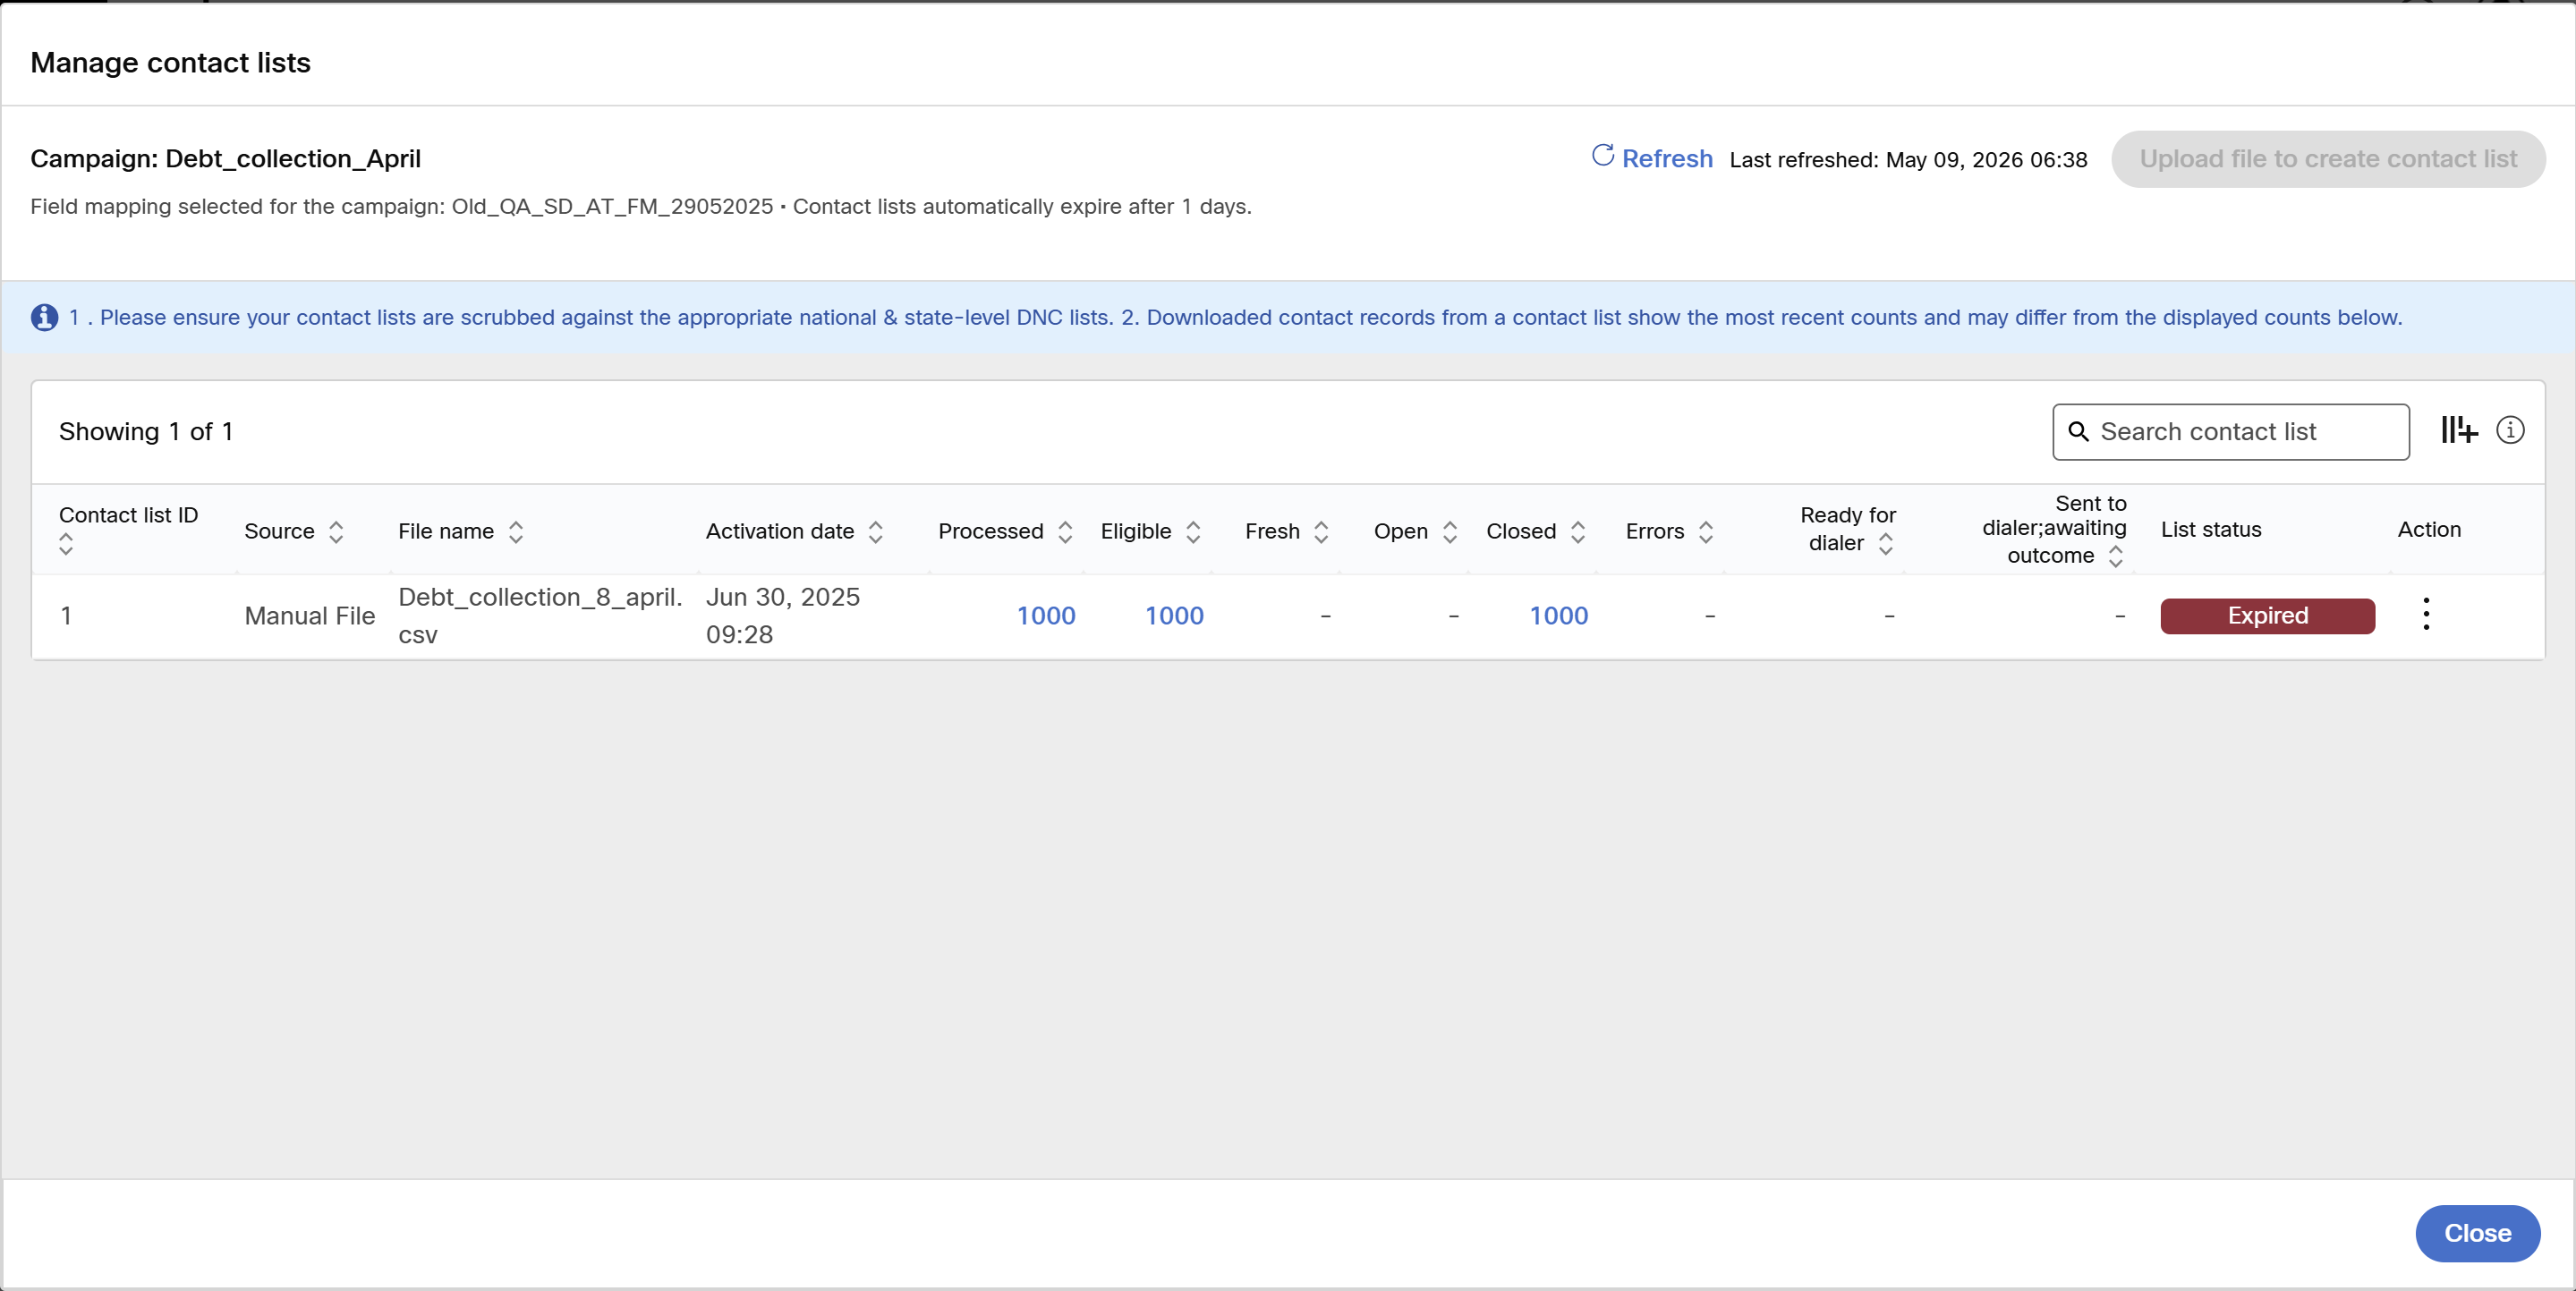
- Processed: Number of records in the contact list.
- Invalid: Number of invalid records in the contact list. a contact record is considered 'invalid' if all the contact mode values for a record are missing or do not match the specification in the associated 'Field Mapping'.
- Valid: Number of valid records in the contact list.
- Eligible: Number of valid records, excluding those for which all contact phone numbers are present in the associated DNC lists. For campaigns in the Running status, this DNC scrubbing is performed twice for both manual and SFTP file uploads.
a) soon after the contact is uploaded, and
b) just before the contact phone number is passed to the dialer
This scrubbing against applicable DNC lists occurs once for contacts created by API or for contacts transferred to chained campaigns. This happens just before the contact phone number is passed to the dialer.
- Sent to dialer - awaiting outcome: Number of records sent to the dialer for whom the call outcomes is not yet known.
- Fresh: Number of contact records which have not been contacted even once.
- Open: Number of contact records which have been contacted at least once and are now eligible to be retried.
- Closed: Number of contact records which no longer need be contacted.
- Errors : Number of contacts which have some sort of errors after the dialer attempt. For example "Invalid wrap-up code received".
- Ready for dialer : Number of contacts which are prepped to be sent to dialer.
- Blocked: Number of contact records blocked because of 'Phone area code block' features.
- Expired: Number of contact records in 'Expired' state as a result of the contact list expiring.
- Closed - Transferred to chained campaign: Number of contact records transferred from parent campaign to chained campaign.
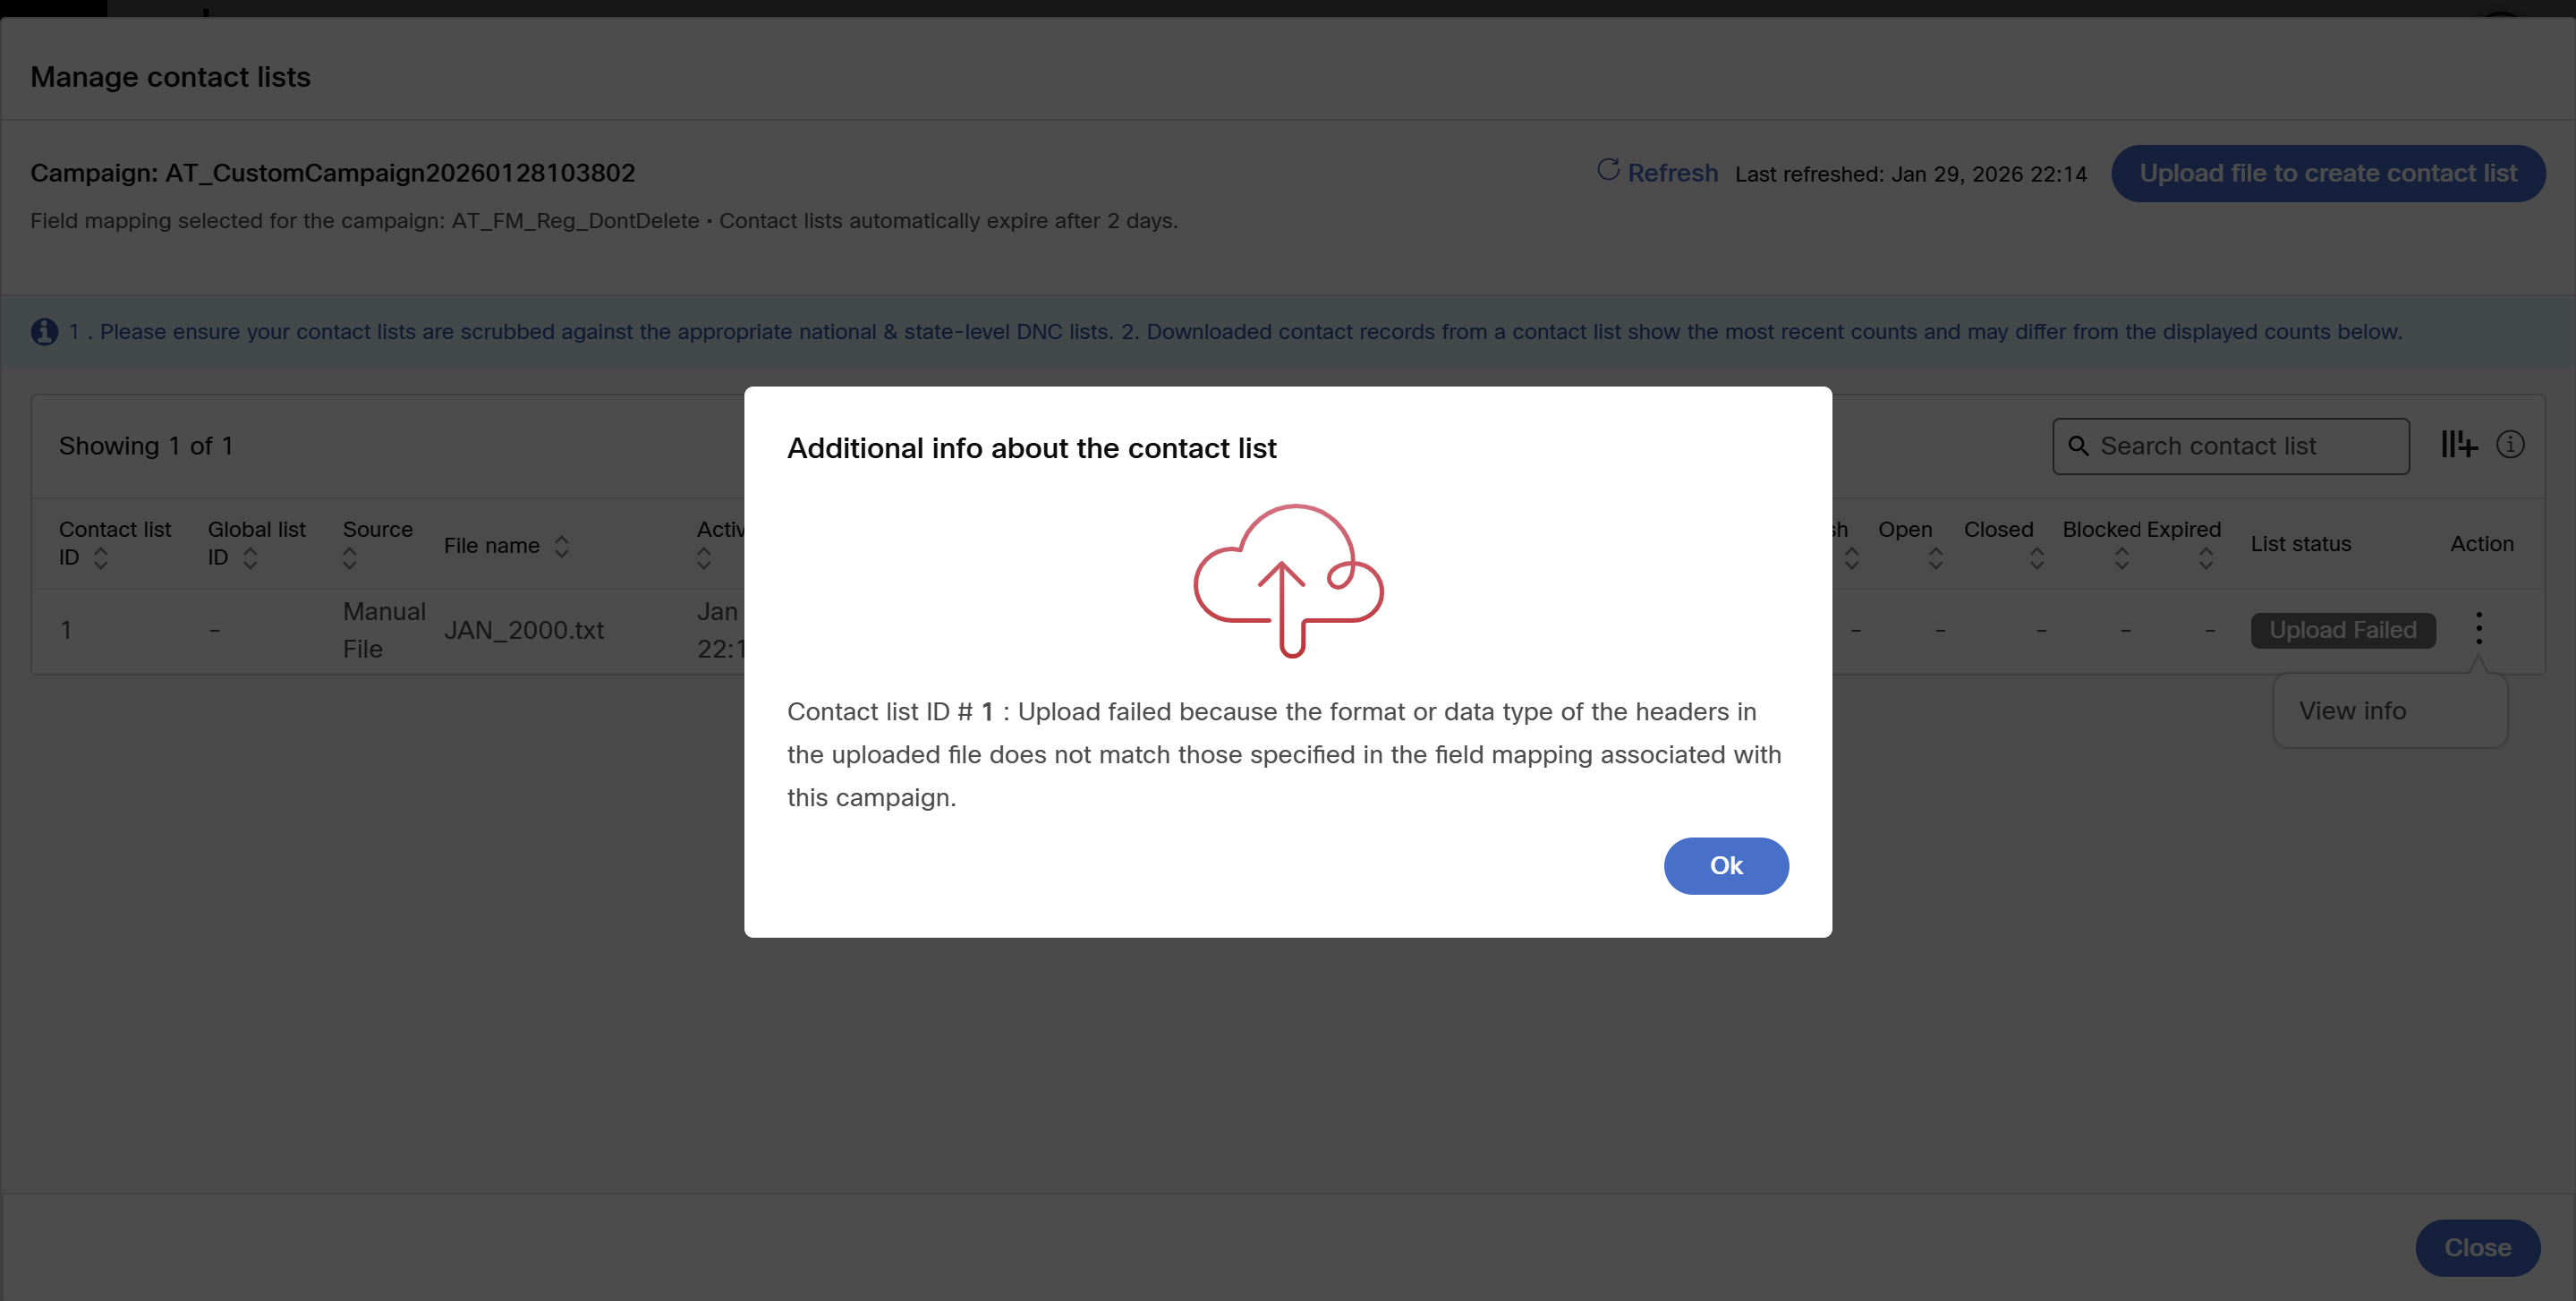
- List status: Status of the uploaded contact list.
To know the status of the failed contact list, click on the respective ellipses icon and click View info.
To expire contacts manually, click on the ellipses icon of the contact list whose contacts to be expired and Expire. All fresh and open contacts within the list will also be expired and their status cannot be changed back to fresh or open.