
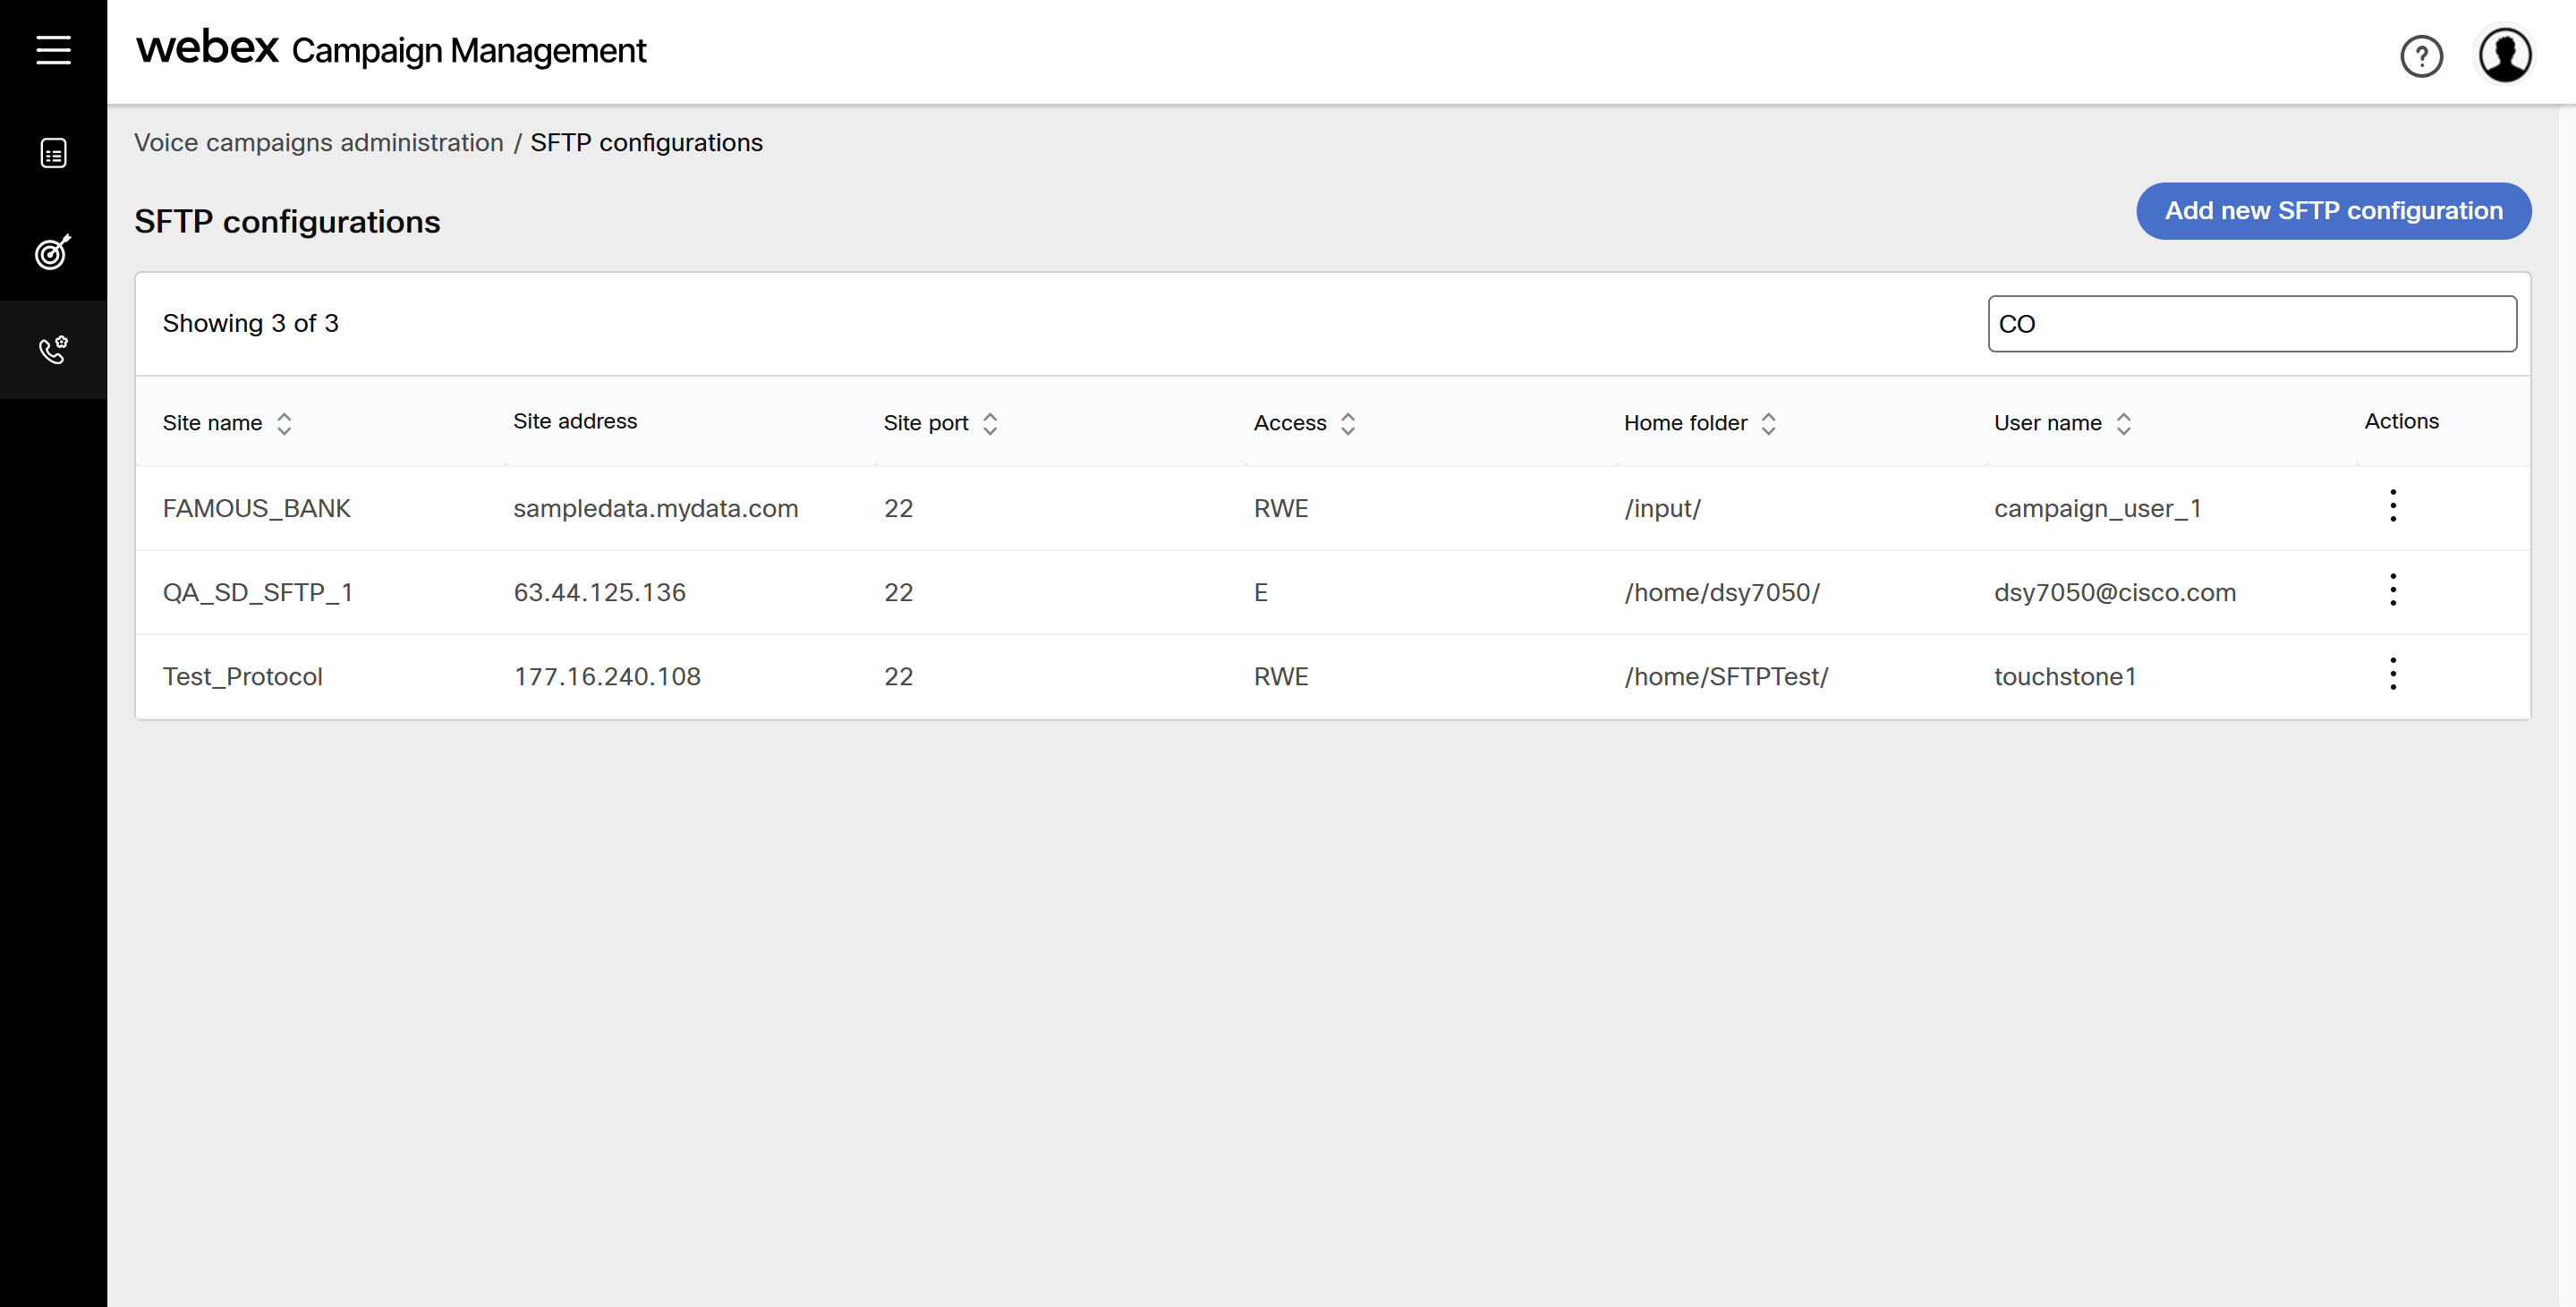
SFTP configurations
For creating a campaign, SFTP configurations is not mandatory. However, it is mandatory If you want to receive the contact list file over SFTP.
The Webex Campaign does not perform validation of the SFTP connection details. You are responsible for ensuring that all SFTP credentials and parameters are accurate and correctly configured.
For contact files processed through SFTP, the campaign timezone is currently not considered; only the server timezone is considered. For example, if your tenant is hosted in London and the Webex Campaign user is located in the EMEA region, the files will be processed according to the server timezone. As a result, there may be a delay in files processing.
This section allows you configure the SFTP connection details, which will be used to access a contact list via SFTP.
Add an SFTP configuration with user name and password
-
Navigate to Voice campaign administration > SFTP configurations. Click Add new SFTP configuration.
-
Enter details in the following fields:
- Site name: Enter a name to identify the SFTP site in Webex Campaign.
- Site address: Enter the IP address of the SFTP site to be accessed.
- Site port: Enter the port number of the SFTP site.
- Username: Enter a user name to access the SFTP site.
- Authentication: Select the authentication type as Password to access the SFTP site.
- Password: Enter the password to access the SFTP site.
- Home folder: Enter the SFTP home folder path. For example,
/home/inputfile/. You can add the csv files inside the folderinputfile. The file name pattern should be specified in the campaign. - Access: Select the type of access to be allowed for the SFTP site to access the data.
The ideal permissions to be granted to Webex Campaign are Read / Write / Execute to allow full operational control of data files.
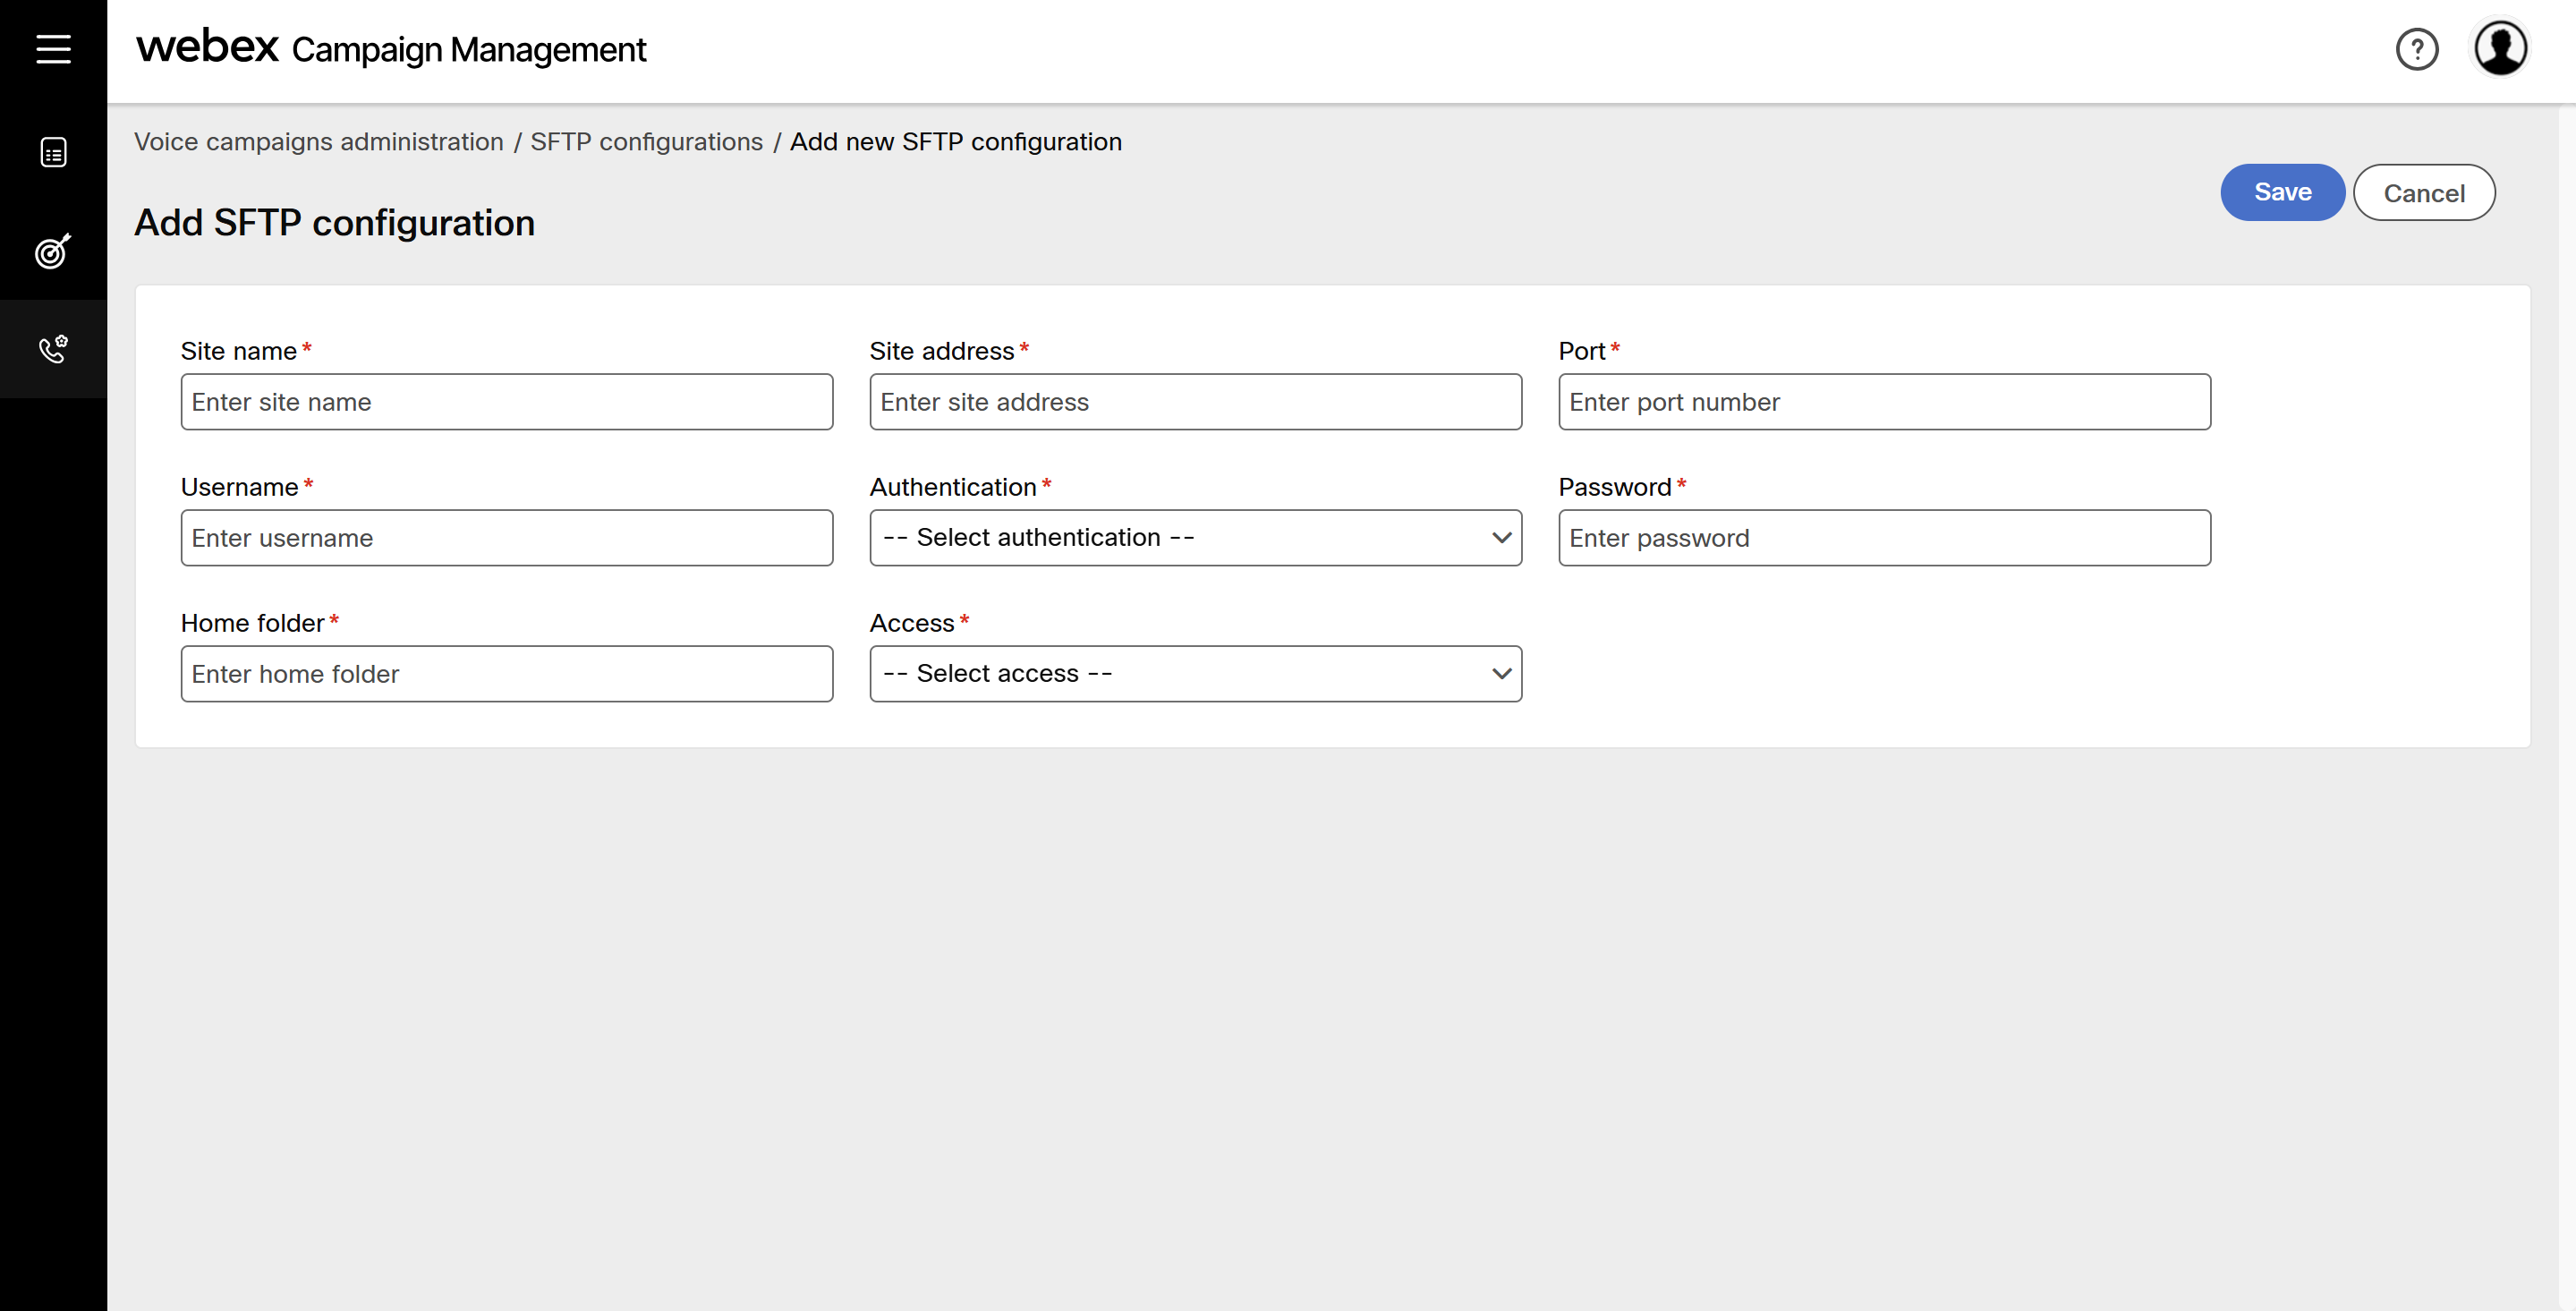
- Click Save.
For detailed instructions on setting up a contact list source through SFTP, see Contact list source using SFTP.
Add an SFTP configuration with Private key
-
Navigate to Voice campaign administration > SFTP configurations. Click Add new SFTP configuration.
-
Enter details in the following fields:
-
Site name: Enter a name to identify the SFTP site in Webex Campaign.
-
Site address: Enter the IP address of the SFTP site to be accessed.
-
Site port: Enter the port number of the SFTP site.
-
Username: Enter a user name to access the SFTP site.
-
Authentication: Select the authentication type as Private key.
-
Private key file: Browse and select the private key file. The following are the supported Private key details:
Value Details Supported Private Key RSA Key length 4096 Format PKCS#8 If you prefer to use a Private key file for SFTP authentication, then your IP address must be added to our allow-list. For this task, please contact your Cisco support team.
-
Home folder: Enter the SFTP home folder path. For example,
/home/inputfile/. You can add the csv files inside the folderinputfile. The file name pattern should be specified in the campaign. -
Access: Select the type of access to be allowed for the SFTP site to access the data.
-
The ideal permissions to be granted to Webex Campaign are Read / Write / Execute to allow full operational control of data files.

- Click Save.
Please contact your Cisco support team and provide your IP address so that it can be added to our allow list. Currently, this feature is supported only in CPaaS-hosted data centers (US, EU1, EU2, and Canada) and is not available in other data centers.
Edit or Delete an SFTP Configuration
- On the SFTP Configurations list screen, click the ellipses icon of the required SFTP site and click Edit.
- Make the required changes to the configuration details and click Update.
- To delete an SFTP site, click Delete button of the required SFTP site.