
Create campaign
In Webex Campaign, a campaign is a set of instructions to deploy communication. You can create multiple campaigns in a campaign group.
You can filter the list of campaigns within a campaign group by multiple values of campaign status. It is useful in cases when there is a large number of campaigns within a campaign group, and you are interested in viewing/monitoring those that have certain statuses. For example, campaigns in ‘Running’ status and campaigns in ‘Paused’ status and so on.

Follow these steps to create a campaign:
Nodes marked with a star (*) represent advanced campaign features. These features will be available at the basic subscription rate until October 2025, meaning no additional charges will apply if you choose to configure and use them during this period.
- On the campaign group list screen, click Create campaign. The campaign configuration screen appears with placeholder nodes to configure.
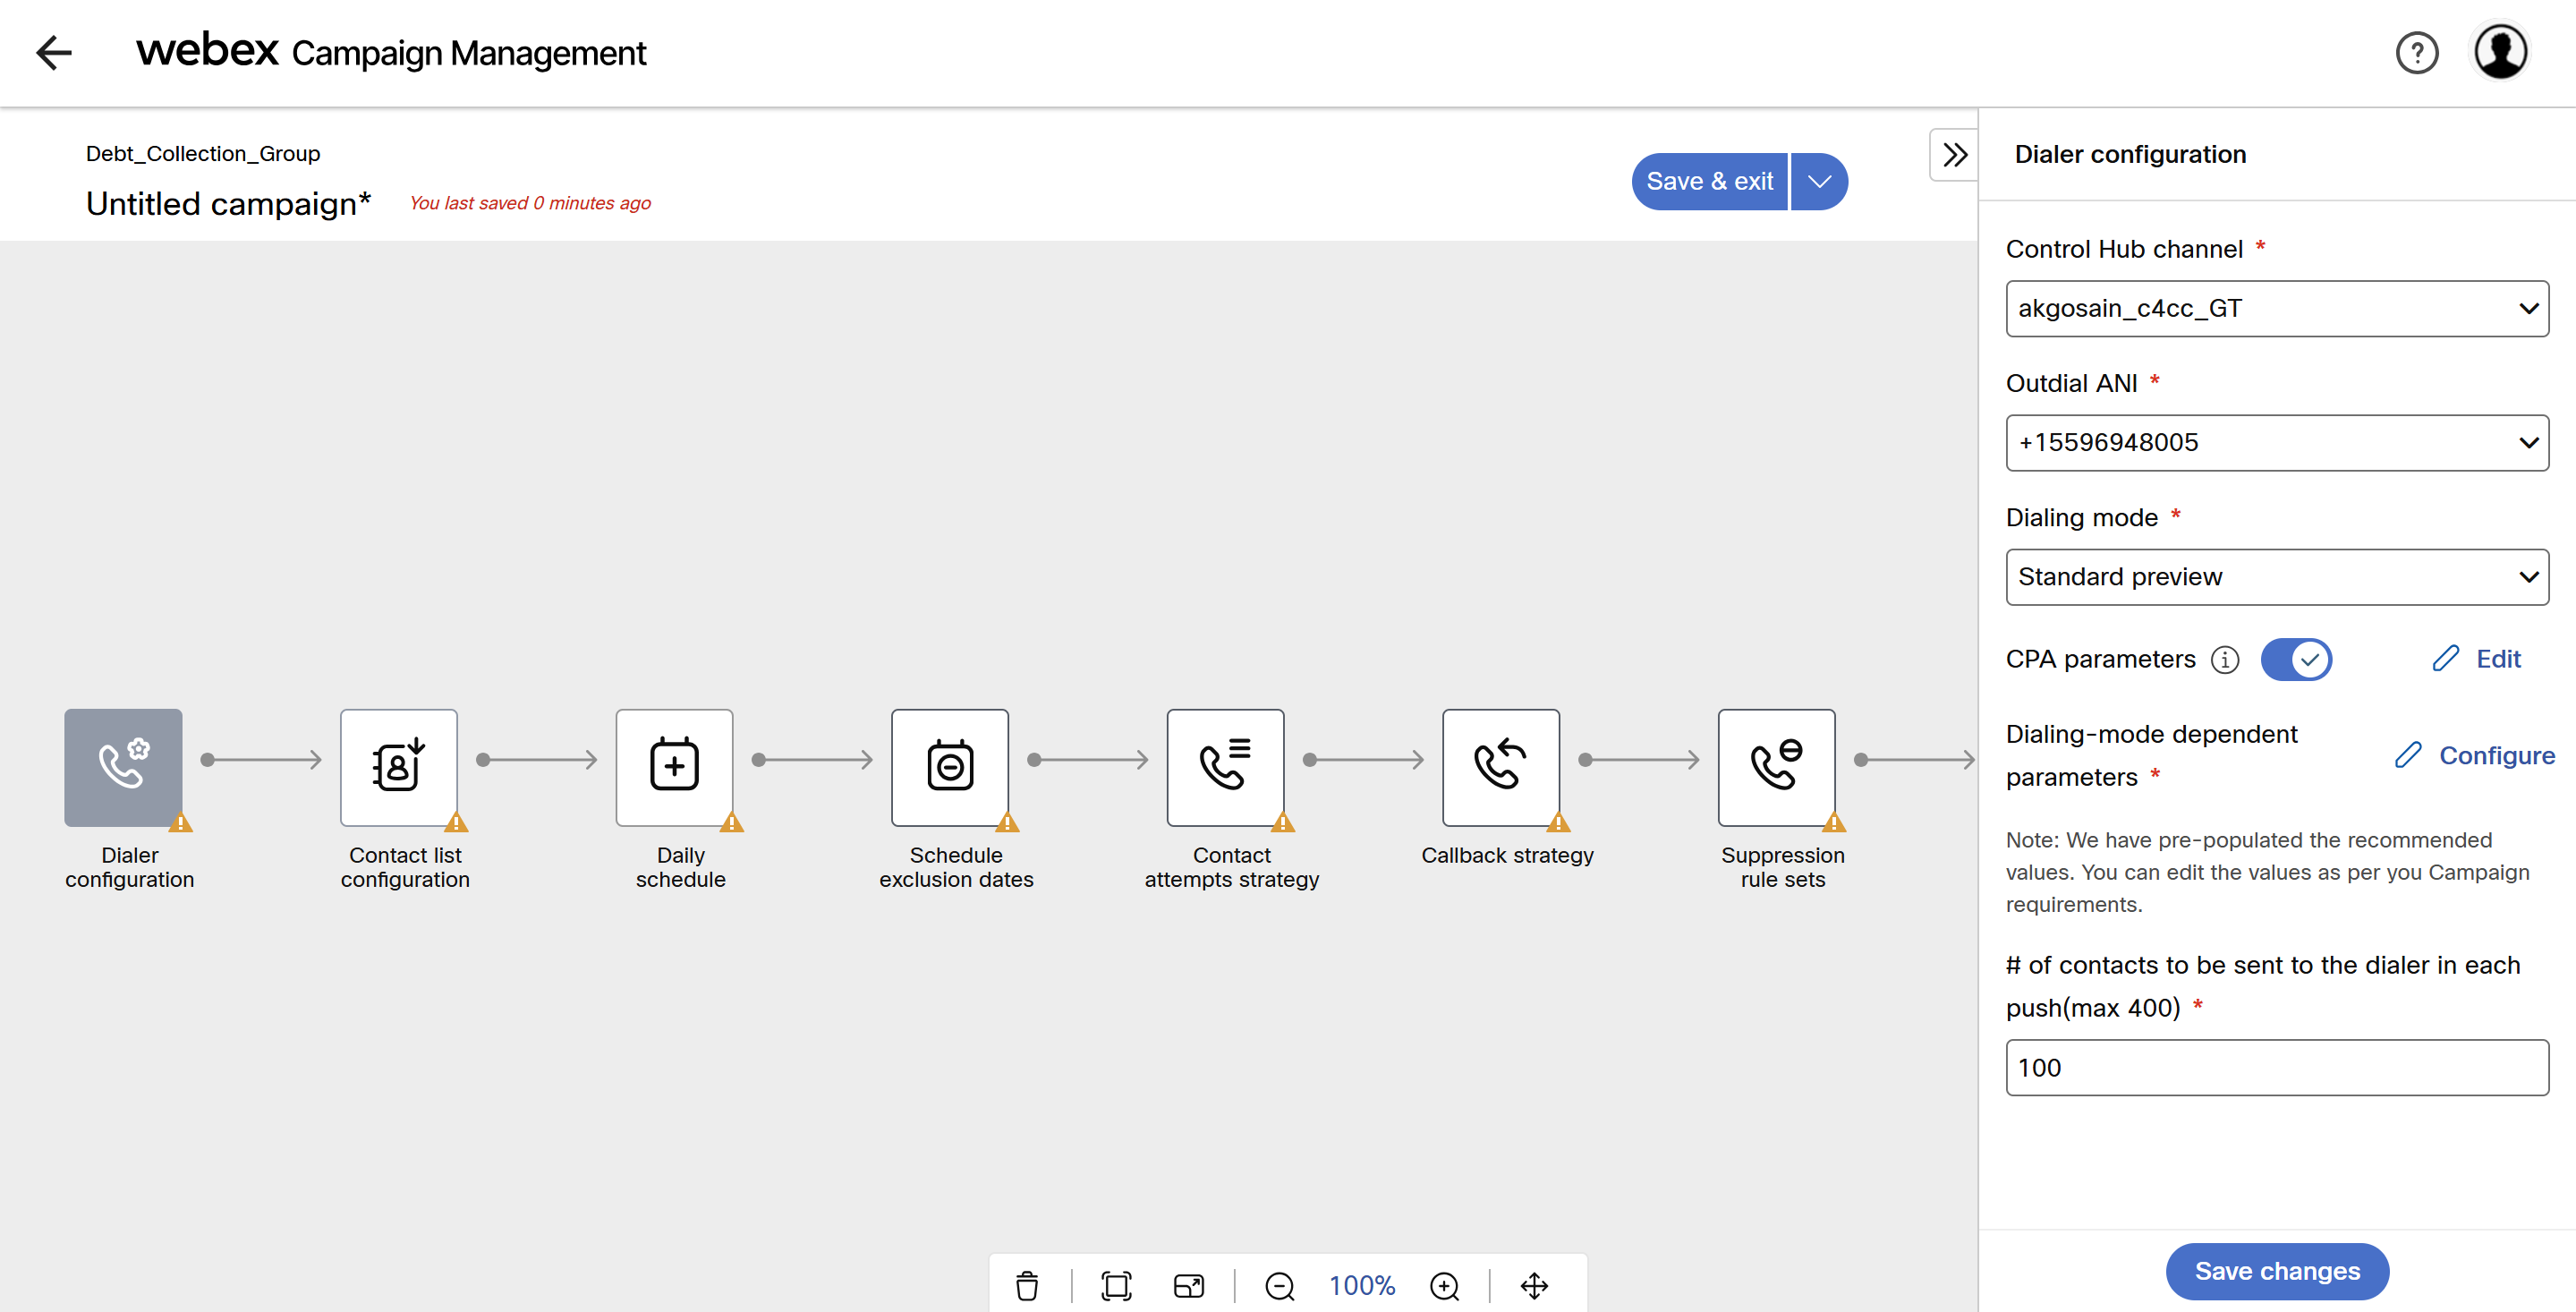
- Configure Dialer configuration node and click Save changes.
- Configure Contact list source node and click Save changes.
- Configure Daily schedule node and click Save changes.
- Configure Schedule exclusion dates node and click Save changes.
- Configure Contact attempts strategy node and click Save changes.
- Configure Suppression rule sets node and click Save changes.
- Click Save and exit and configure the following details:
- Campaign name: Enter a meaningful name for the campaign. The length of the campaign name is limited to 64 characters long. A campaign name can have a combination of alphabets and numbers. A campaign name should not contain spaces or special characters except an underscore (_). For example, First_campaign2025. A campaign name can also contain multiple underscores. For example, My_First_Campaign_2025.
- P&L: Select applicable P&L from the drop-down.
- Purpose: Select purpose from the dropdown.
- Applicable DNC lists: Select applicable DNC lists from the drop-down.
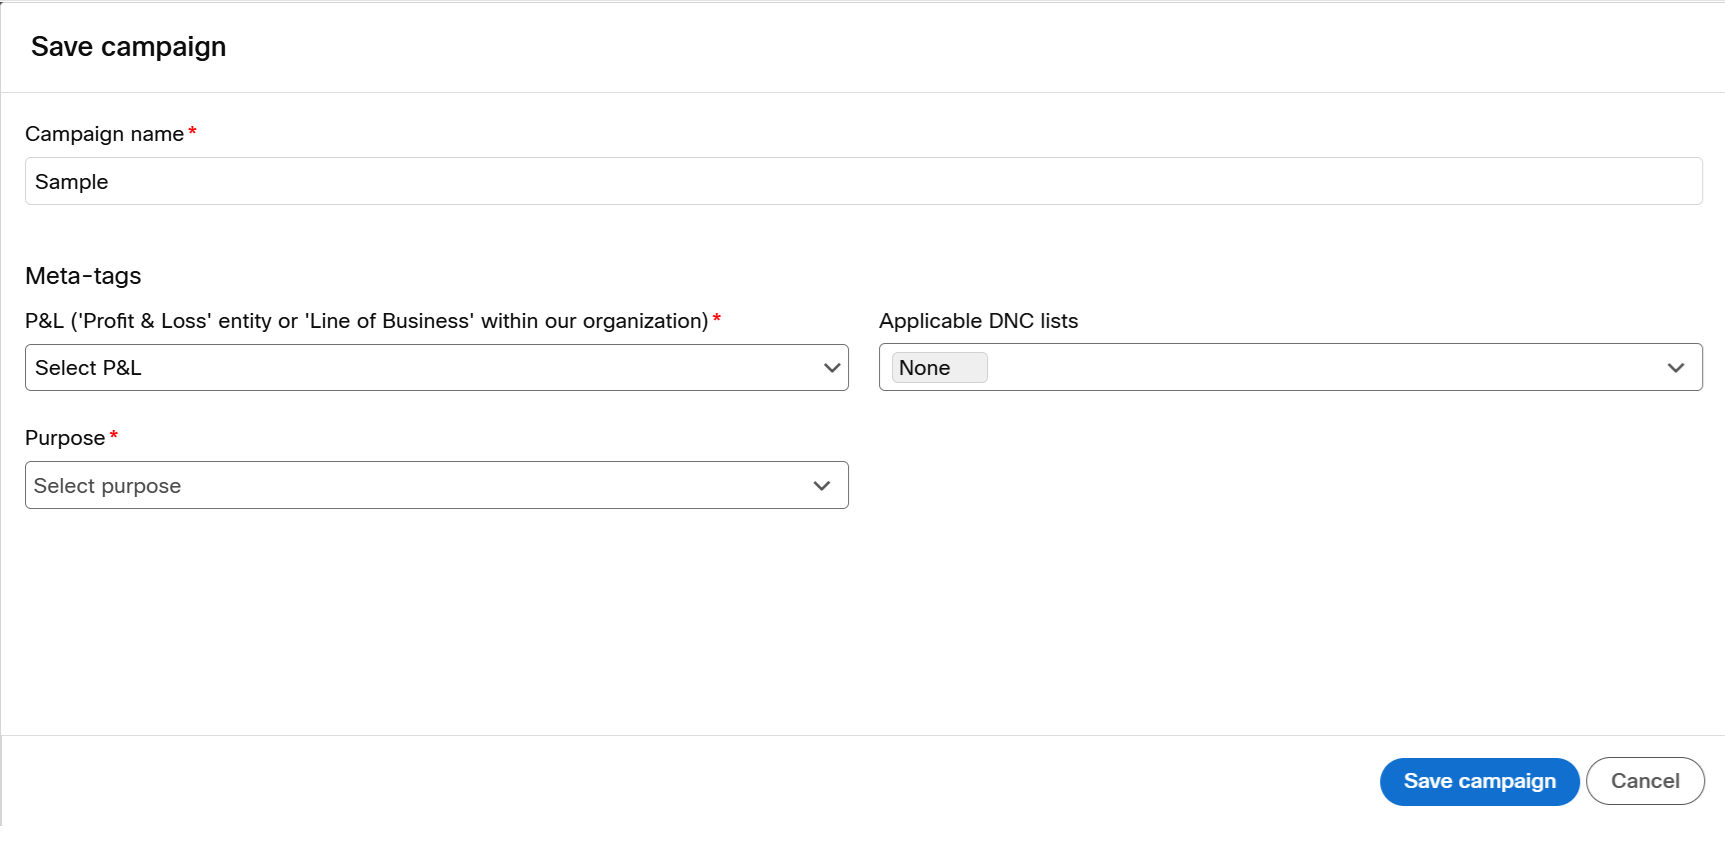
- Click Save campaign.