
Field mappings
Field mappings refer to the process of uploading a template or sample data and mapping the headers with the headers of dialer system. You can also define the data type for each header or define if a header needs to be encrypted. The headers of the dialer system will be mapped to the sample data type.
When you create a campaign, you have to assign the field mappings to a campaign and an appropriate contact list has to be uploaded. When you upload a contact list to a campaign, and if the headers of the field mappings do not match, then you will get an error.
When a file header is marked as PII-enabled and locked in one field mapping, the same header will be treated as PII-enabled in all other field mappings—both existing and future.
For example, if the header
CREDIT_CARD_NUMBERis marked as PII-enabled and locked in one field mapping, it will be considered PII-enabled in any other field mapping where the same header appears.
When a file header is marked as PII-enabled and locked in one field mapping, the same header will be treated as PII-enabled in all other field mappings—both existing and future.
For example, if the header CREDIT_CARD_NUMBER is marked as PII-enabled and locked in one field mapping, it will be considered PII-enabled in any other field mapping where the same header appears.
Hence make sure you upload the correct contact list to a campaign to avoid datatype mismatch errors.
The PII enabled/encrypted field mapping file headers of a contact list are not available for applying conditions in Contact selection filters and in Search contacts screen.
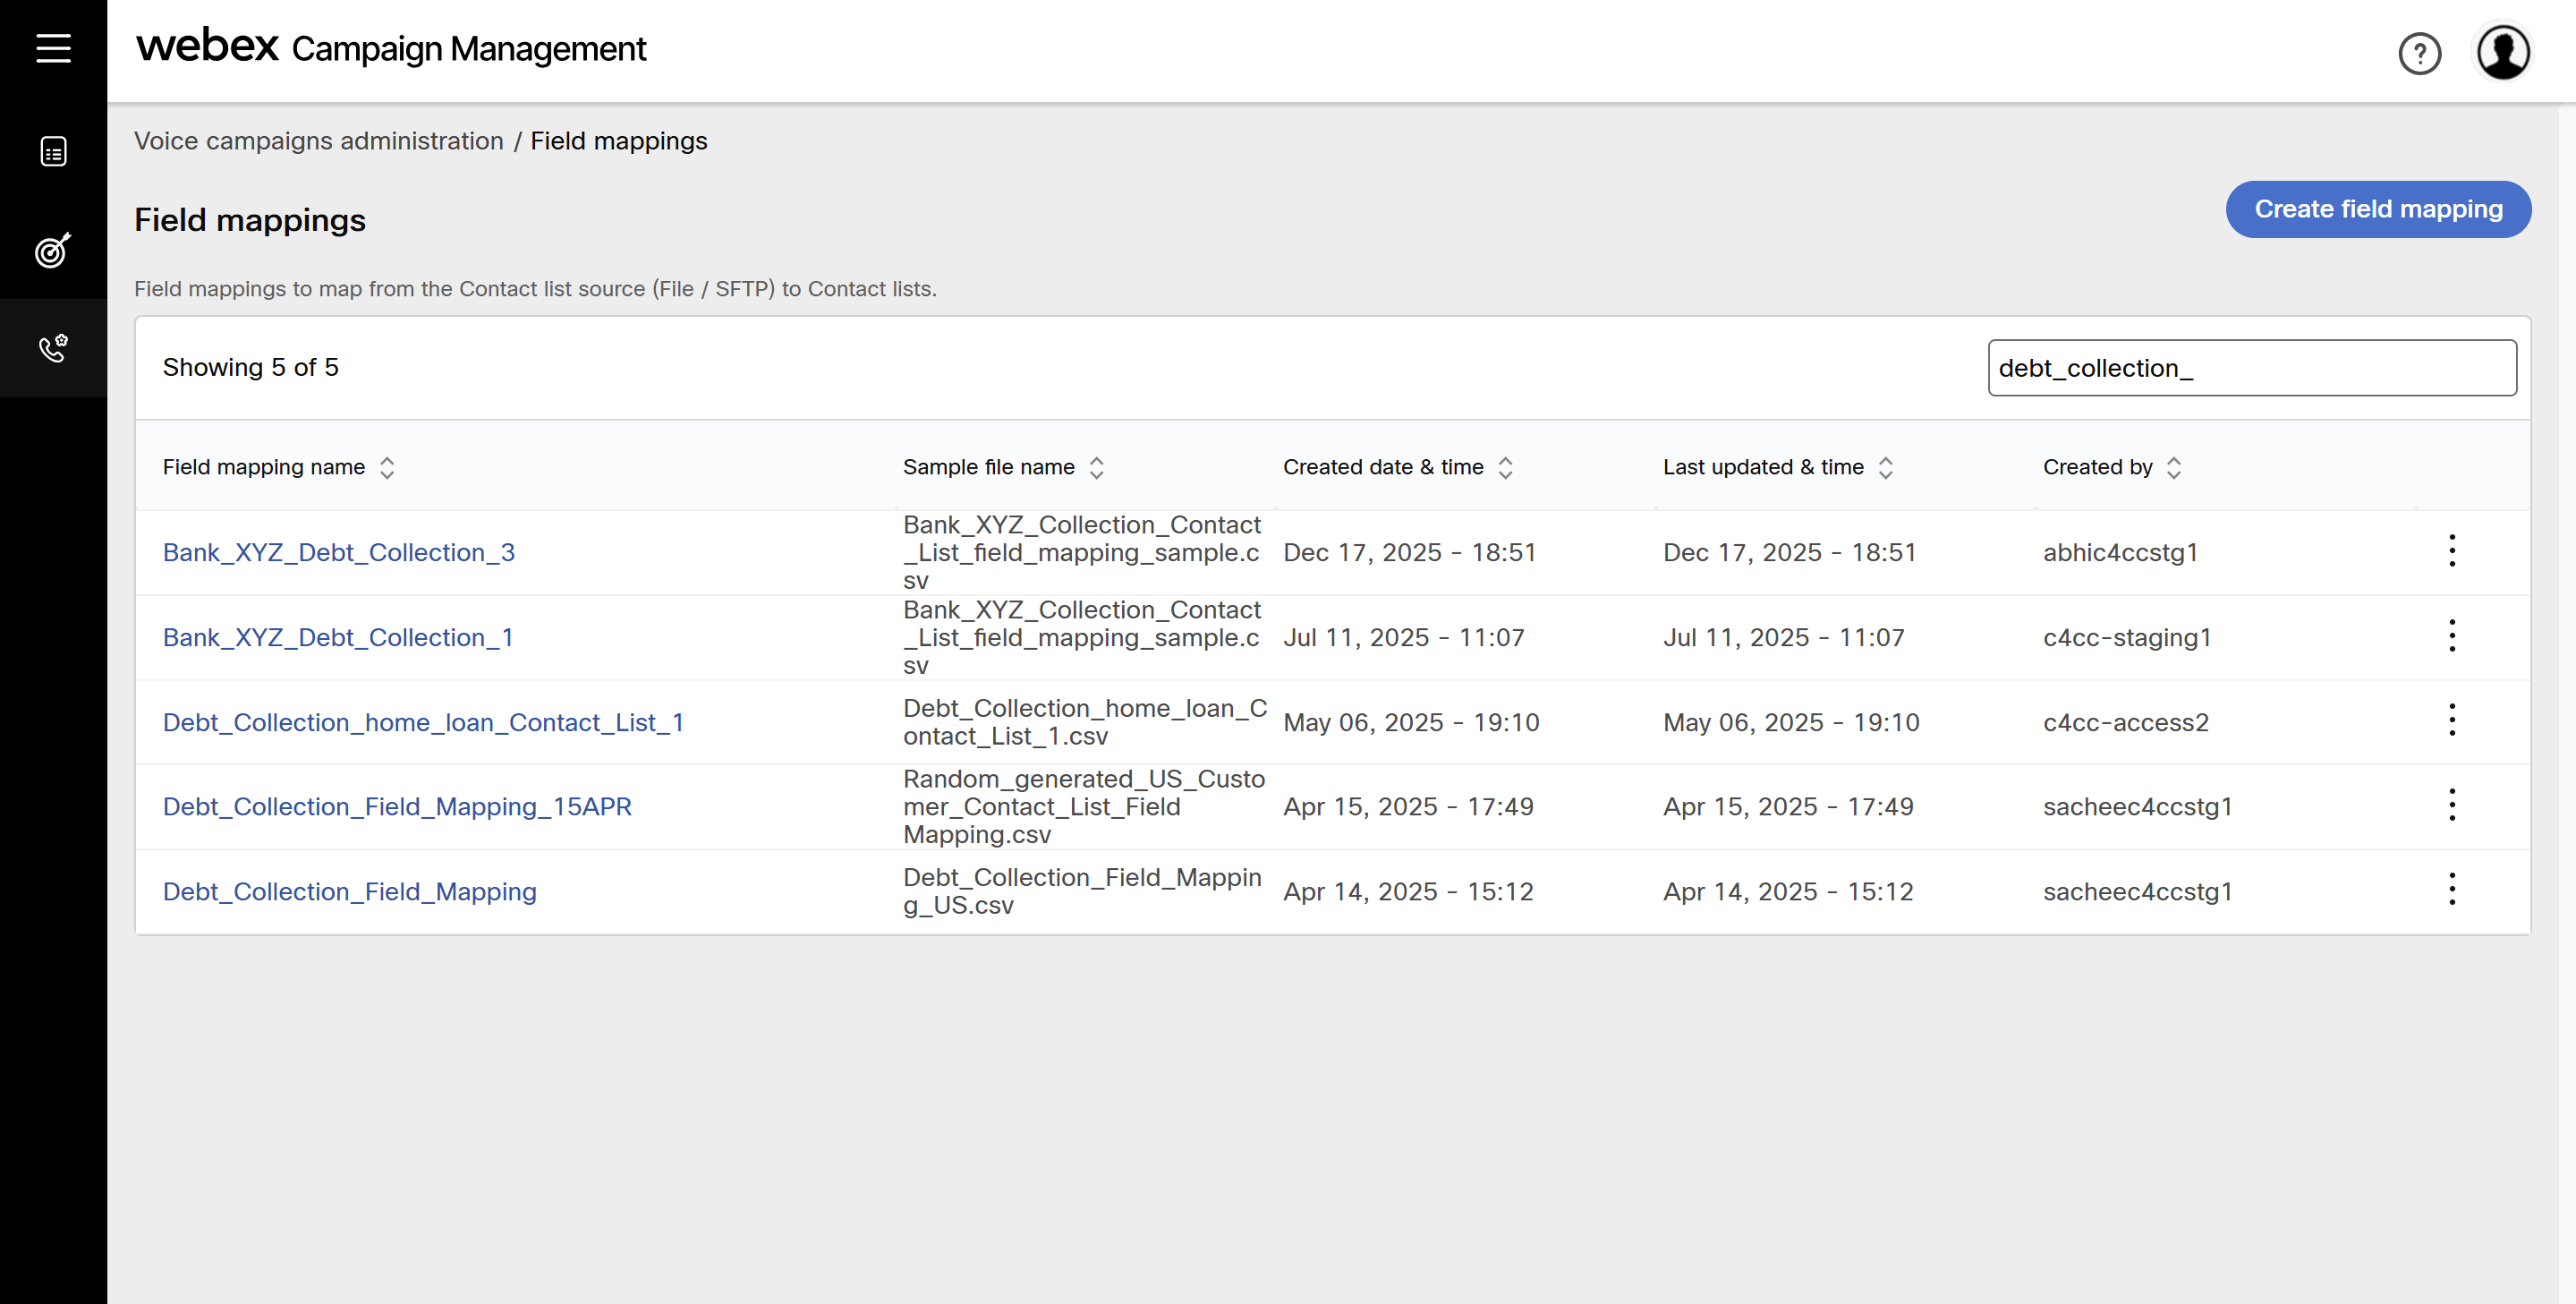
Create field mapping
- Navigate to Voice campaign administration > Field mappings. The Field mappings list screen will be displayed.
- Click Create field mappings. Enter a name for the field mapping and complete the steps mentioned below:
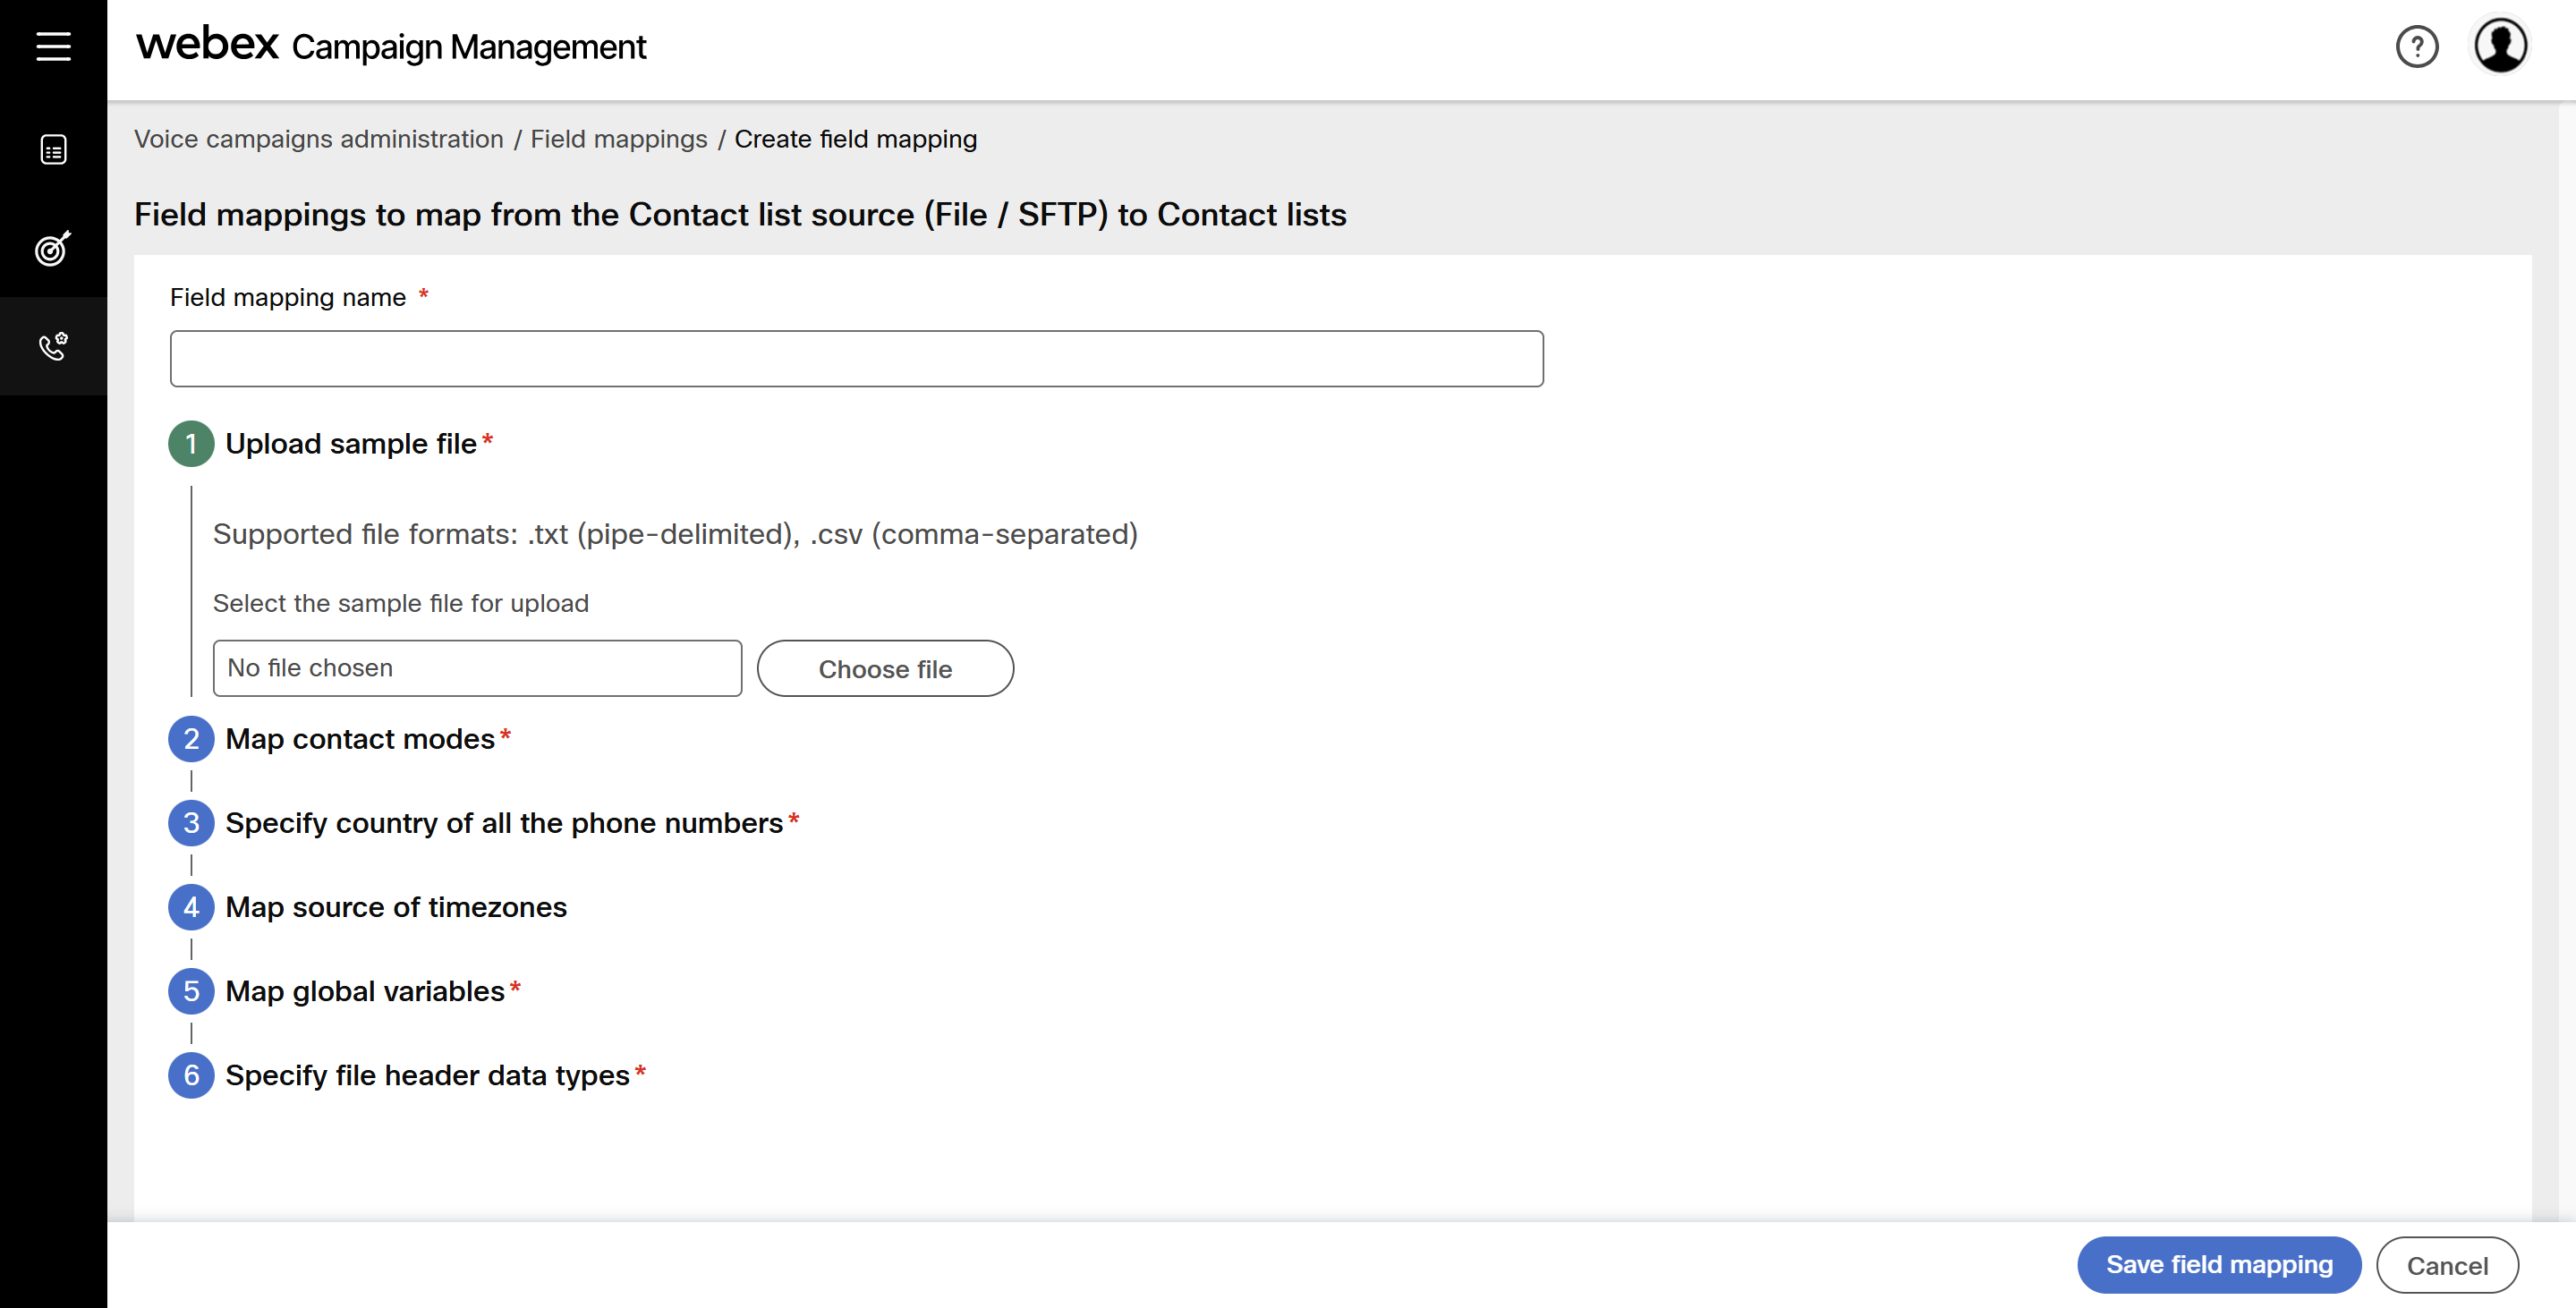
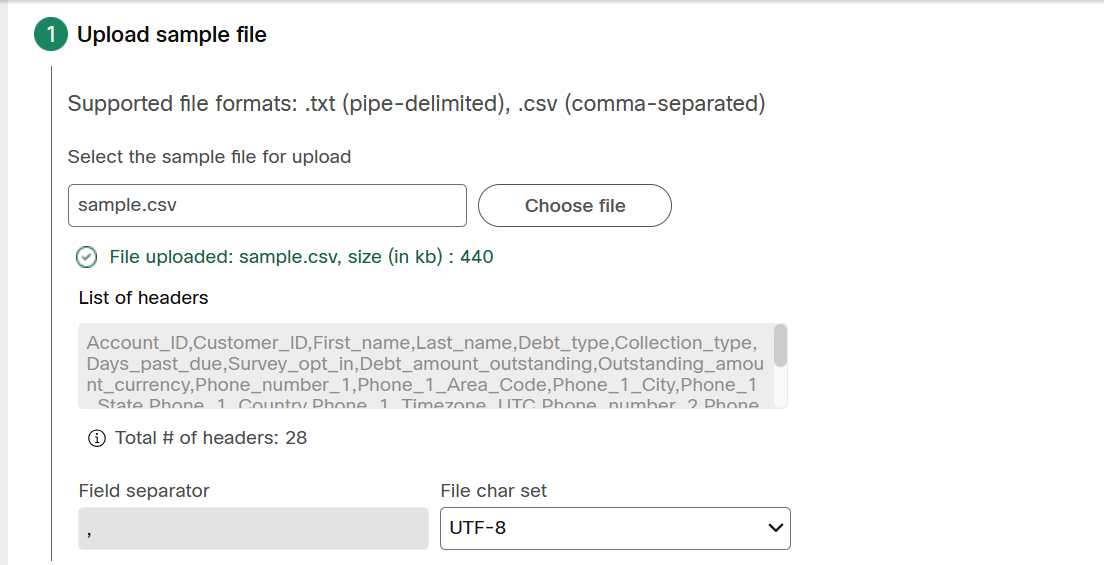
- Step 1: Upload sample file: Click Choose file and select the .txt (pipe delimited) or .csv (comma separated) file.
- Once the file upload is successful, the screen will display the List of headers of the file, Field separator in read-only mode and File char set. You can change the File char set as needed.
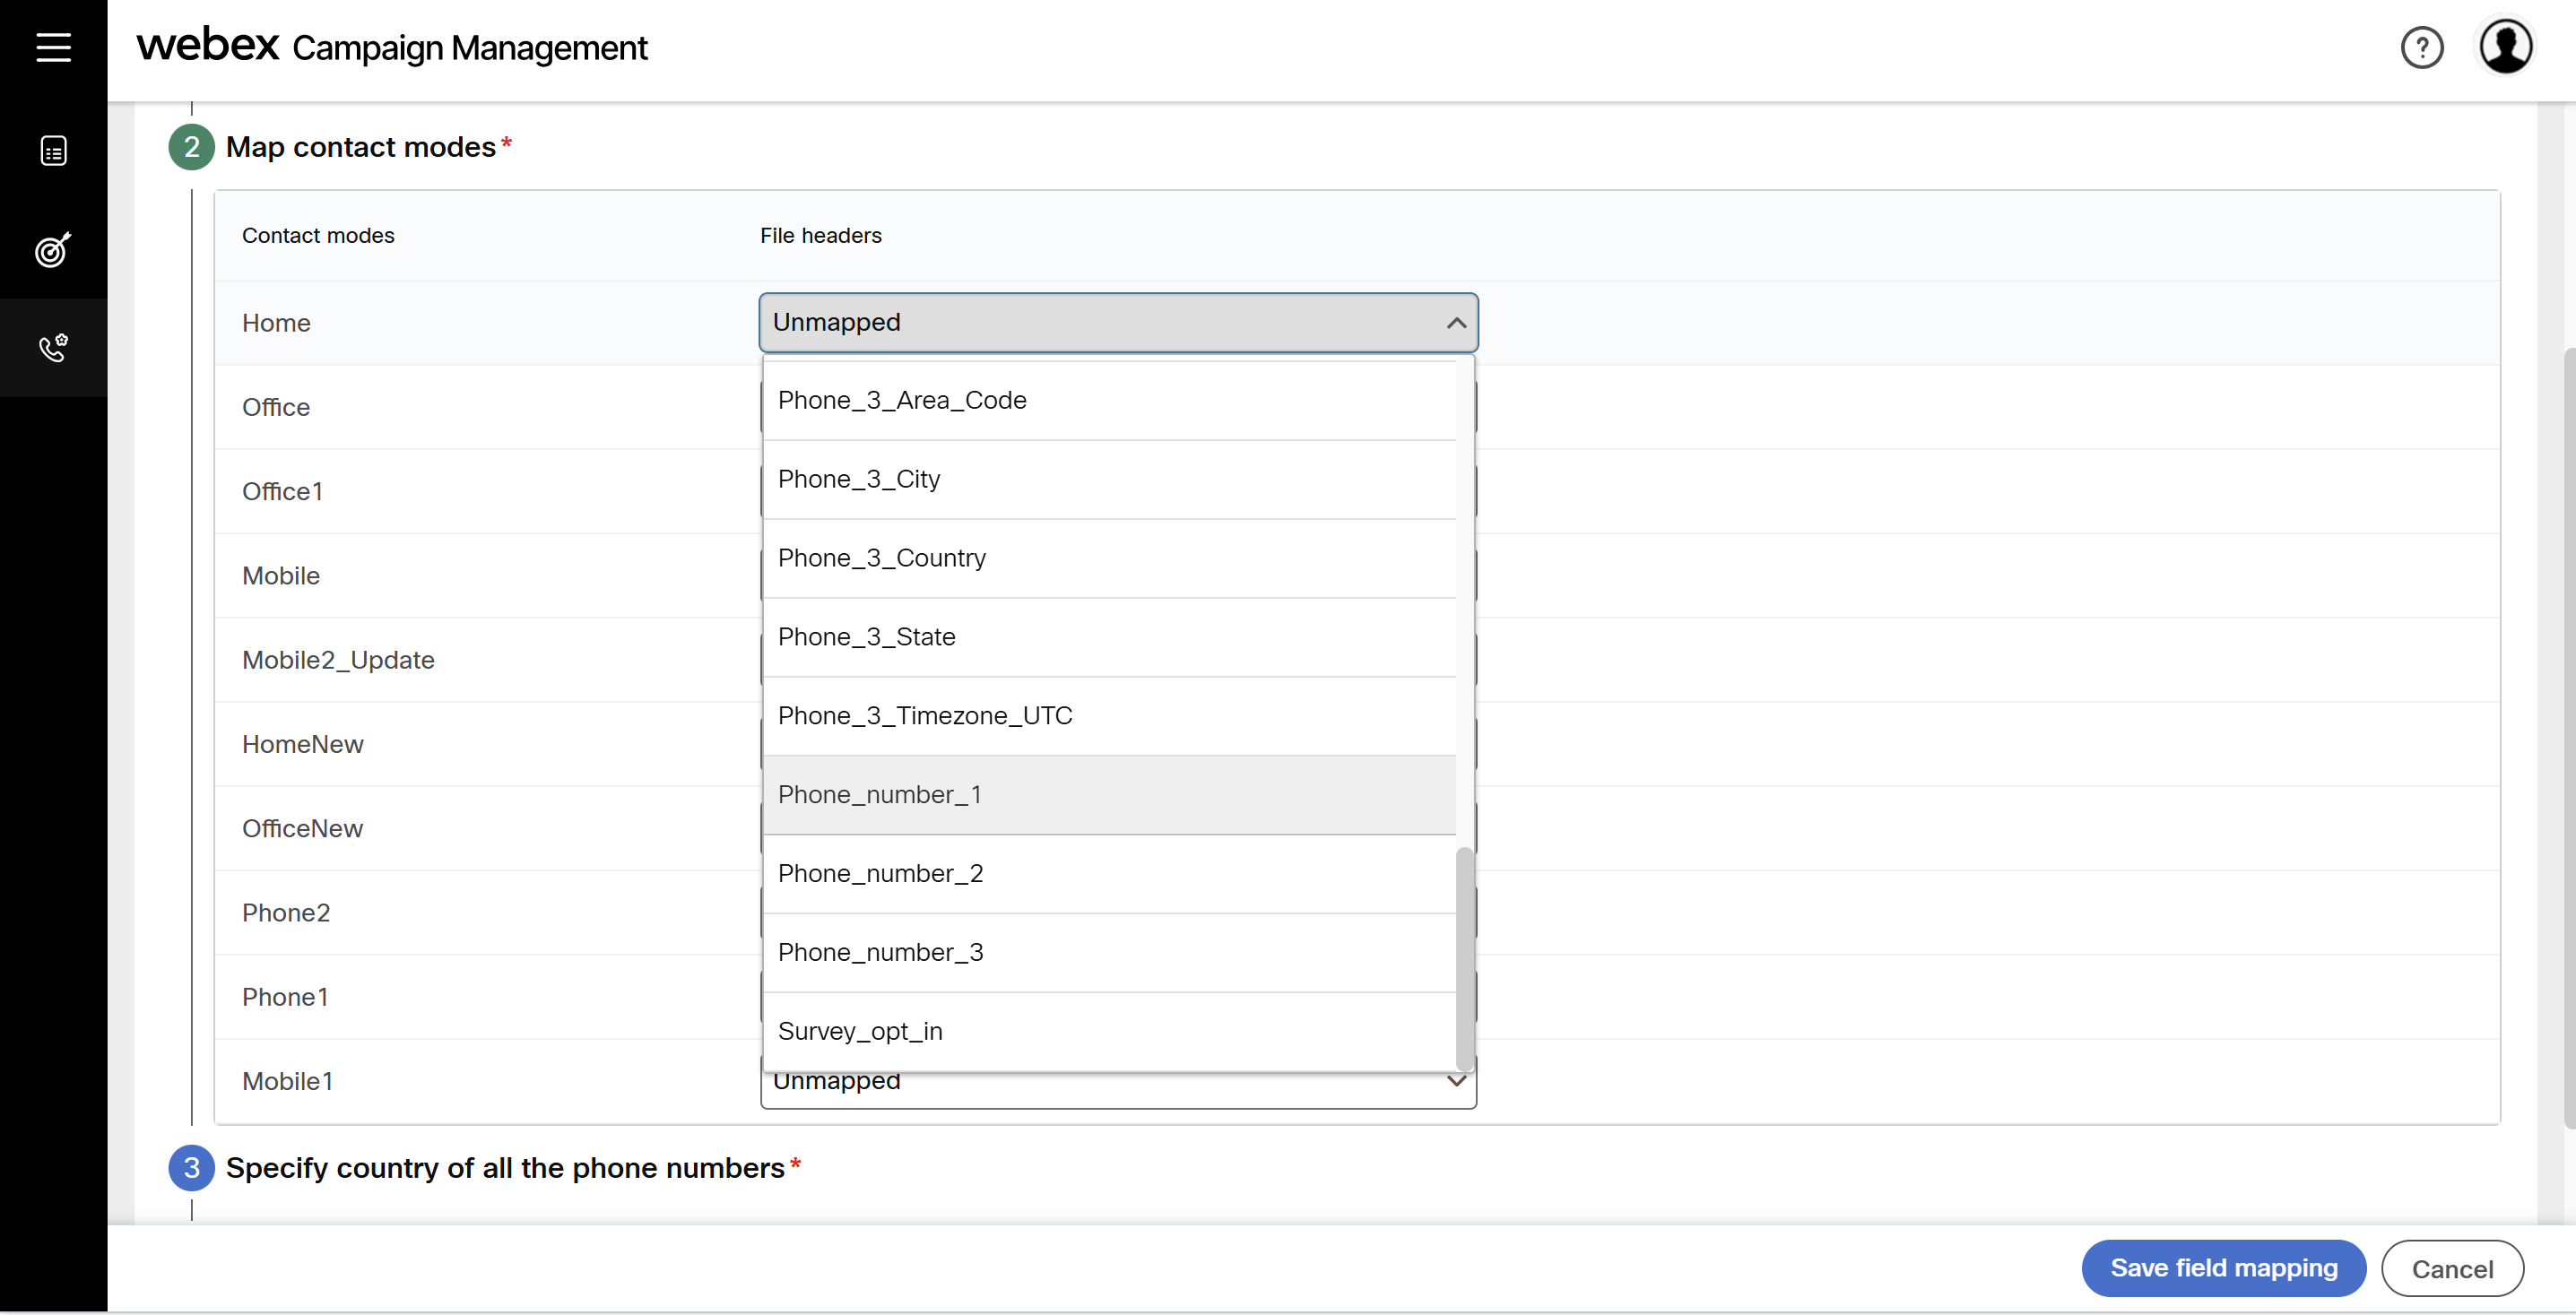
- Step 2: Map contact modes: Select the drop-down of each header and map with the corresponding contact modes. This will ensure that appropriate number is dialed based on schedule.
- Step 3: Specify country of all the phone numbers: Select the country for which the field mapping is created. Select the format of the phone number. We support 4 phone number formats.
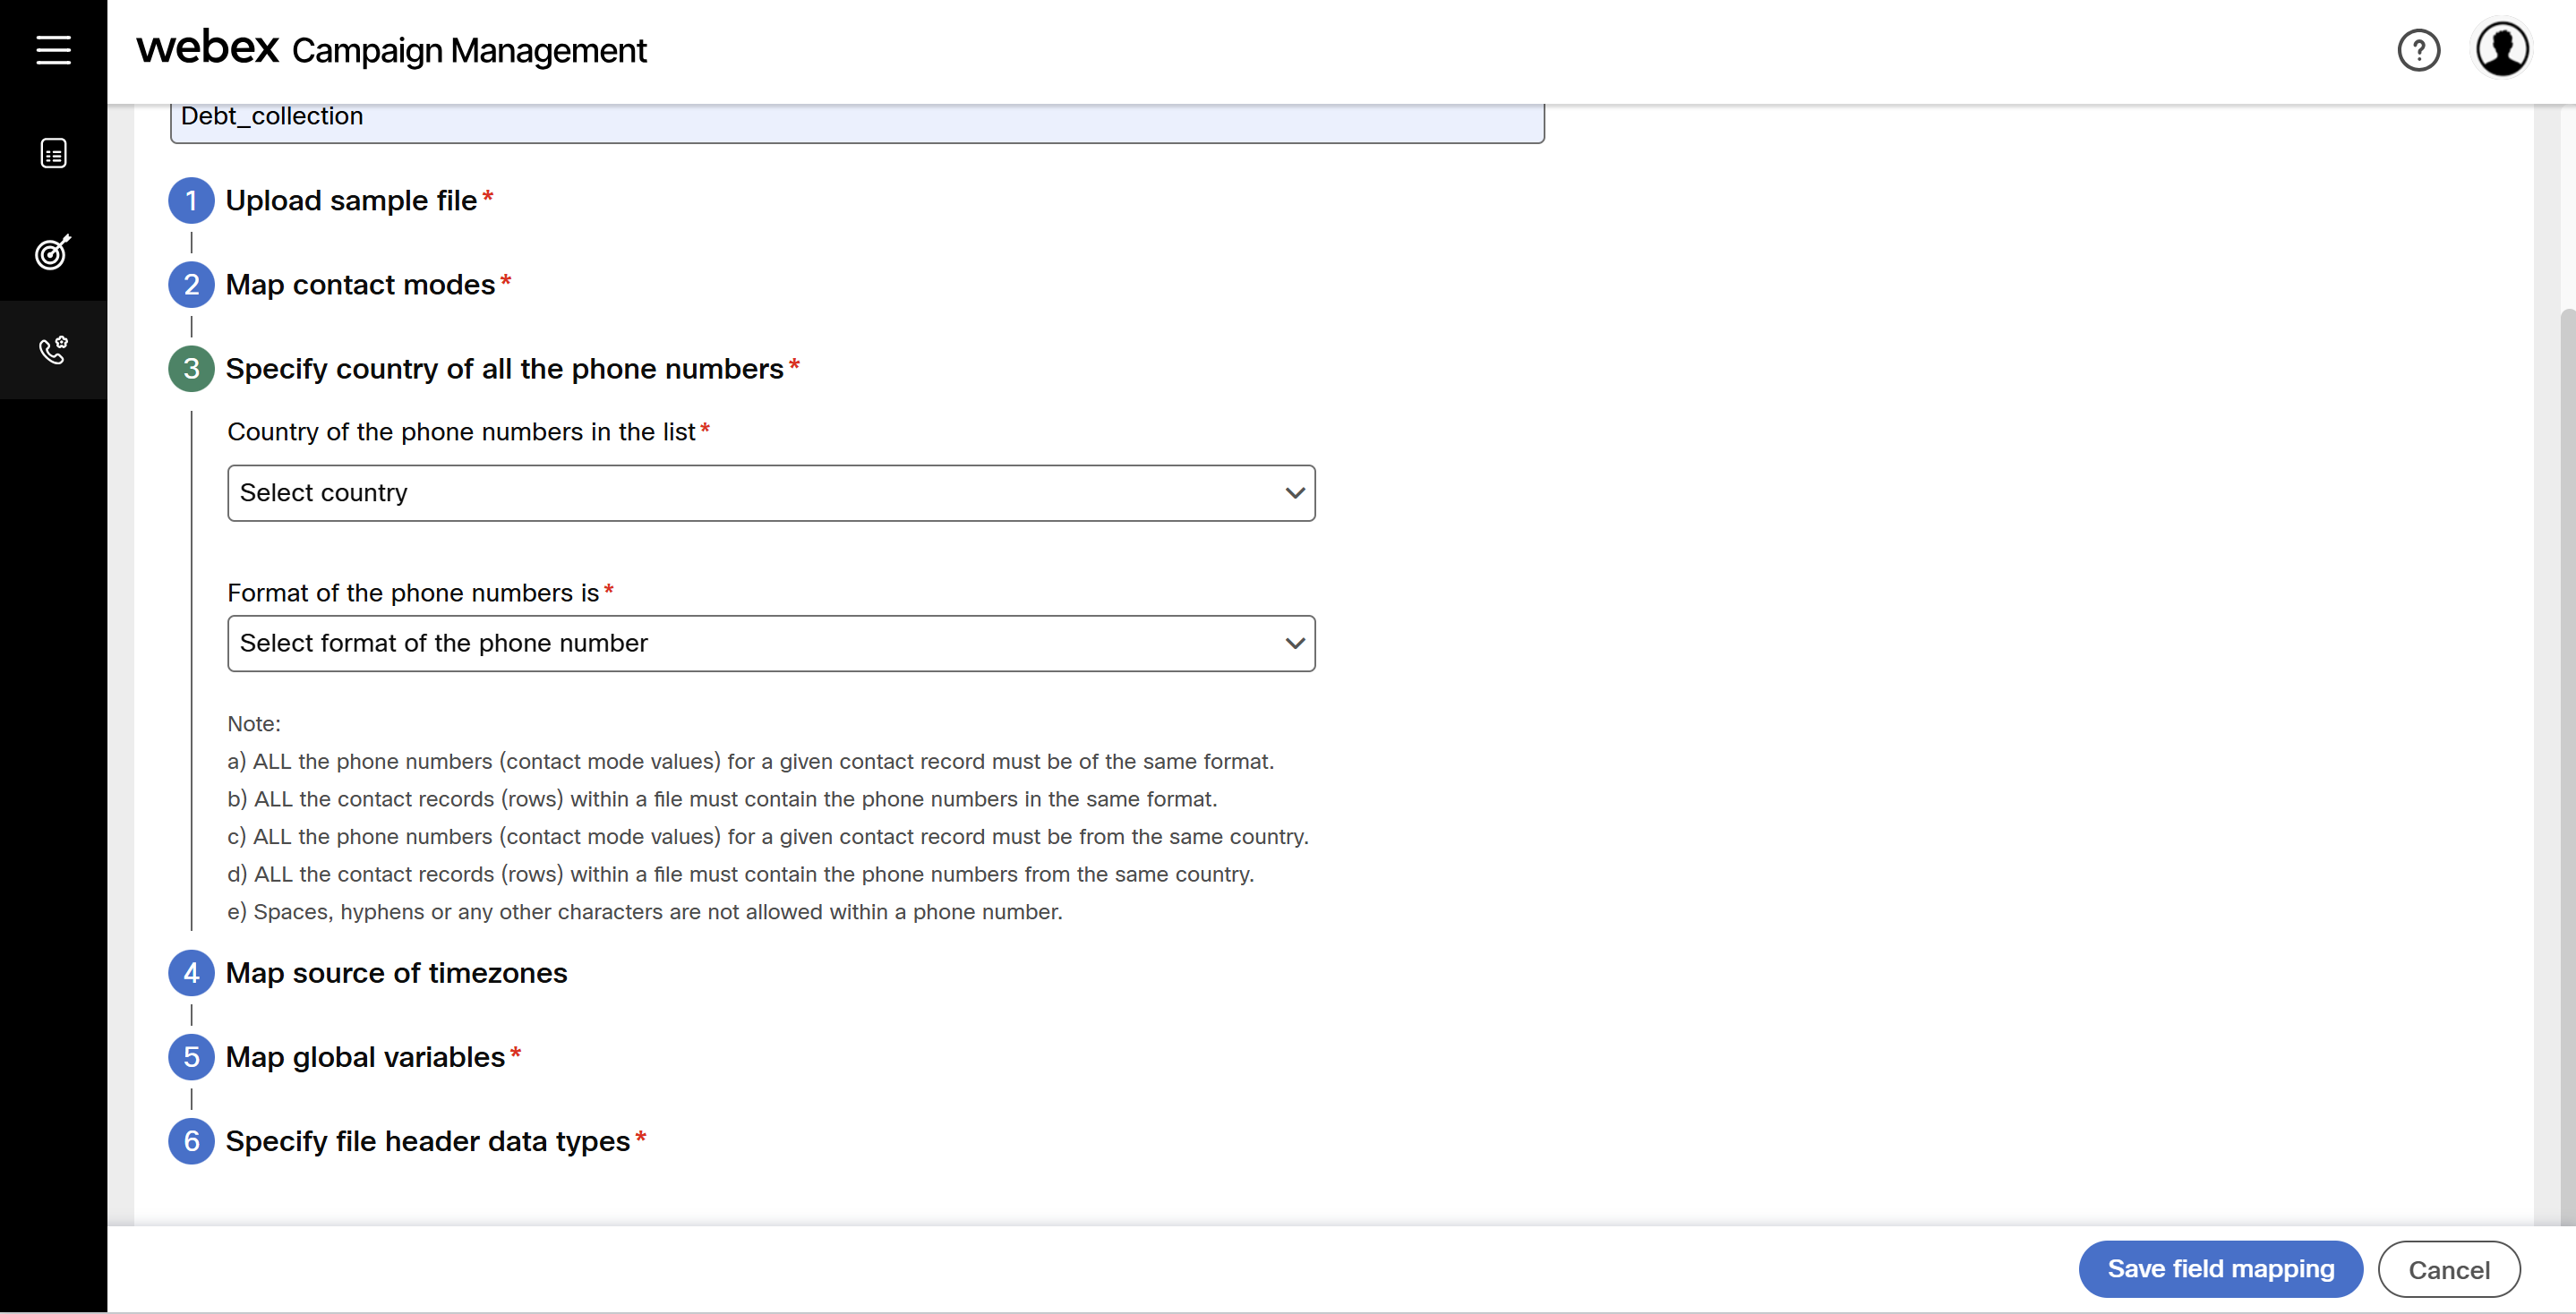
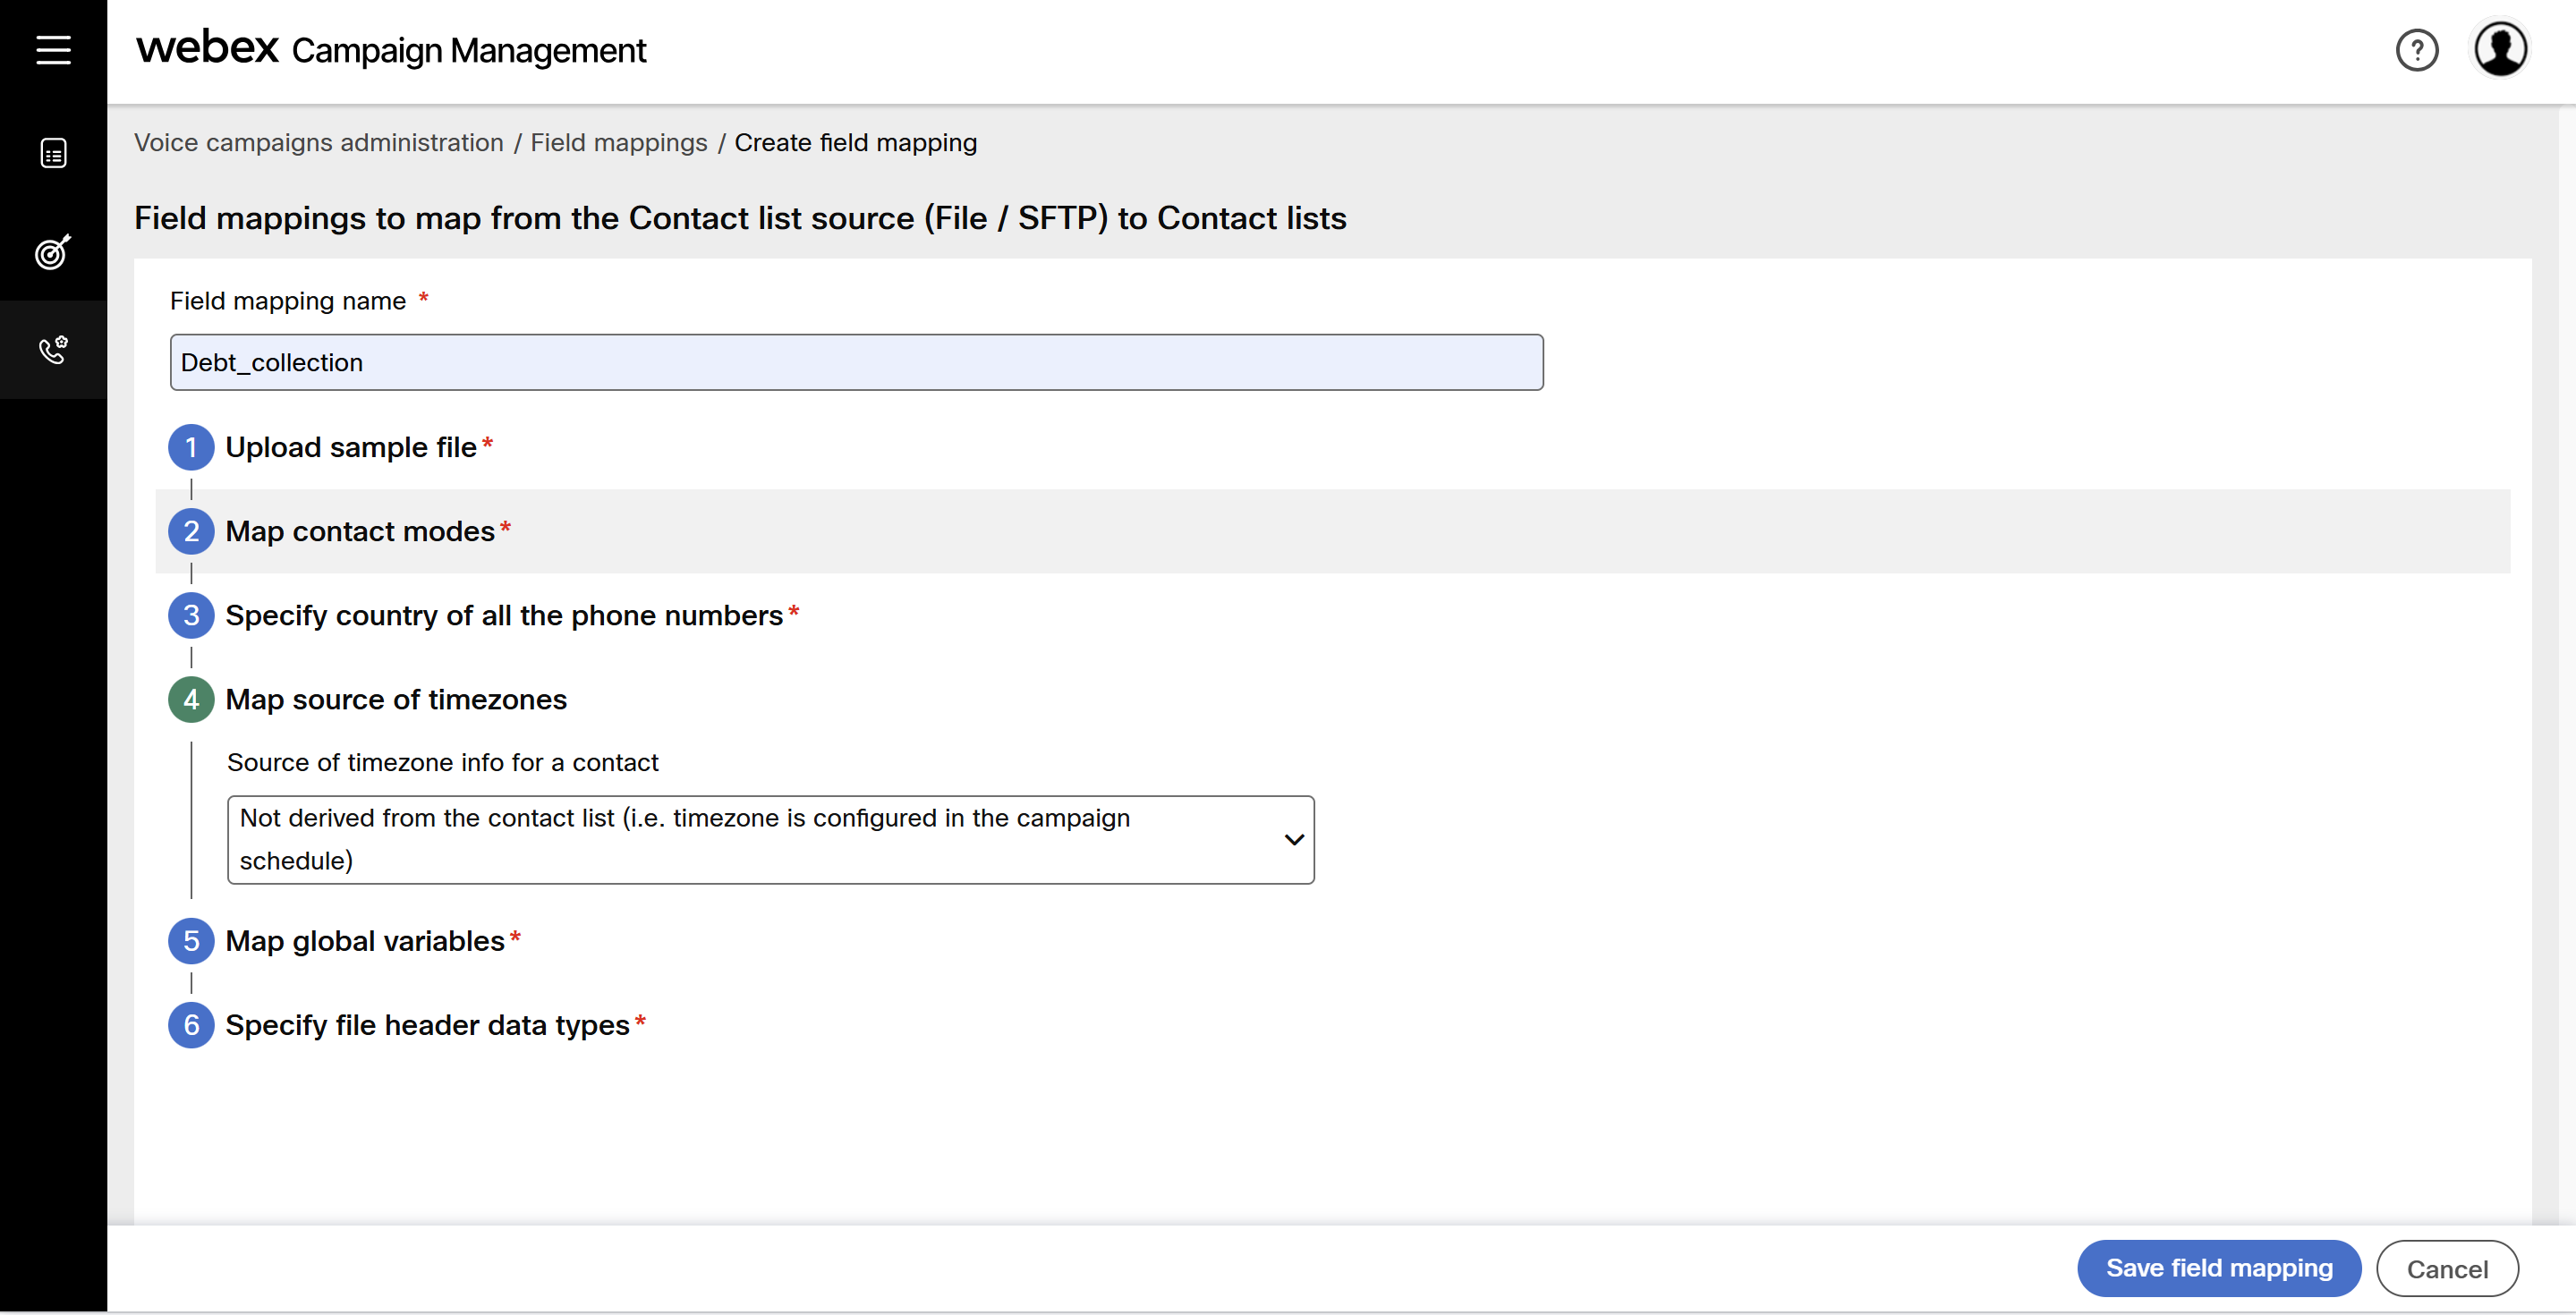
- Step 4: Map source of timezones: Select one of the below options:
- Not derived from the contact list: Select this option if you want to configure the timezone at the time of campaign creation.
- Derived from the contact list (US / Canada telephone area code): Select this option if the telephone area codes are derived from contact list.
- Derived from the contact list : US ZIP codes: Select this option if the ZIP codes are derived from contact list.
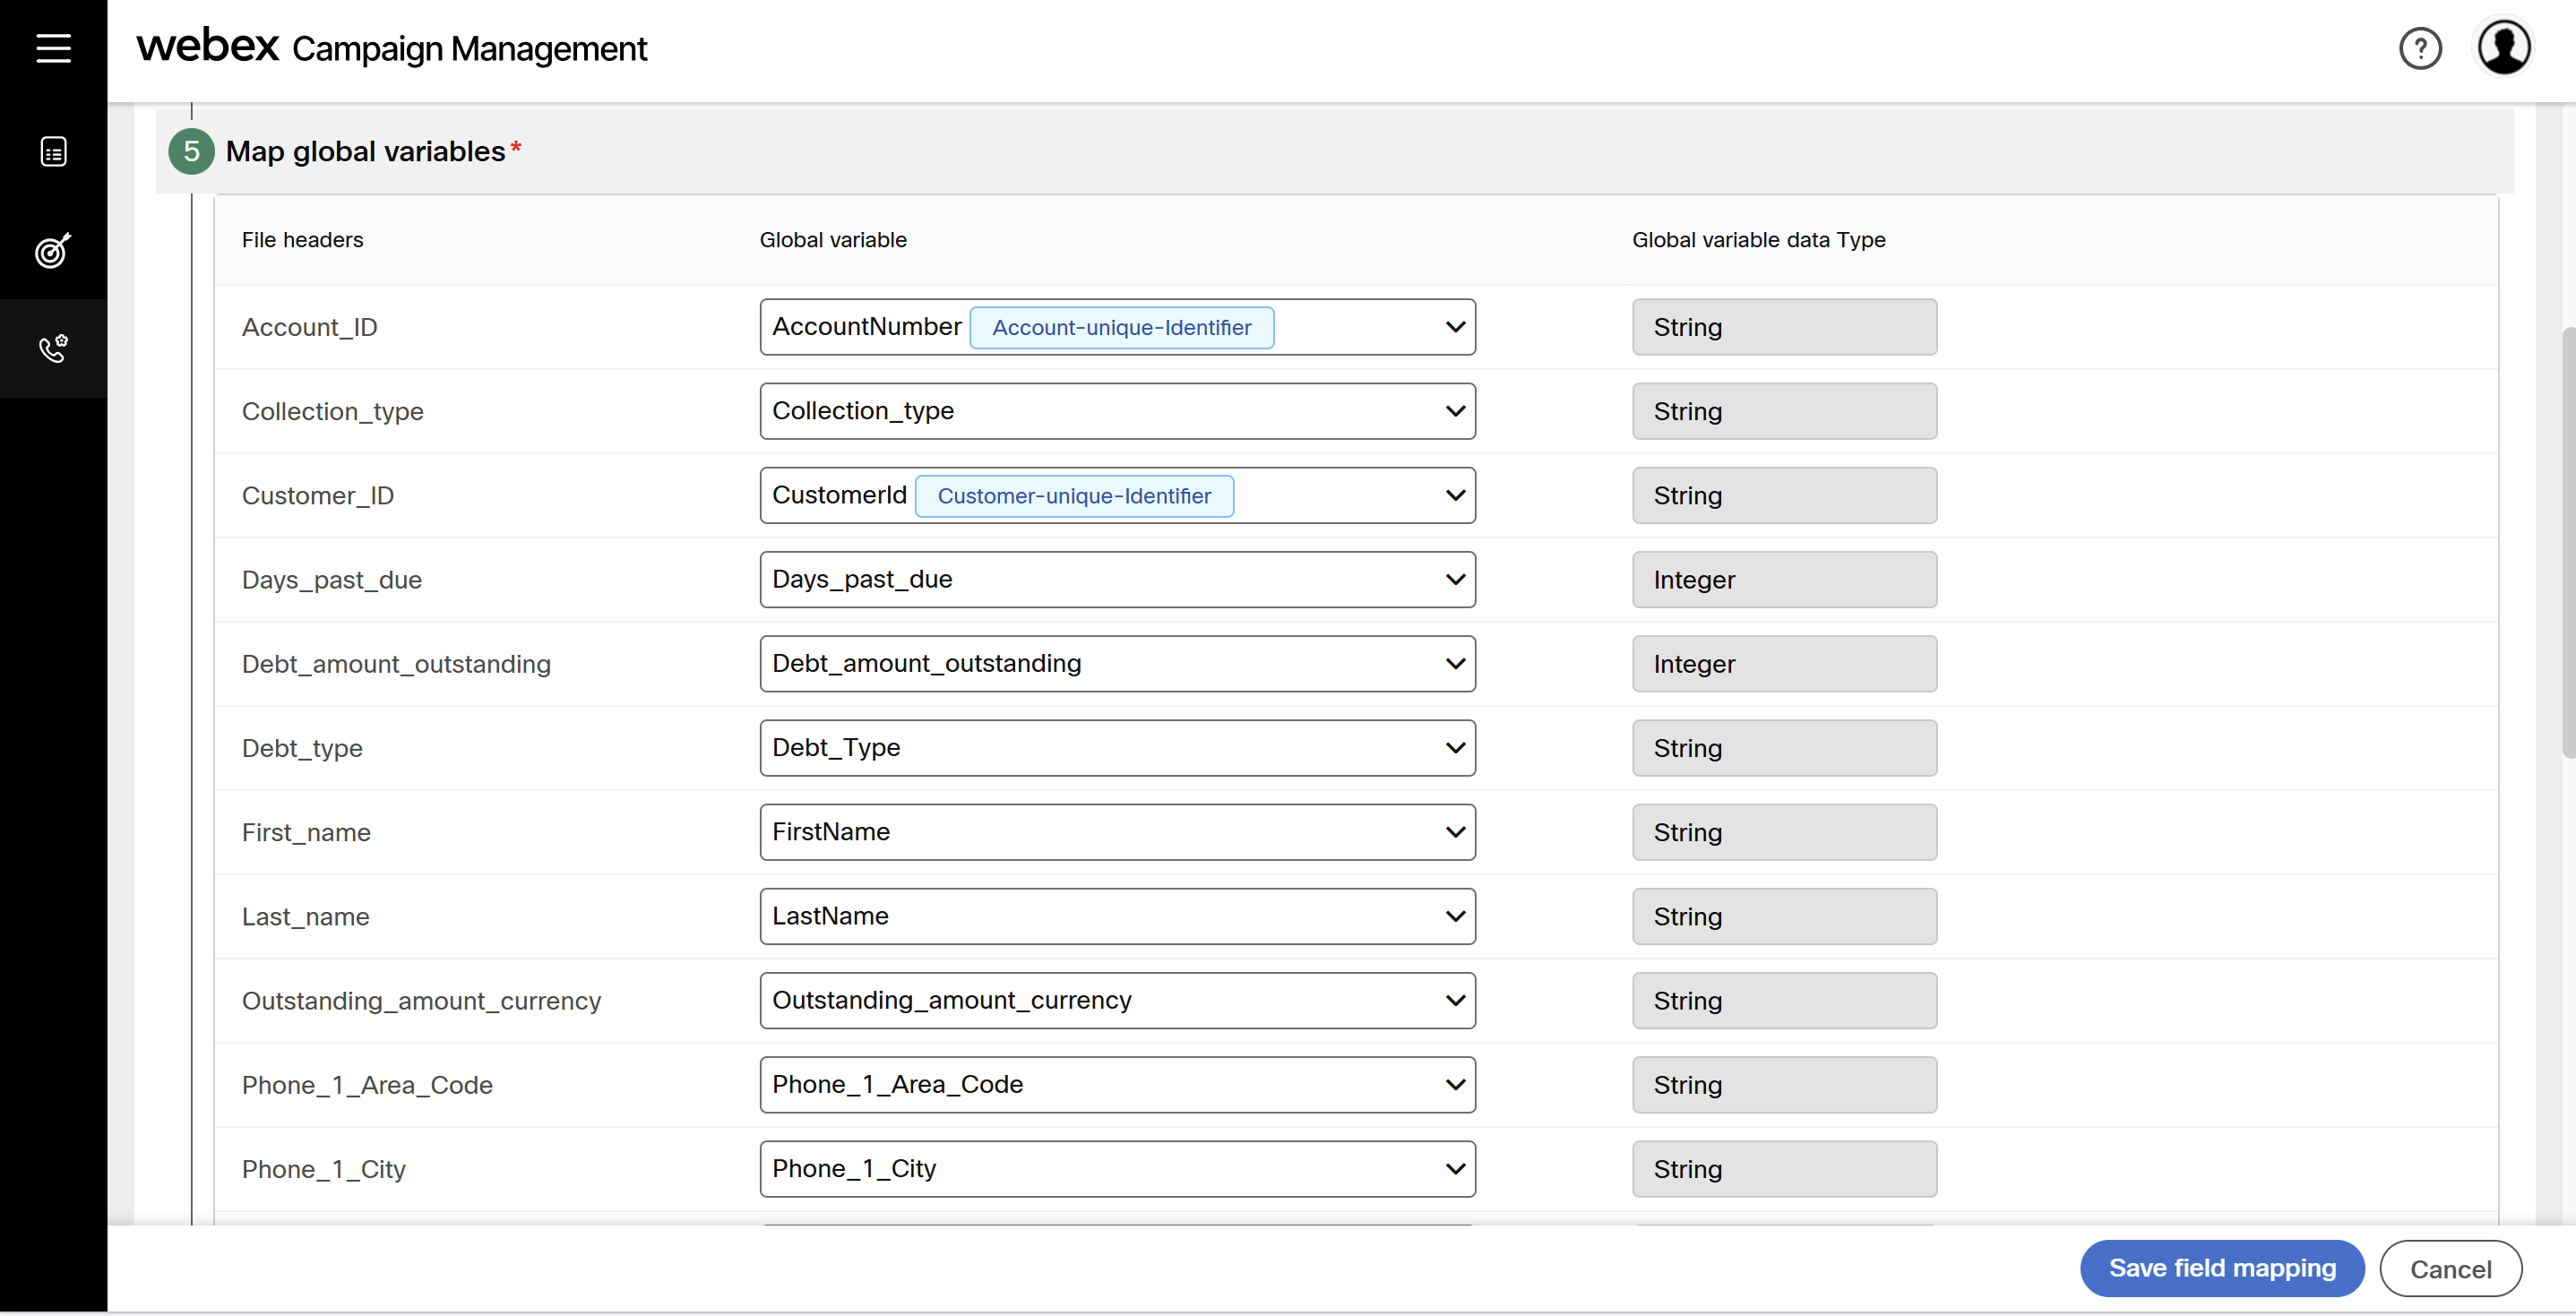
- Step 5: Map global variables: Select appropriate header from the drop-down to map with the respective global variables.
- Step 6: Specify file header data types: Based on the file you upload, system populates the data type. You can change the data type to a different data type from the drop-down. You can also enable PII protection for a file header. When a header is PII enabled, the value will be masked or encrypted.
PII encryption is allowed only if the data type is String.
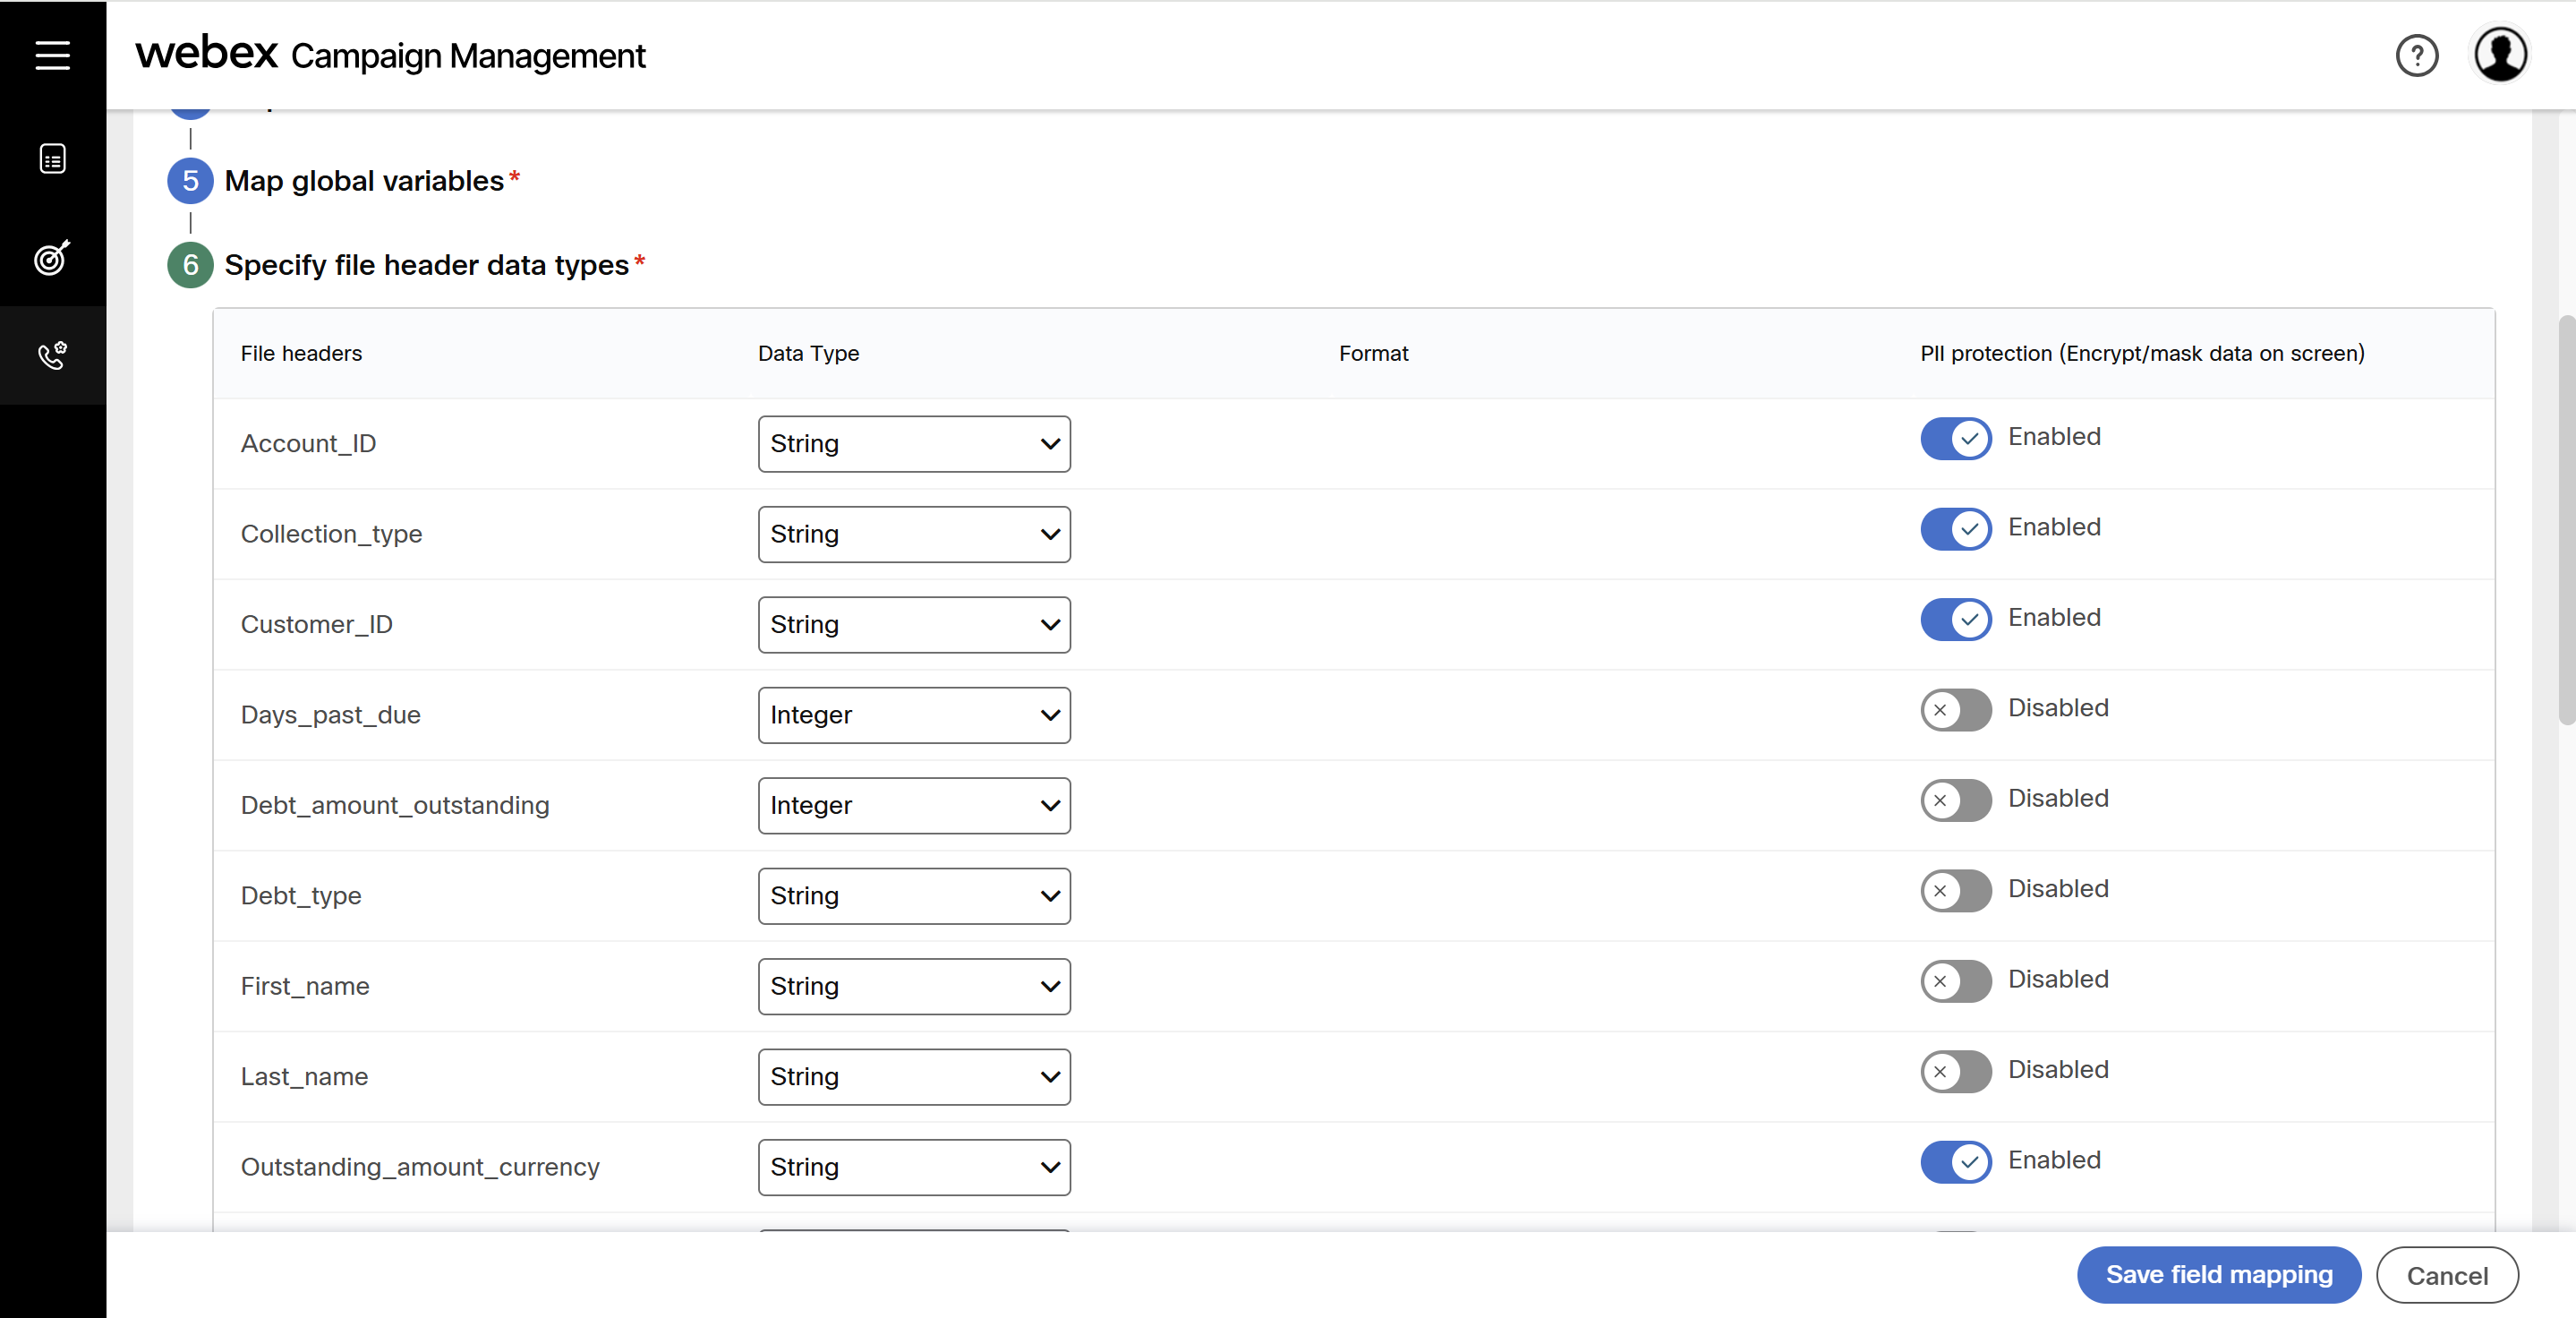
The data type of the 'ZIP code' file header should be set to String. Otherwise, ZIP codes that begin with a zero (e.g., 00501) may appear as 501, which would make the U.S. ZIP code invalid since it must contain six digits.
- Click Save field mapping.
Edit field mapping
You can edit a field mapping if it is not associated with any campaign. Any field mapping associated to a campaign will not be allowed for editing irrespective of the campaign status.
Follow these steps to edit field mappings:
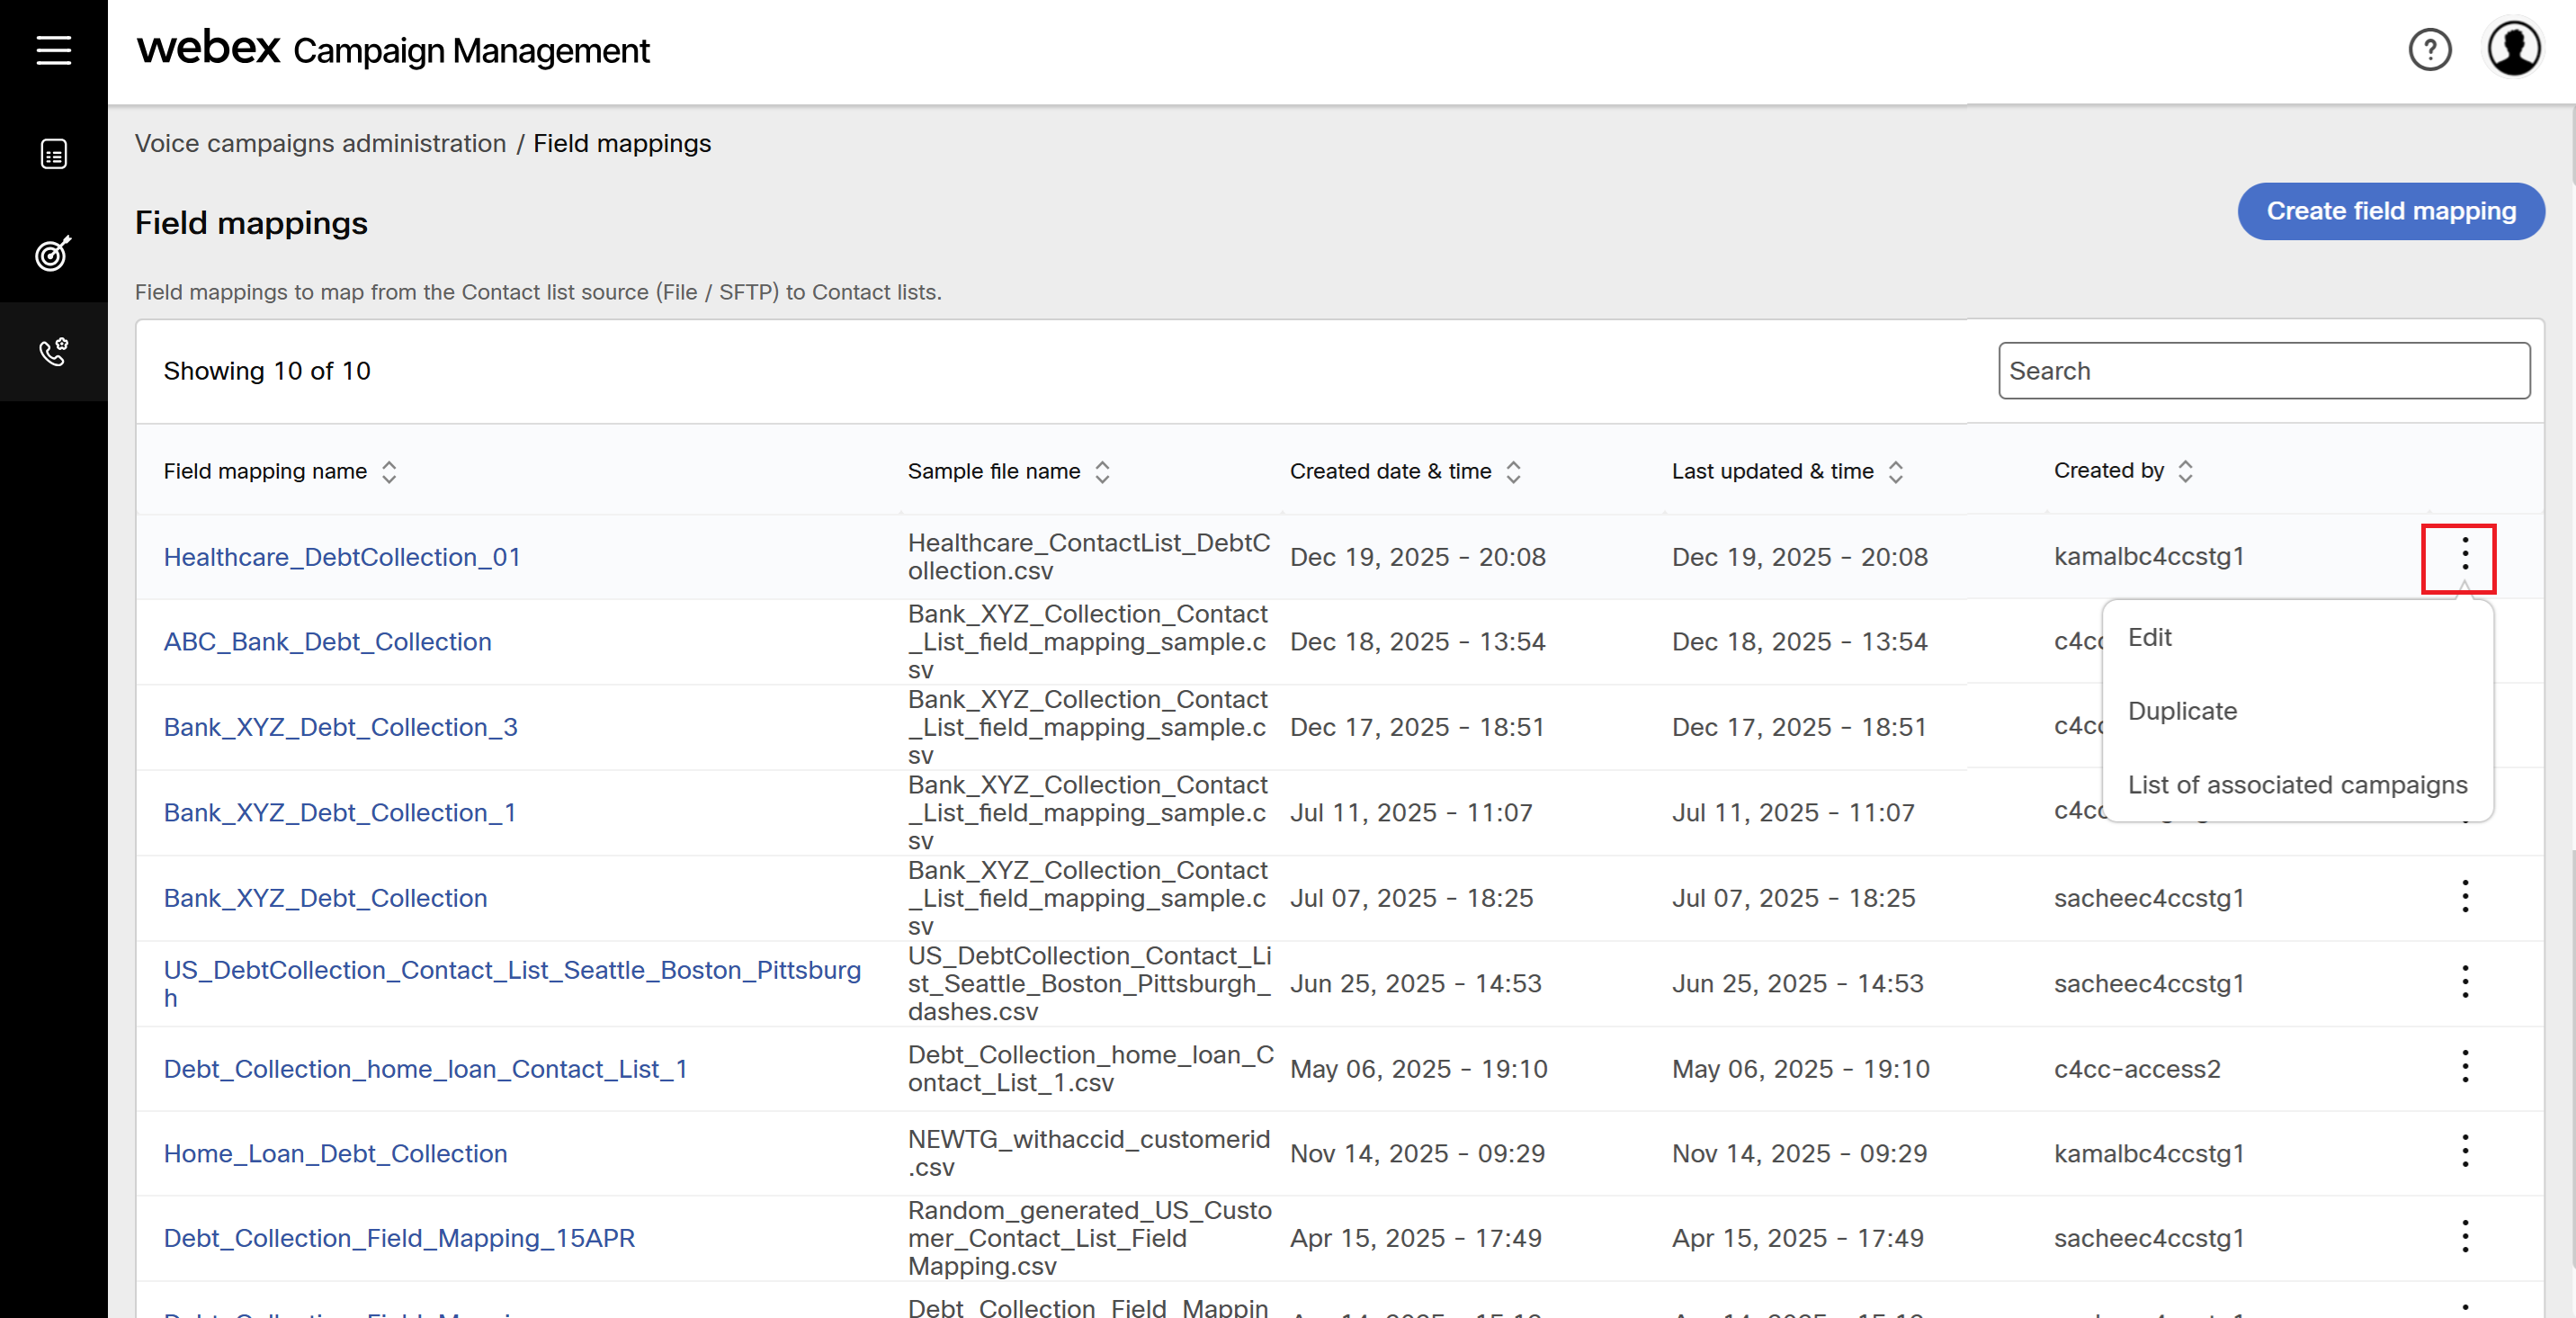
- Navigate to Voice campaign administration > Field mappings. The Field mappings list screen will be displayed.
- Click the ellipses icon of the respective field mapping and click Edit.

- Make necessary changes to the field mapping and click Update field mapping.
View list of associated Campaigns
You can view all the campaigns that are associated with respective mapping.
Follow these steps to view the campaigns associated with the campaigns:
- Navigate to Voice campaign administration > Field mappings. The Field mappings list screen will be displayed.
- Click the ellipses icon of the respective field mapping and click List of associated Campaigns.

- The screen will display the campaigns and their status that are associated with the selected field mappings.
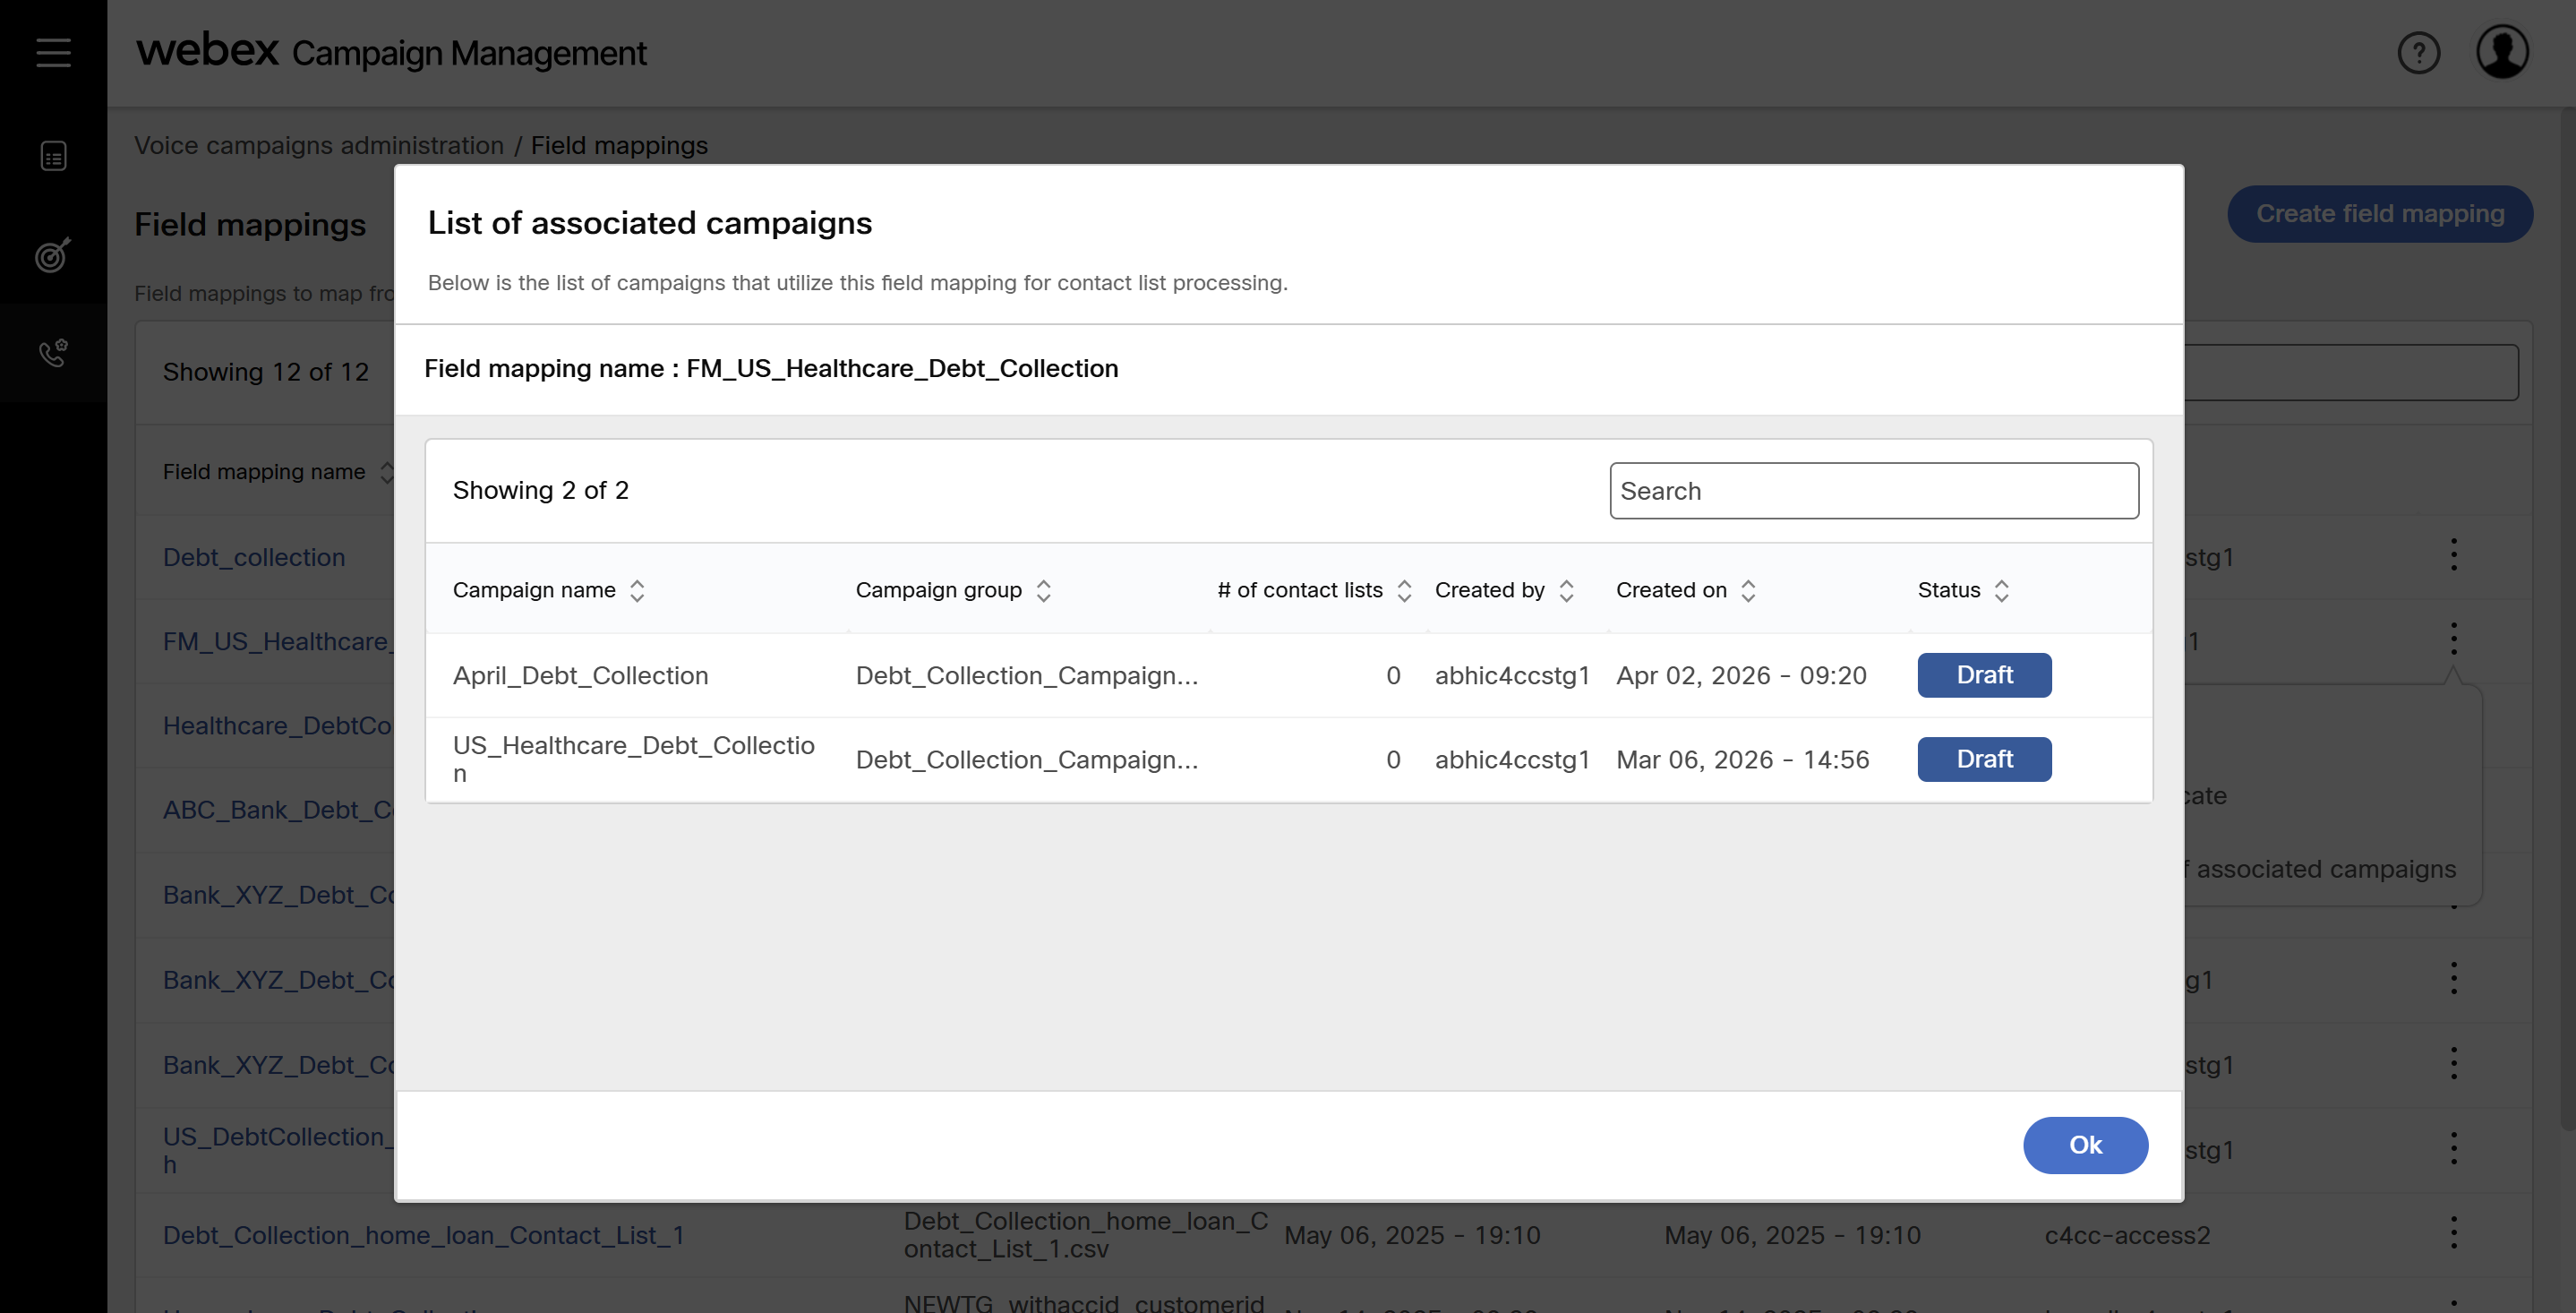
- (Optional) To find a campaign, type the campaign name in the search box.
- Click OK to close the screen.
Duplicate field mapping
You can view all the campaigns that are associated with respective mapping.
Follow these steps to view the campaigns associated with the campaigns:
- Navigate to Voice campaign administration > Field mappings. The Field mappings list screen will be displayed.
- Click the ellipses icon of the respective field mapping and click Duplicate.
- The screen will display a popup to enter a name for field mapping.
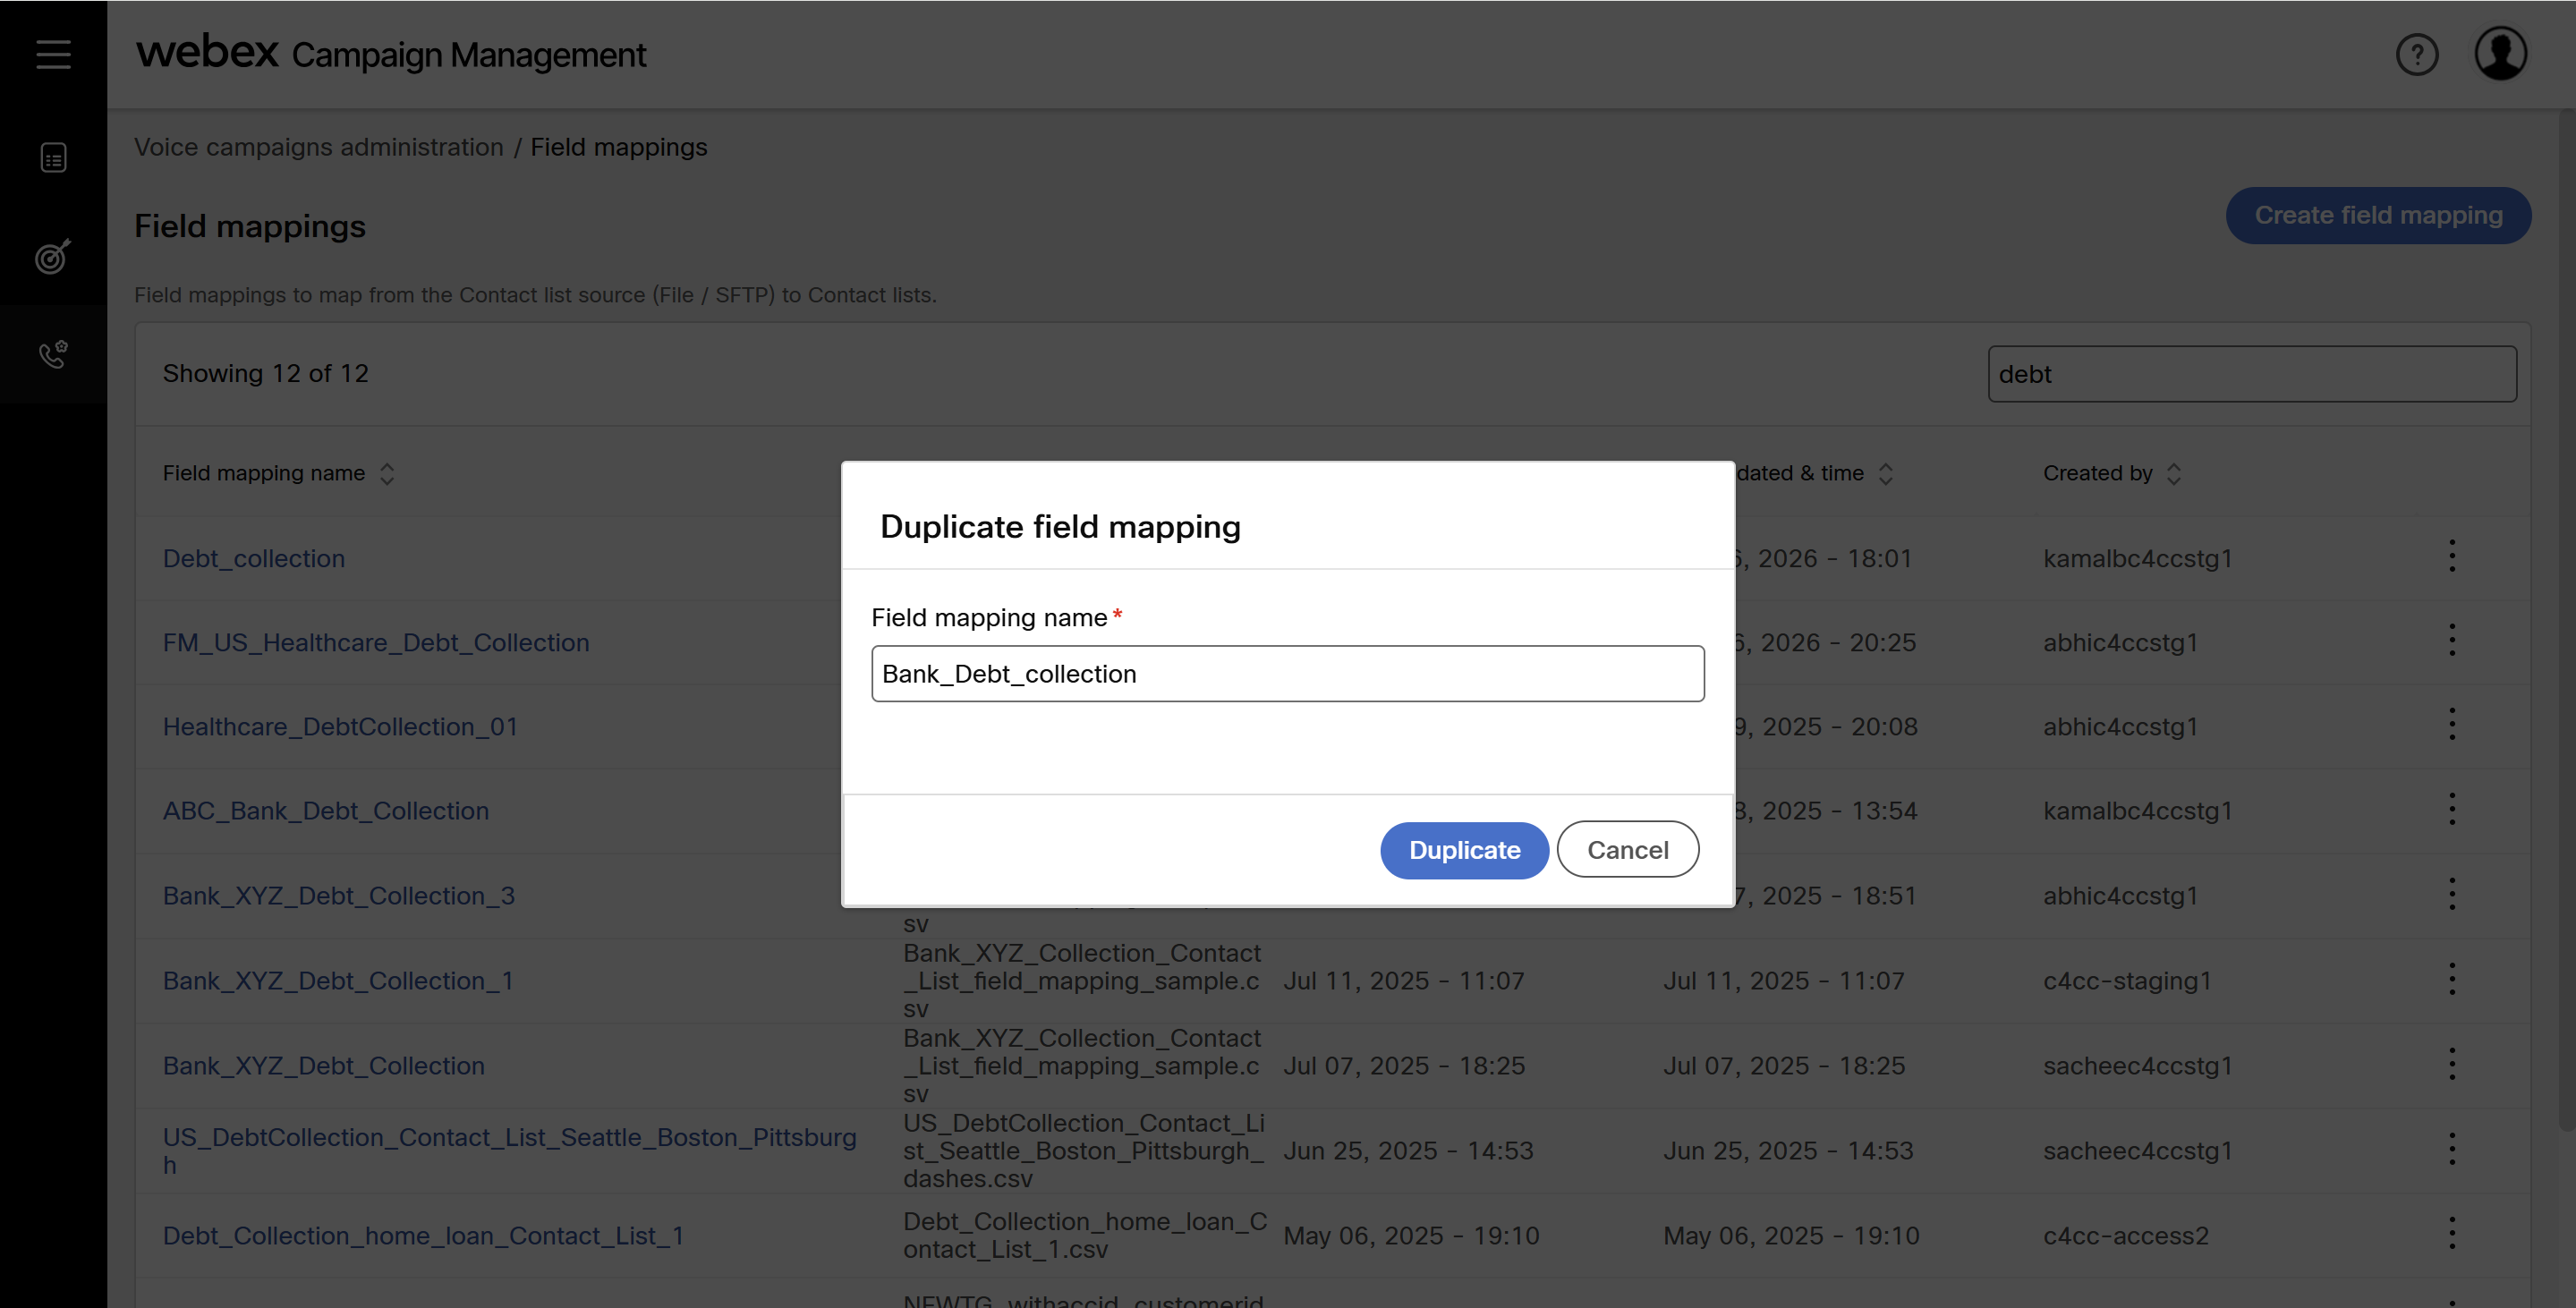
- Enter the name and click Duplicate.
Important Notes:
a) All phone numbers (contact mode values) for a single contact must follow the same format and belong to the same country.
b) All contact records within a file must use the same phone number format for a country.
c) Phone numbers must not contain spaces, hyphens, or any other non-numeric characters.