
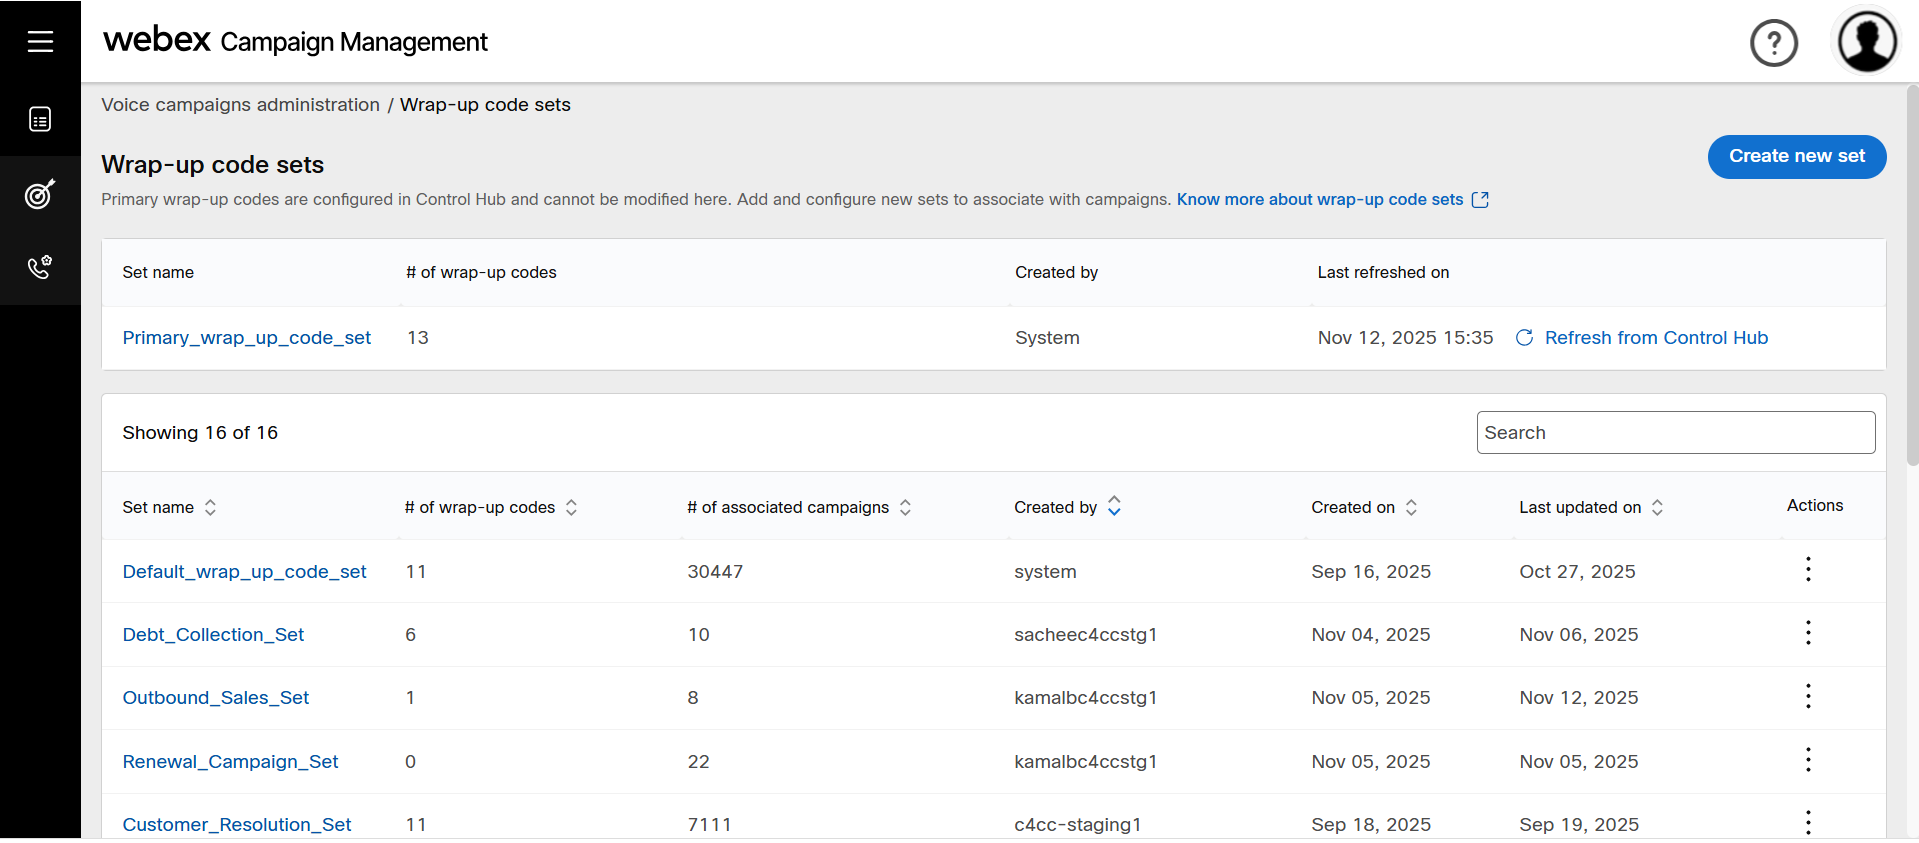
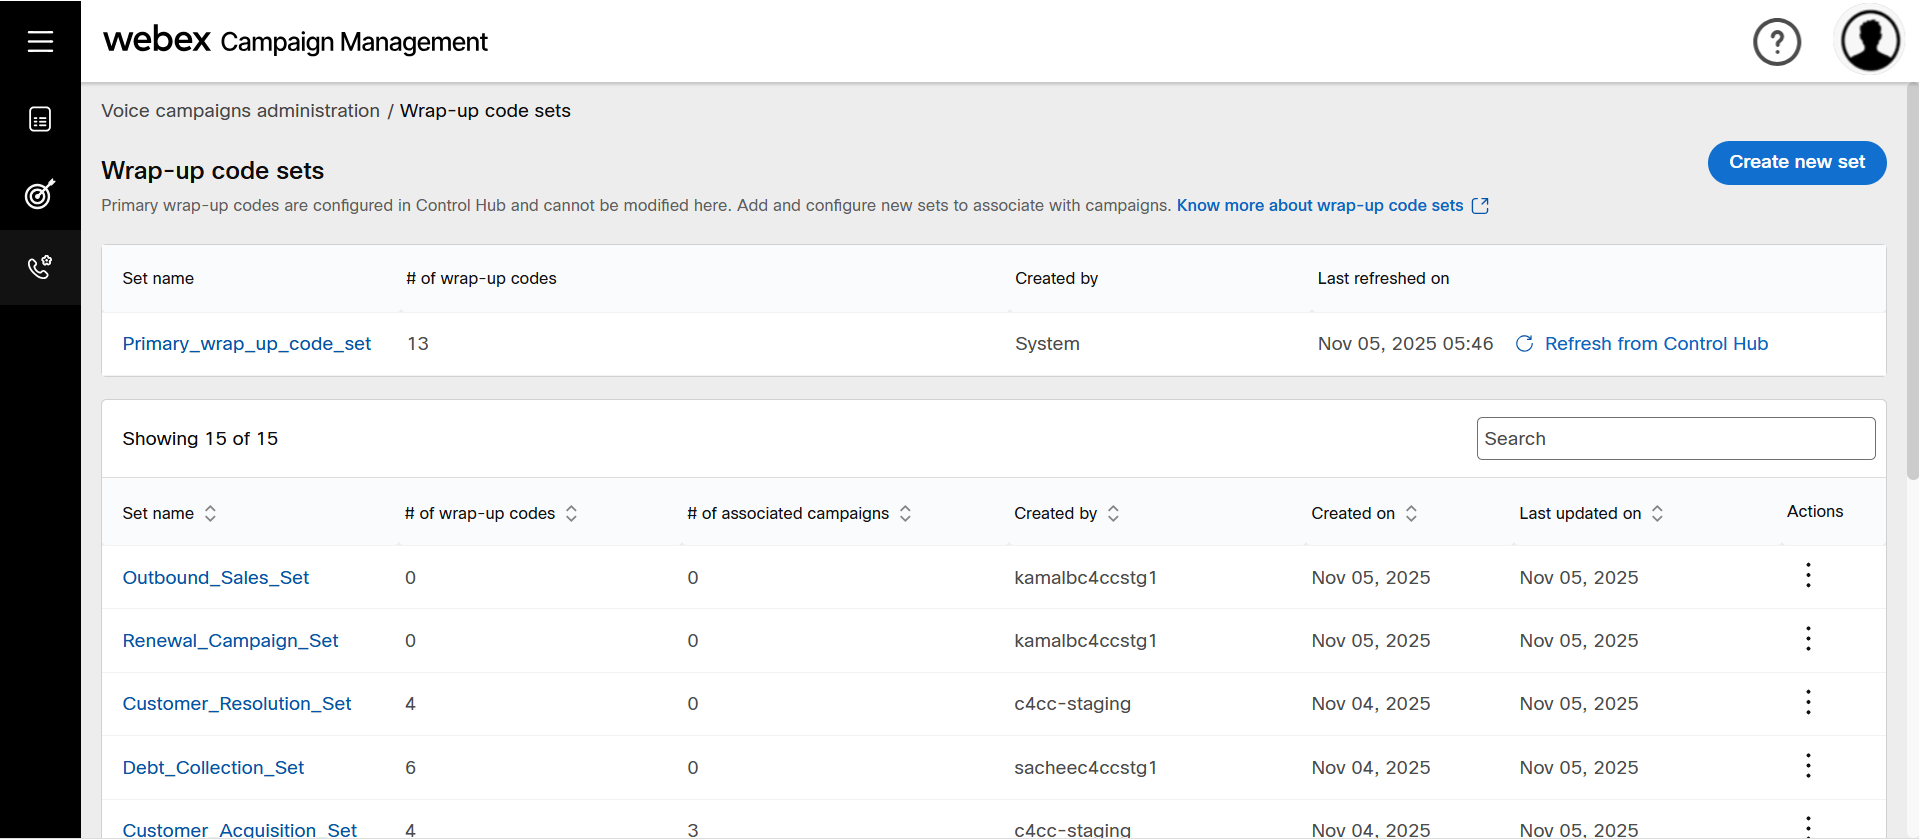
Wrap-up code sets
Wrap-up codes are the tags applied by agents after a call to categorize and record the outcome of each customer interaction. These codes are defined and managed in Control Hub. Although you can be periodically fetch and update them in Webex Campaign, new wrap-up codes cannot be created directly within Webex Campaign. However, you can edit the configuration of these wrap-up codes to determine whether a contact should be considered for future campaigns.
If you choose to reconfigure the wrap-up codes synced from Control Hub, you can do so. Any changes made to the wrap-up code within Webex Campaign will not be overwritten during subsequent synchronizations with Control Hub.
You can create up to 100 wrap-up code sets from the Primary wrap-up code set (created by the system). The wrap-up codes in each set can be customized to suit different campaign requirements.
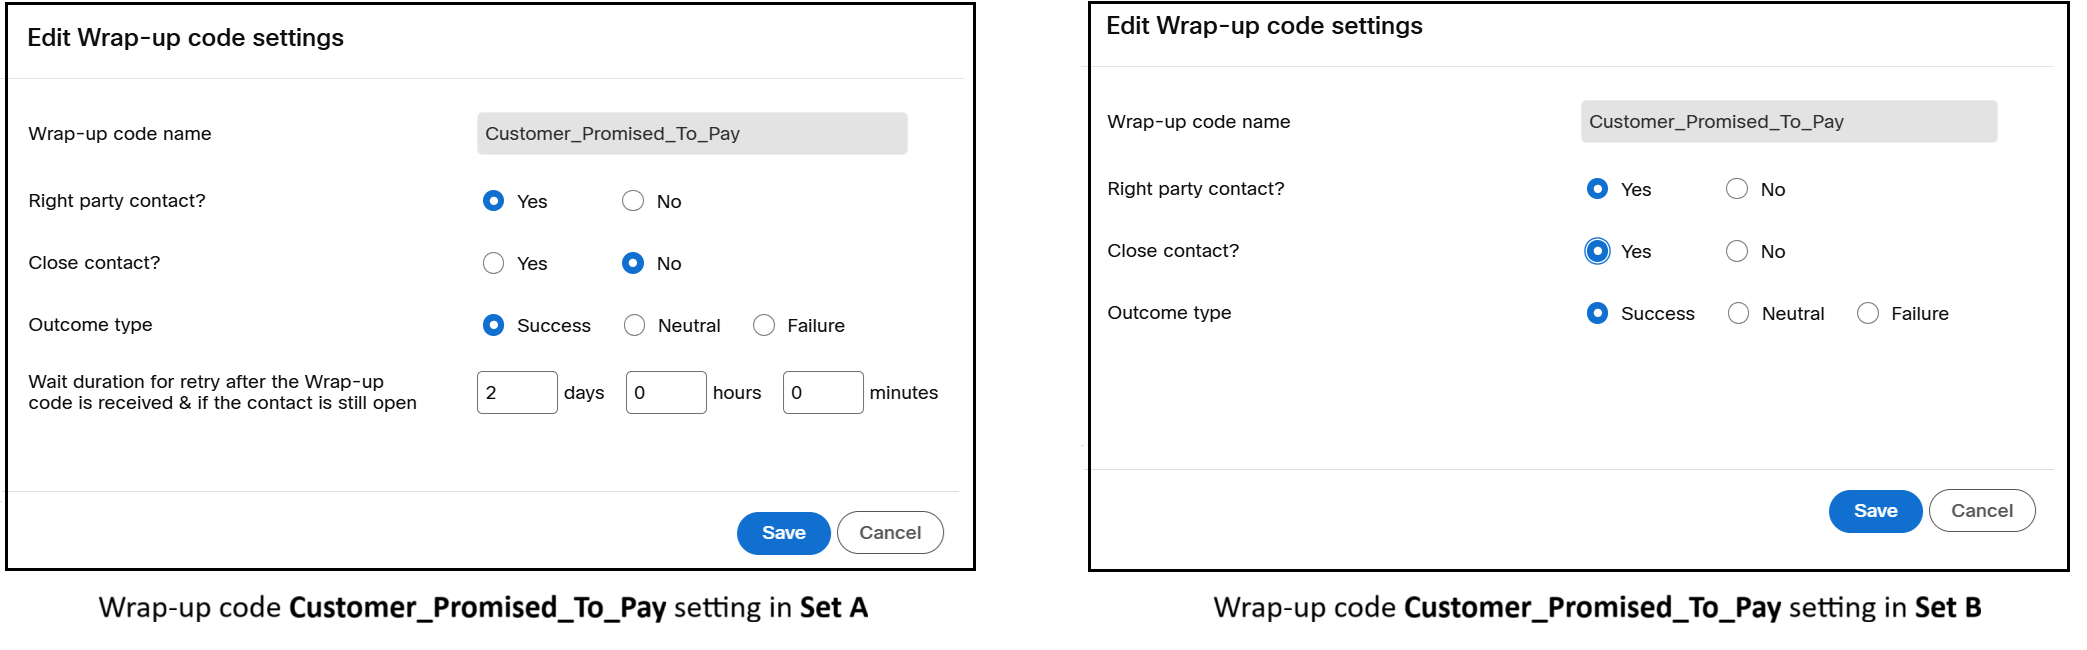
For example, the wrap-up code Customer_Promised_To_Pay in Set A can be configured with Close contact = Yes, while the same wrap-up code in Set B can be configured with Close contact = No.
Create a wrap up code set
Follow these steps to create a wrap up code set:
- Navigate to Voice campaigns administration and click Wrap-up code sets.
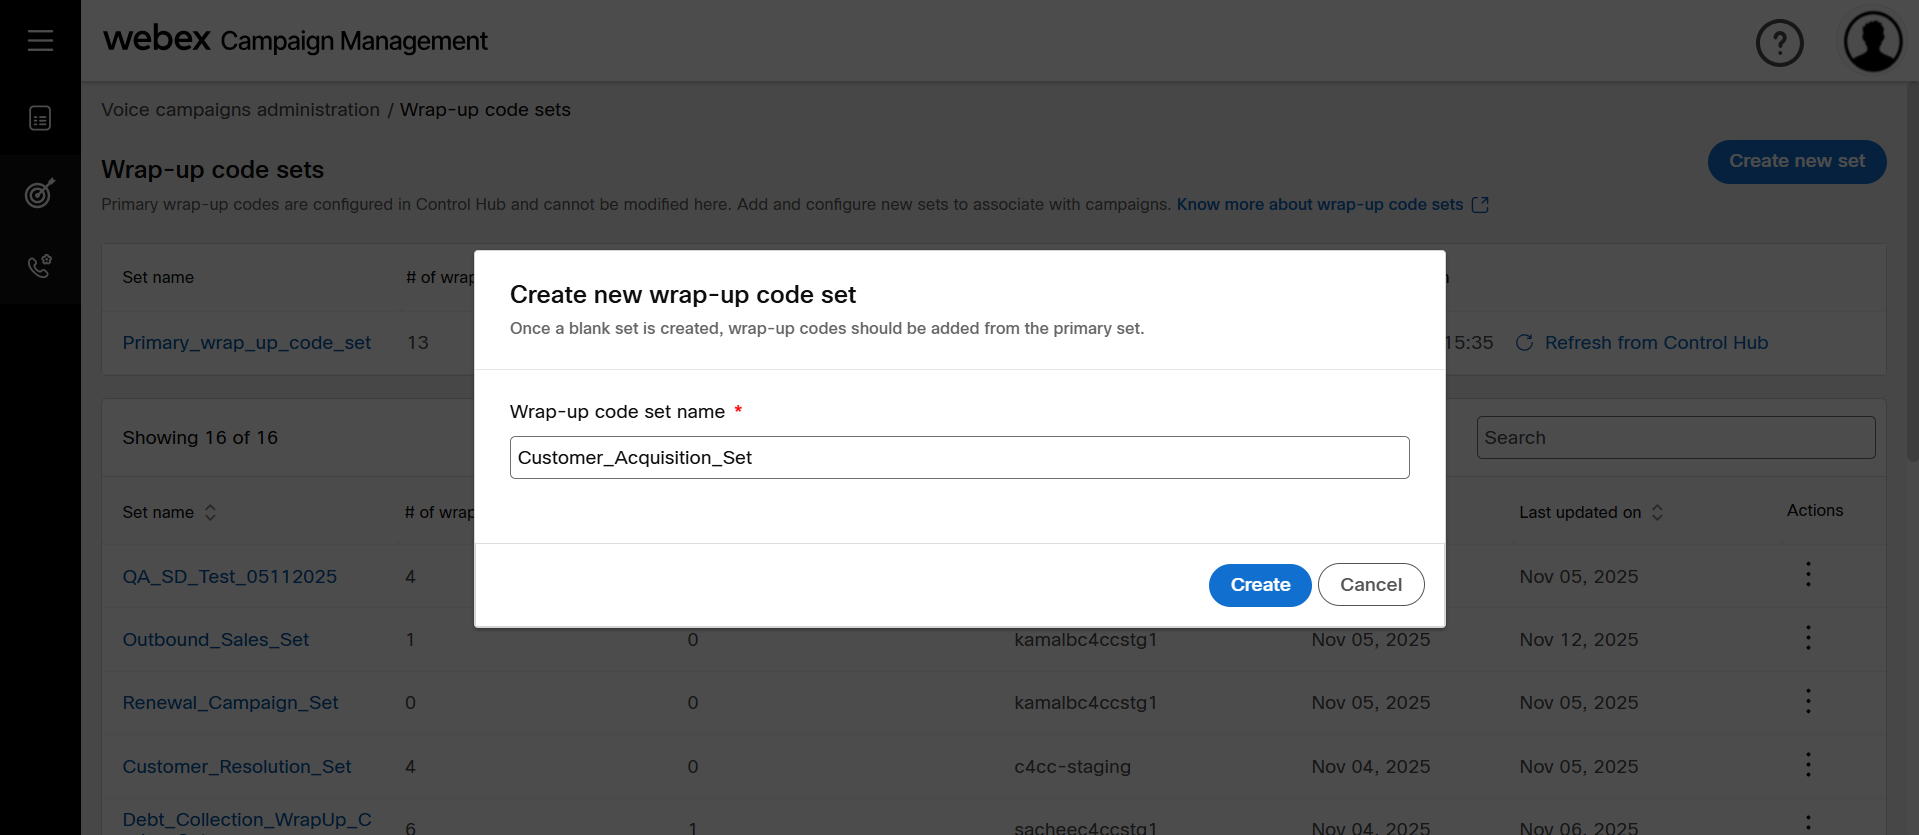
- Click Create new set and enter a name for wrap-up code set. For example, Customer_Acquisition_Set.
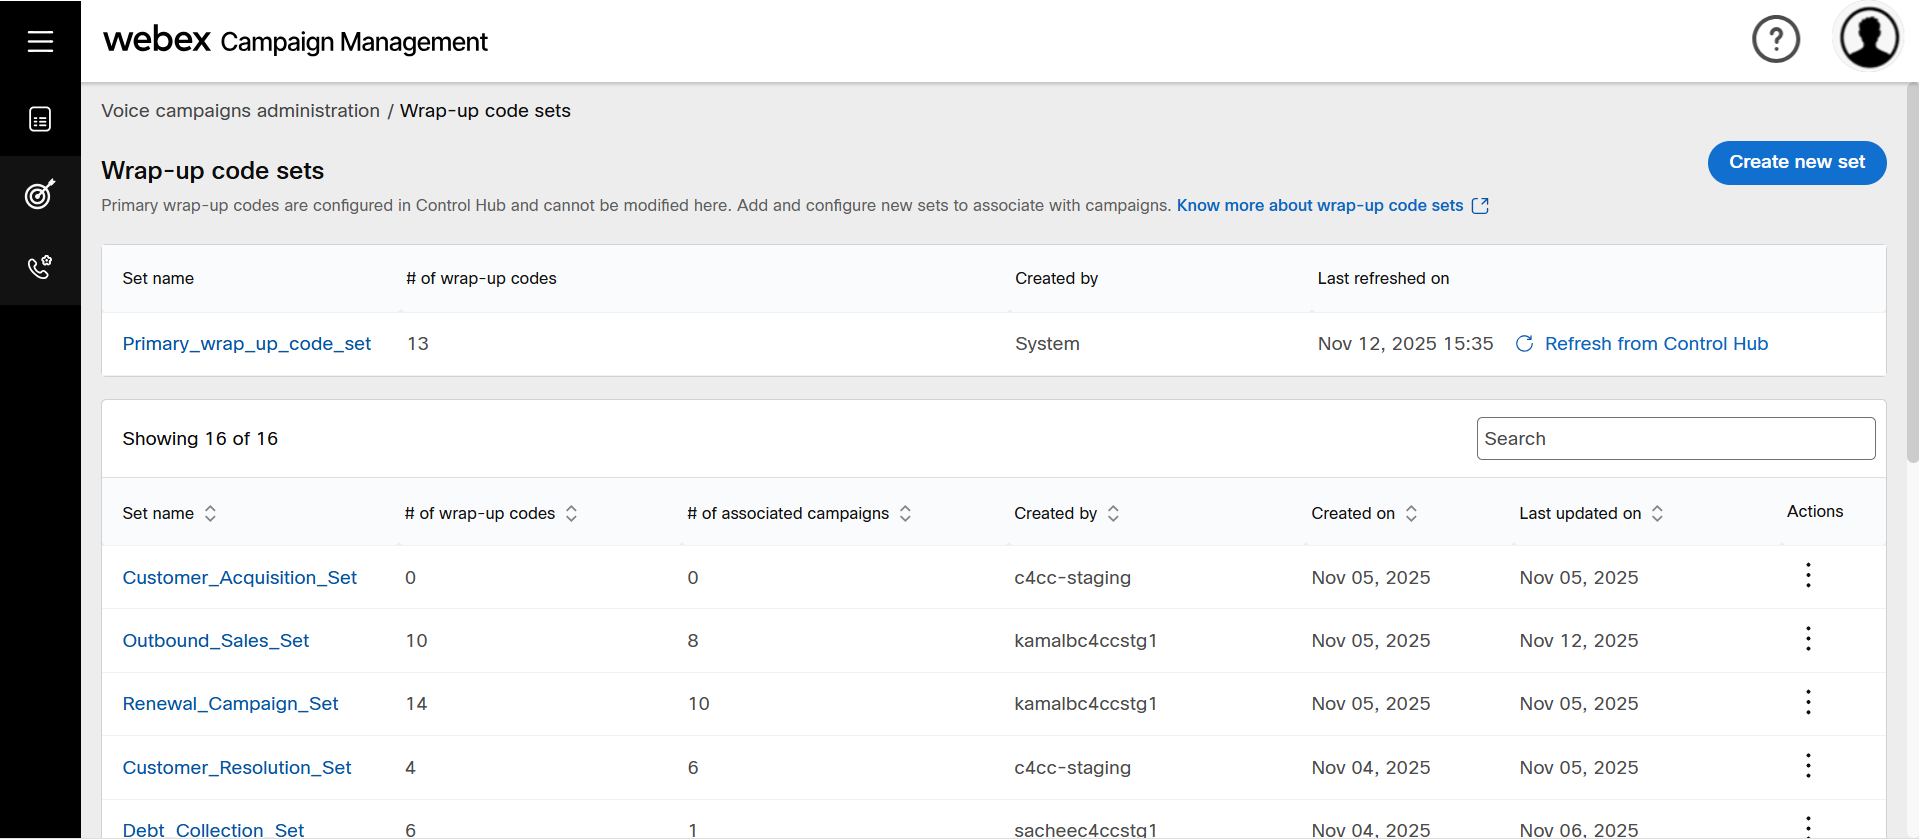
- The new wrap-up code set will be added to the list.
- Click newly created wrap-up code set and click Add wrap-up codes.
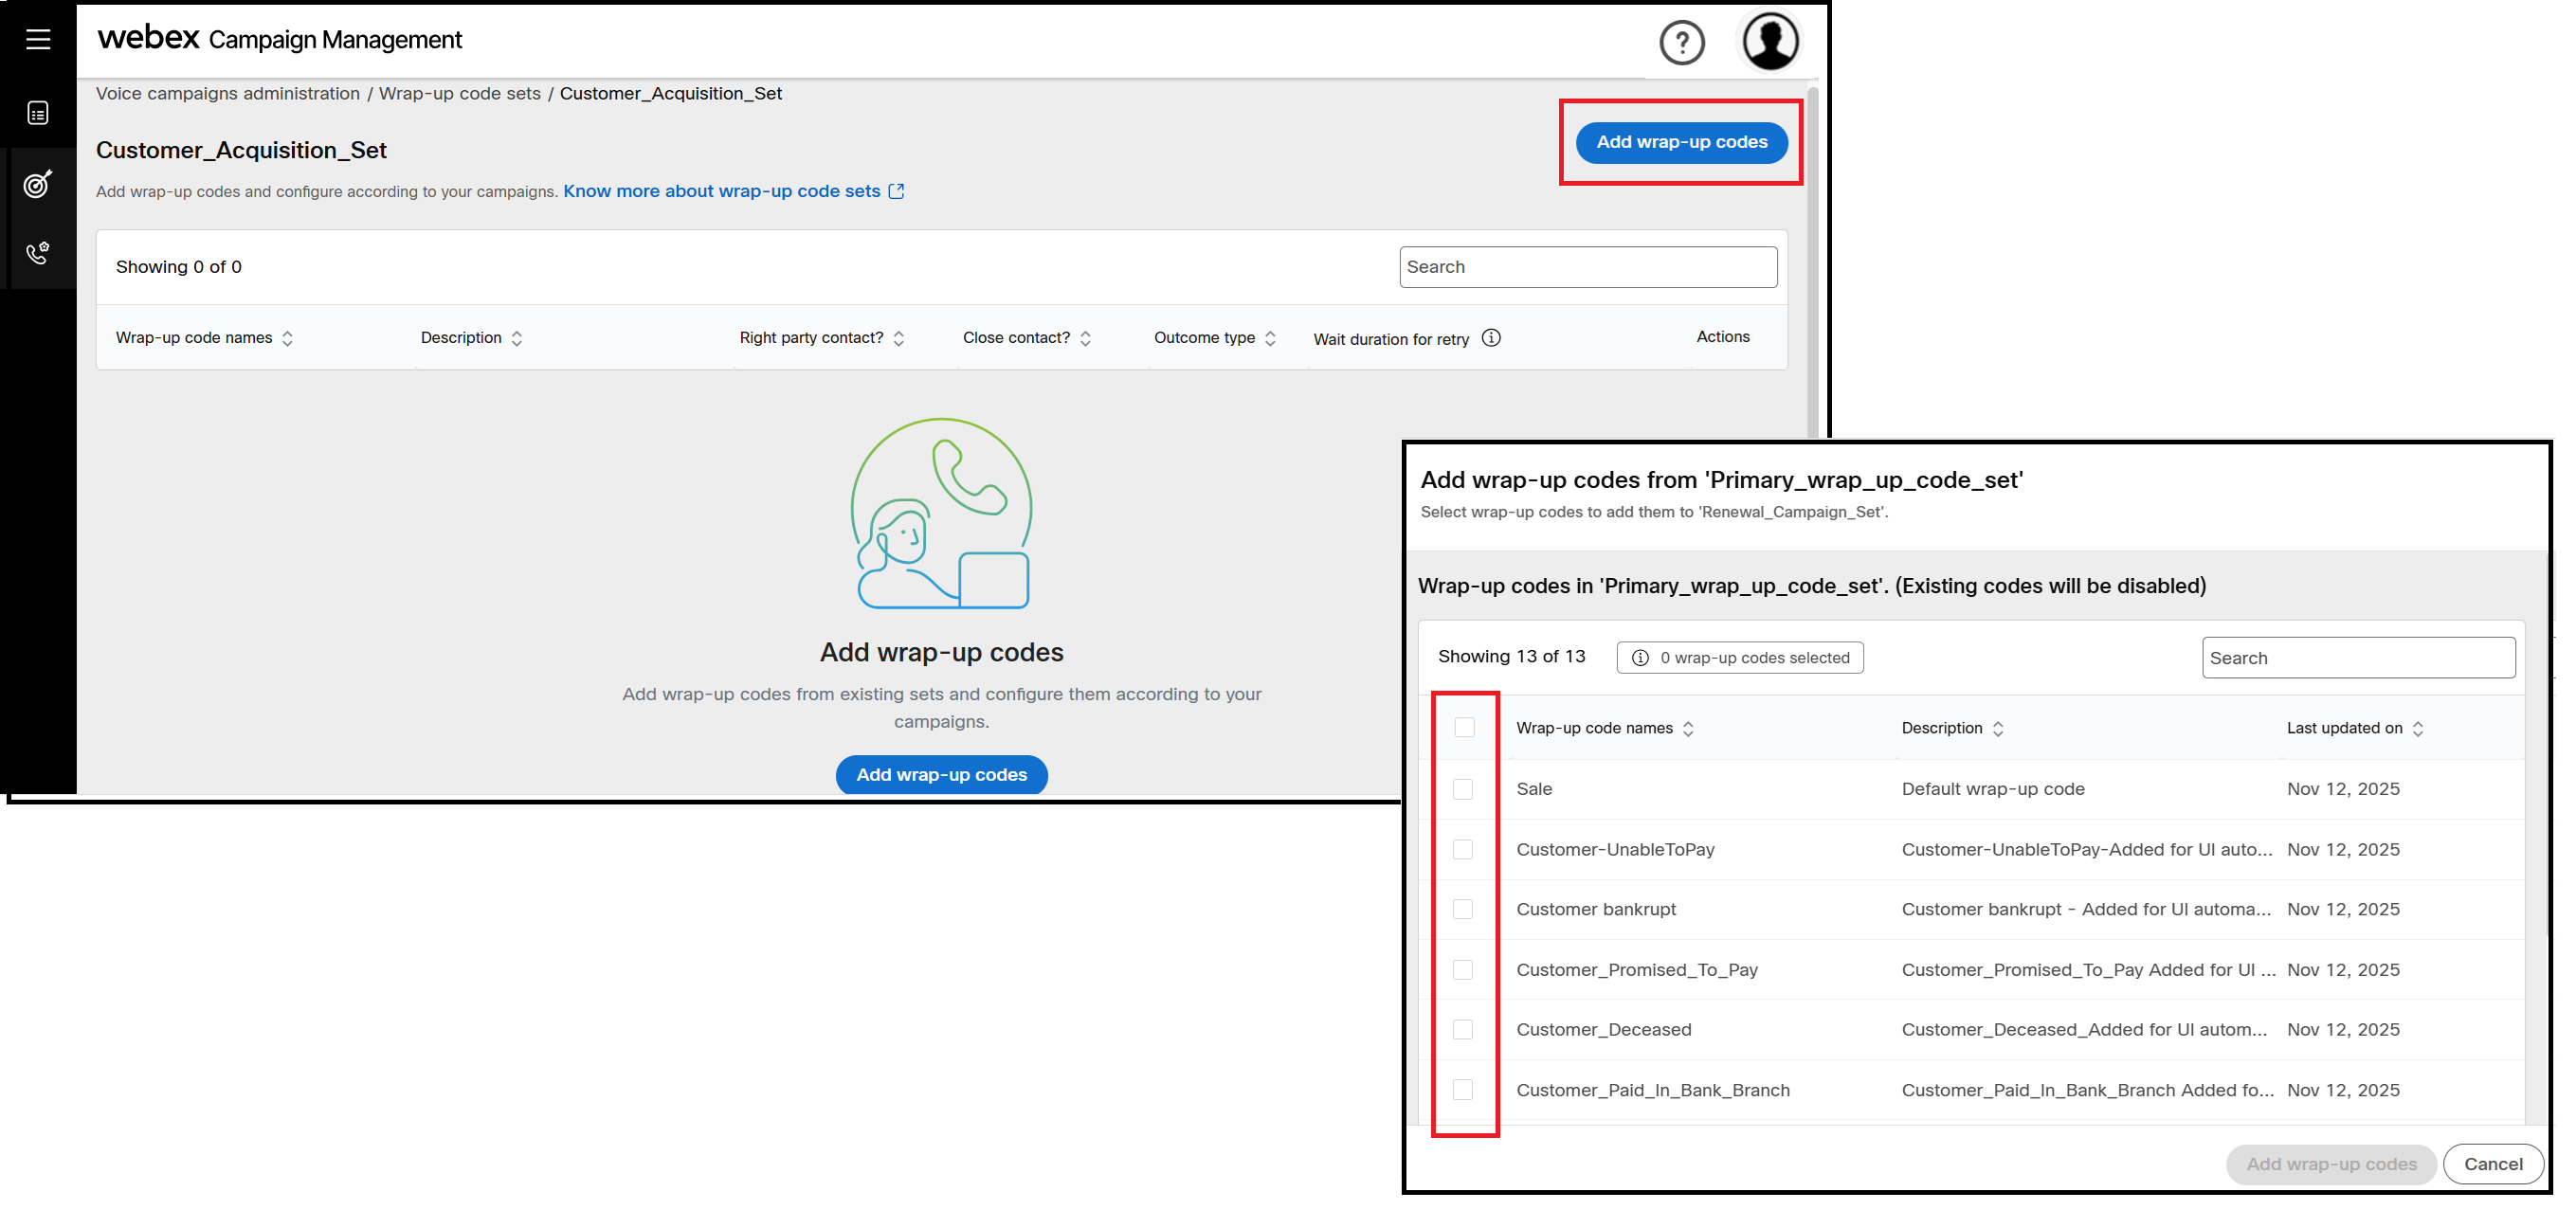
- Choose the wrap-up codes you want to include. To select all, click the checkbox in the table header.
- After you select the desired codes, click Add wrap-up codes.
Now, the wrap-up code settings in the primary set and the new set are identical for the codes that you have selected. You can either edit the wrap-up codes in the new set or use them as they are in your campaign.
You can add new codes to a wrap-up code set even while it is being used in campaigns. However, you cannot remove codes from the set.
Edit a wrap-up code set
Follow these steps to edit a wrap up code setting:
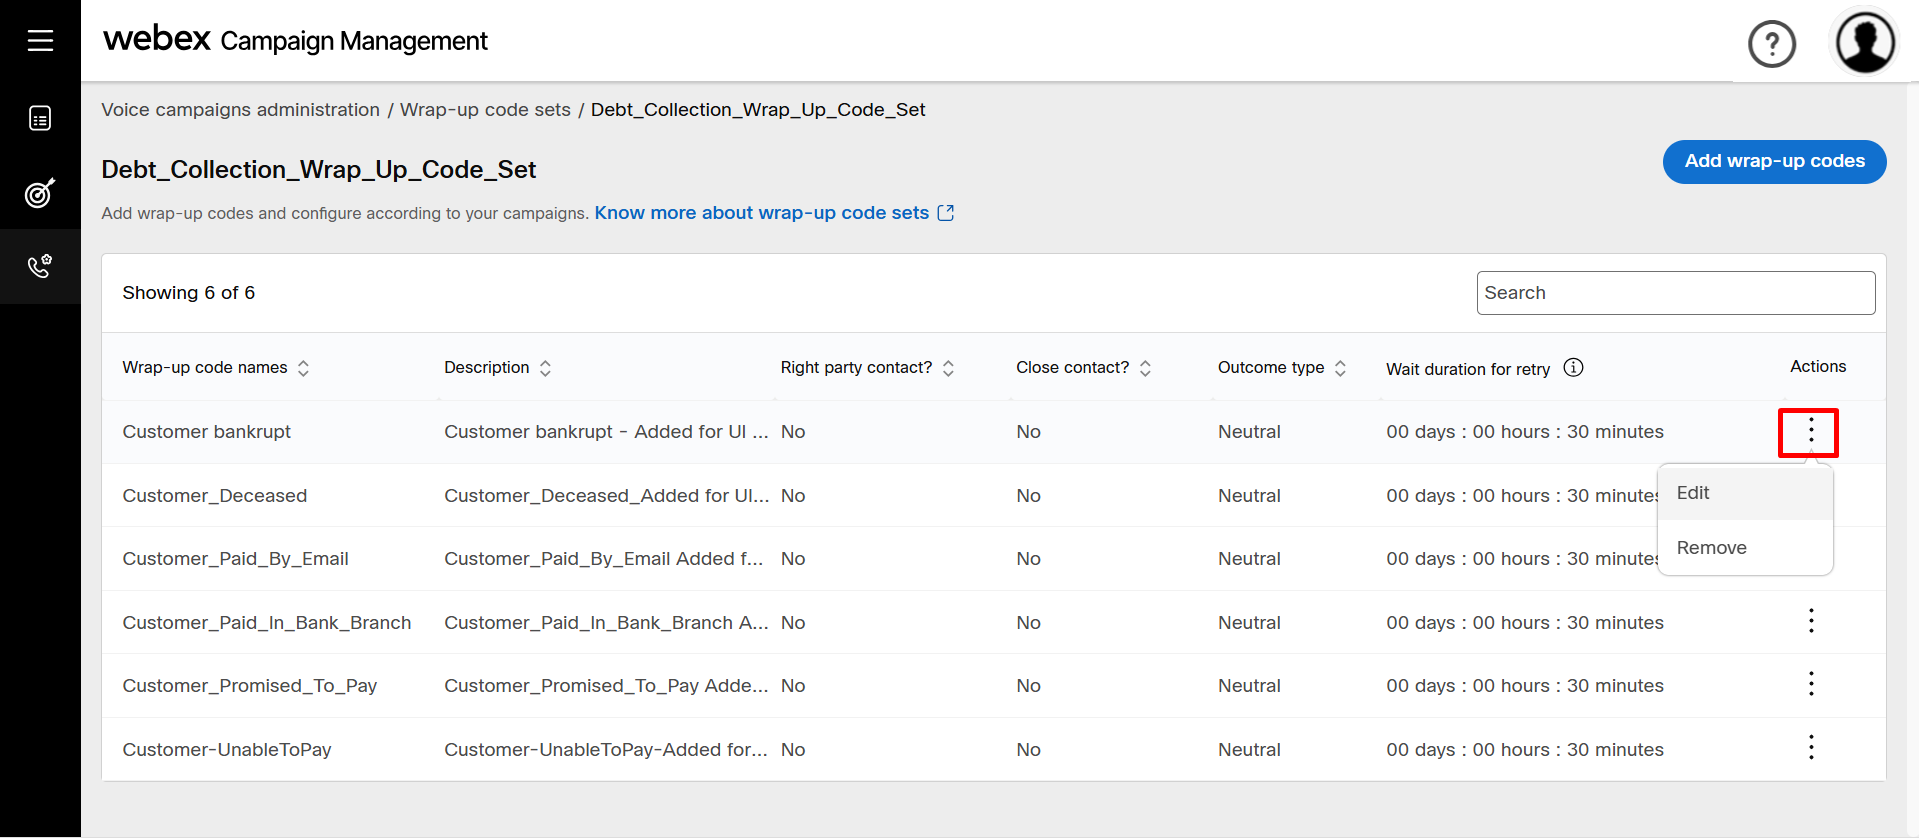
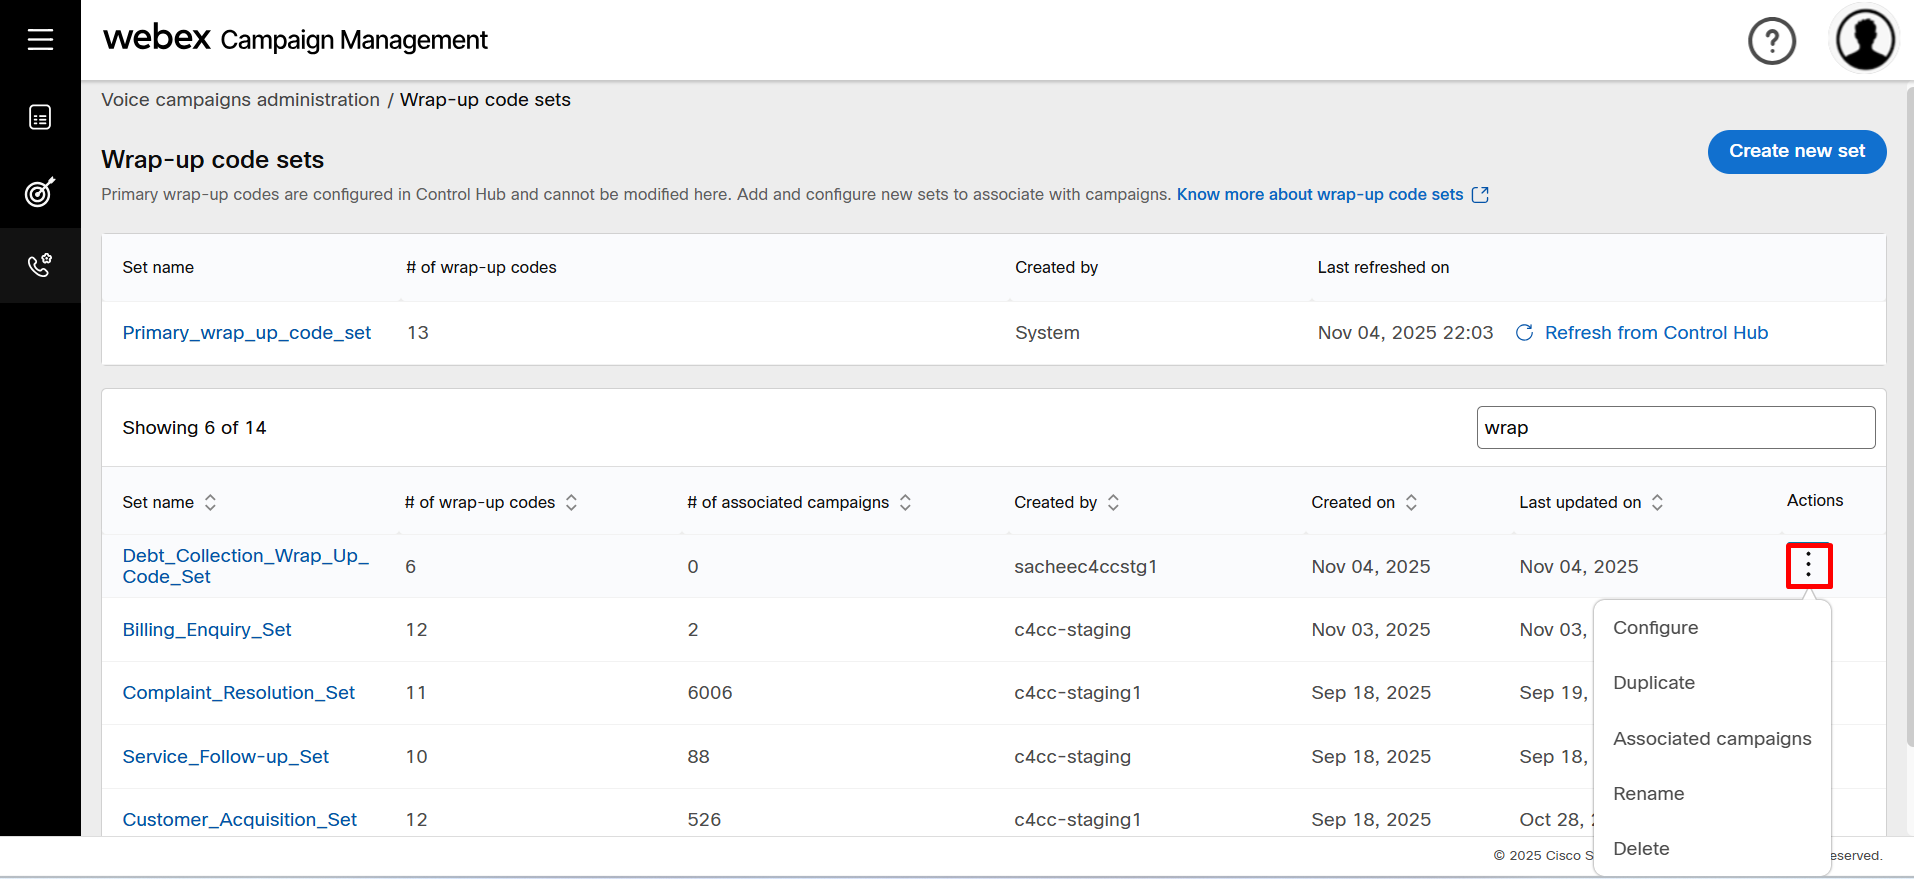
- To edit a wrap-up code set, click the ellipses icon of the required set and click Configure.

- The Wrap-up code set will display all the wrap-up codes added to the set. Click the ellipses icon of the required code and click Edit.
- In the Edit Wrap-up code settings screen, you can edit the following options.
- Right party contact? Select No if the contact is not the intended recipient.
- Close contact: Select Yes to close the contact. This will avoid future calls to contacts.
- Outcome type: Select appropriate outcome type.
- Wait duration for the next call after the Wrap-up code is received & if the contact is still open: Configure the wait time before the next call attempt.
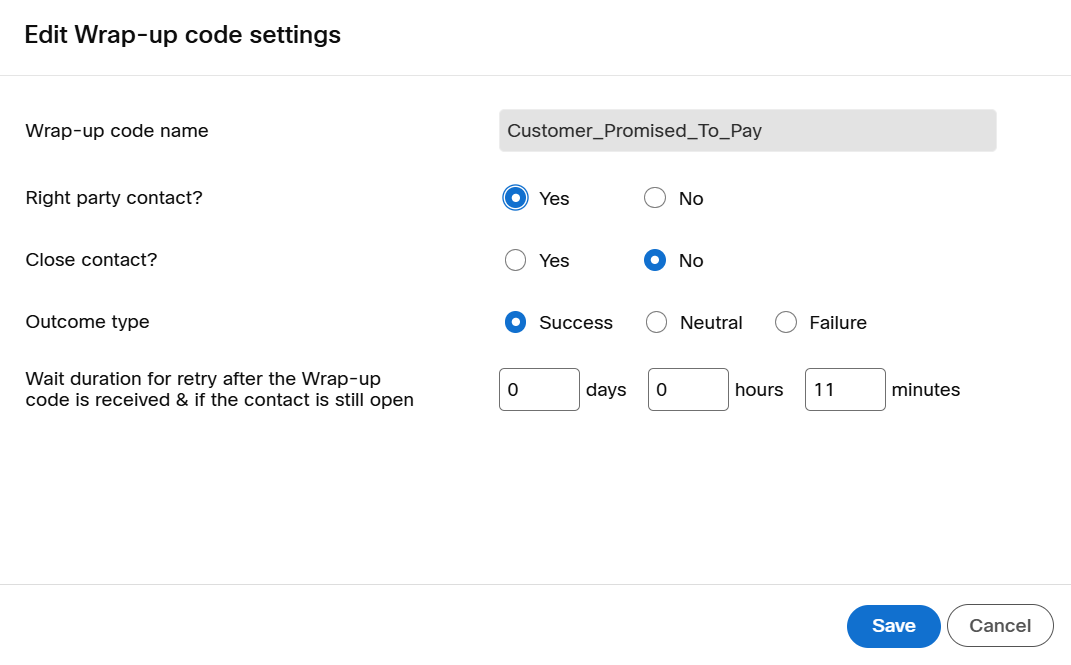
- Click Save.
The settings of the wrap-up codes remain unchanged even after you click Refresh from Control Hub. Any newly fetched codes will be added only to the system-generated wrap-up code set. You must edit each wrap-up code set to include the newly fetched codes.
- To remove a wrap-up code, click the ellipses icon of the required set and click Remove.

Duplicate a wrap-up code set
This feature allows you to replicate the wrap-up code configuration of a set in another set.
- Click the ellipses icon of the required set and click Duplicate.

- Enter a name for the set and click Duplicate.
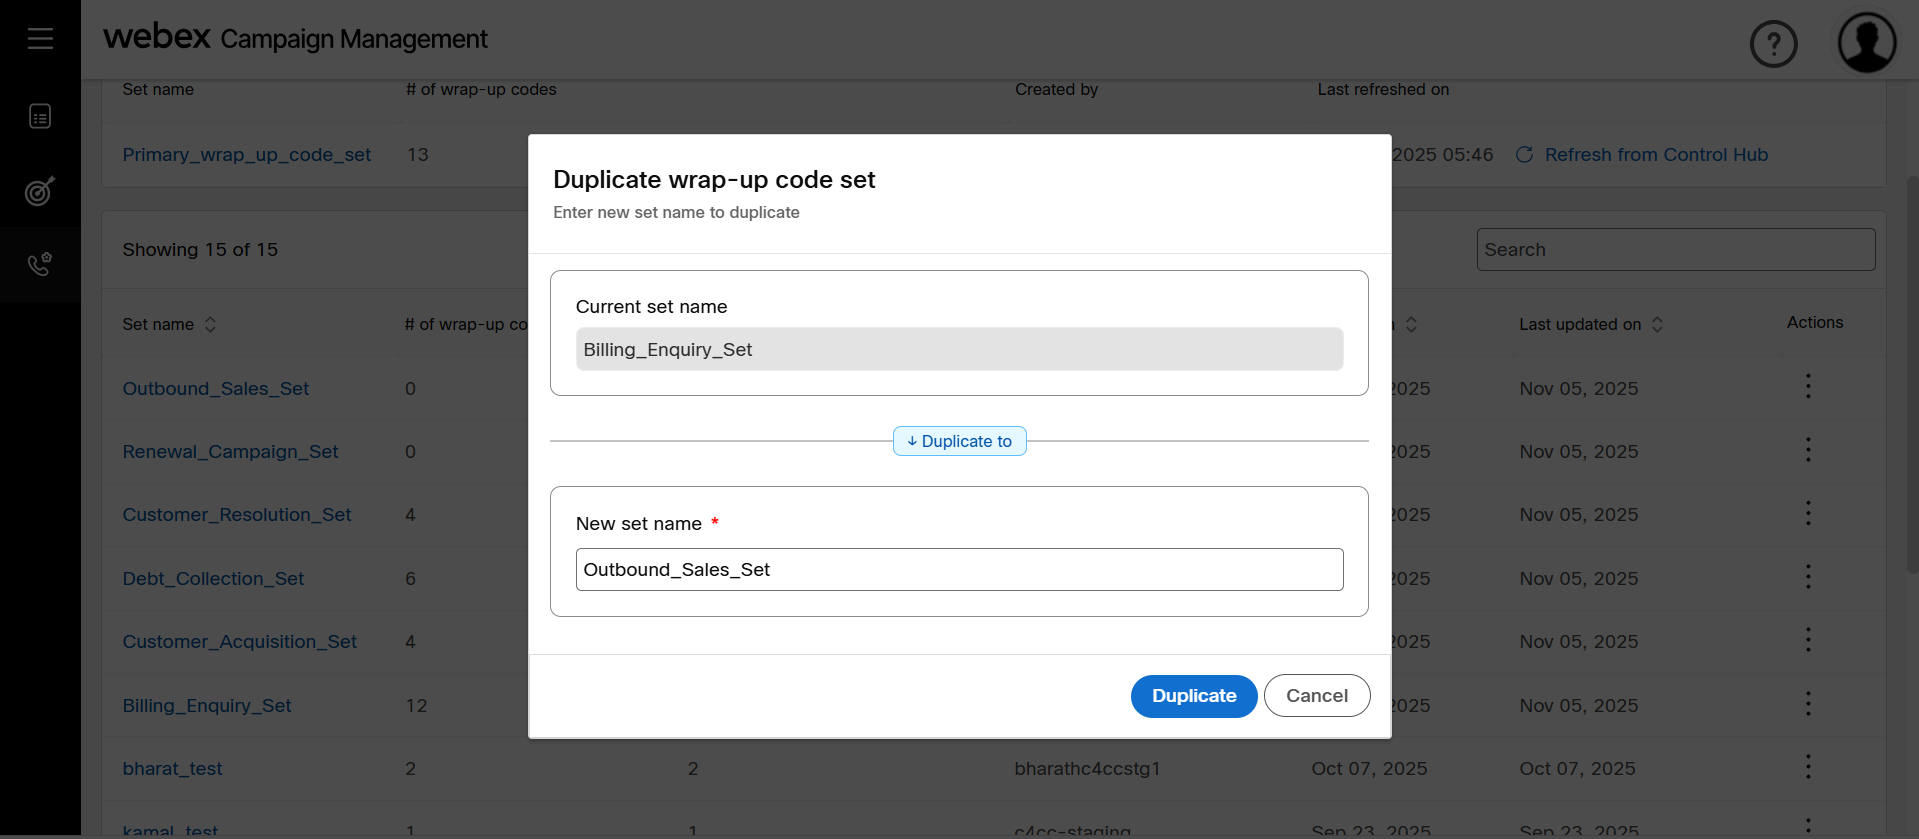
- (Optional) Click the newly created set and edit required wrap-up code setting as needed.
Additional actions for a Wrap-up code set
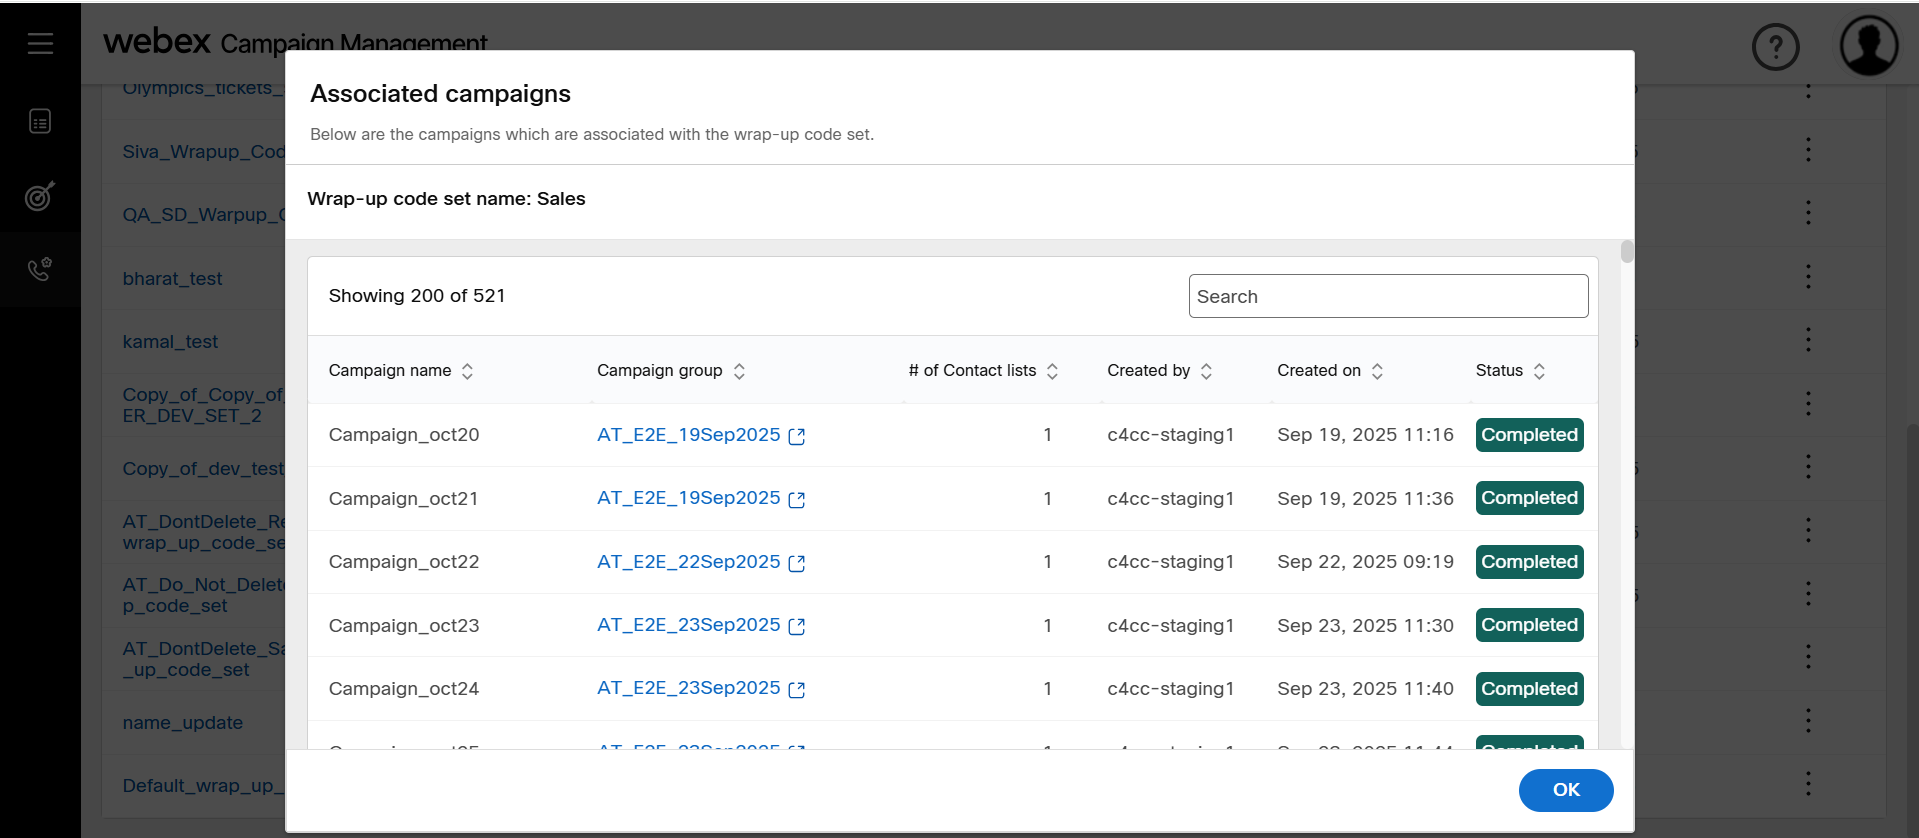
View campaigns associated with the wrap-code sets
- Click the ellipses icon of the required set and click Associated campaigns.
- The screen will display all the campaign status along with the Campaign name, Campaign group, Number of Contact lists, Created by and Created date.
Delete a wrap-code set
- Click the ellipses icon of the required set and click Delete.
- A confirmation message appears if campaigns are not associated with the wrap-up code set.

A wrap-up code set cannot be deleted if it is associated with campaigns whose status is running or paused state.
Rename a wrap-code set
- Click the ellipses icon of the required set and click Rename.

- Enter a name and click Rename.
